How to replace oil boiler: A homeowner's step-by-step guide
Learn how to replace an oil boiler safely and efficiently, explore options (oil vs gas vs heat pump), required permits, and a step-by-step plan from assessment to commissioning.

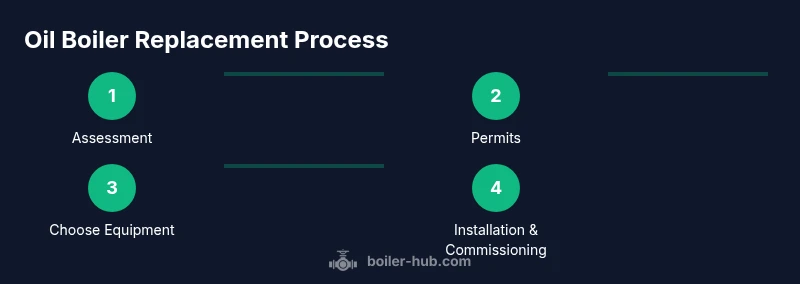
This guide helps homeowners replace an oil boiler with a compliant, efficient system. It covers option choices (oil-to-oil, conversion to gas, or heat pump), safety, permits, and a clear step-by-step process from assessment to commissioning. You’ll learn when to replace, how to choose a new unit, and how to hire a qualified installer.
Understanding when to replace an oil boiler
According to Boiler Hub, most homeowners consider replacing an oil boiler when efficiency declines, frequent repairs become costlier than replacement, or fuel prices rise enough to justify an upgrade. If your boiler struggles to reach set temperatures, produces frequent cycling, or emits odd odors or excessive smoke, it’s a strong sign replacement is prudent. Aging seals, rusted heat exchangers, and a boiler that fails weekly safety checks are red flags. A professional heat-loss calculation can confirm whether your current equipment still suits your home’s needs. Replacing an aging oil boiler with a modern, high-efficiency model can reduce fuel consumption, improve comfort, and lower emission outputs over the system’s lifespan. Boiler Hub’s analysis emphasizes evaluating not just upfront cost but long-term operating costs and reliability in daily use.
In many homes, the decision to replace is also tied to the radiators and piping layout. If your current distribution system is dated or inefficient, a new boiler pair with modern controls can unlock better performance. The goal is to match the boiler’s output to your home’s heat load, not oversize for comfort or waste energy. A well-planned replacement improves safety by reducing the risk of CO2 buildup and reduces risk from venting problems with older chimneys. Always engage a licensed professional to perform a full assessment and to identify any required venting or fuel-line modifications.
Options after deciding to replace an oil boiler
There are several paths when replacing an oil boiler, and each has trade-offs. An identical oil-to-oil replacement can improve efficiency and reliability, especially if you select a high-efficiency model with modern controls and an upgraded burner. A fuel-switch option moves you to a gas boiler if natural gas is available and the property is connected to a gas line, but this requires a gas supply assessment, gas piping work, and permits. A third option is a heat pump system (air-source or geothermal) paired with a zoning strategy to meet space-heating needs, which can be more energy-efficient and reduce emissions, though installation costs and climate suitability vary. Biomass boilers are another alternative in some regions, using pellets or wood as fuel, but this path involves storage considerations and local incentives. When evaluating options, consider fuel availability, maintenance requirements, expected lifespan, and compatibility with existing radiators and domestic hot water systems. A reputable Boiler Hub analyst would stress evaluating total cost of ownership and potential tax credits or rebates available in your area, which can influence the overall value of replacement.
Planning and permits: what needs to be in place before you replace
Preparation is essential for a smooth replacement project. Start with a professional energy audit or inspection to establish the correct boiler size and efficiency target. Obtain required permits from your local authority, which often include building permits for venting changes, fuel-line work, and boiler installation. Schedule an installation window that minimizes disruption to daily life, and arrange for temporary heating if needed. Ensure the installer will handle venting rework, condensate drainage, combustion air supply, and electrical connections safely and to code. Keep clear records of the equipment specifications, old boiler removal, and new system commissioning. The process may also involve inspecting chimney integrity and updating CO detectors, which is a safety-critical step. Boiler Hub recommends documenting all compliance steps to avoid future disputes with inspectors or utility providers.
Sizing, efficiency, and choosing the right replacement boiler
Selecting the correct boiler size is critical to comfort and fuel economy. A unit that’s too small will struggle during cold snaps, while an oversized model wastes energy and increases wear. A professional heat-loss calculation, radiator sizing checks, and protocol-driven commissioning ensure the new boiler matches your home’s needs. When evaluating efficiency, look for high AFUE ratings and modern controls such as thermostatic zoning, outdoor reset controls, and modulating burners. The choice between oil, gas, or electric alternatives depends on fuel availability, installation costs, and long-term operating expenses. Consider future plans, such as converting to a heat pump or adding solar thermal to reduce fossil-fuel reliance. Always confirm compatibility with existing piping, expansion tanks, and safety devices like pressure relief valves.
Installation considerations and the typical sequence
A typical replacement involves removing the old boiler, upgrading the flue/vent, installing the new unit, connecting fuel lines and electrical supply, and commissioning the system with a safety test. Venting integrity and combustion air supply must meet current codes to prevent dangerous buildup of gases. The installer should perform leak testing on all joints, verify correct fuel pressure, and calibrate the burner for optimal efficiency. Expect a final inspection by local authorities or utility representatives, along with proper documentation for warranty and taxation records. Safety devices, CO detectors, and emergency shutoffs should be tested before handover. Boiler Hub stresses that proper system balancing and lockout checks prevent cold spots and ensure consistent heat distribution across zones.
Post-installation maintenance, safety, and long-term costs
After replacement, schedule regular maintenance visits to keep the system clean, calibrated, and efficient. Annual servicing typically includes burner cleaning, heat-exchanger inspection, venting checks, and pressure testing. Security and safety considerations include ensuring CO detectors are functional, keeping the fuel room free of leaks, and inspecting the expansion tank for proper pressure. While maintenance costs vary by region and system type, a proactive maintenance plan lowers the risk of unexpected breakdowns and prolongs the boiler’s life. Boiler Hub notes that routine inspections can also help catch corrosion, gasket wear, and scaling early, reducing costly repairs later.
Common mistakes to avoid during a boiler replacement
Avoid selecting a replacement based solely on the upfront price without evaluating operating costs and reliability. Skipping a proper load calculation can result in an undersized or oversized system, increasing fuel use and reducing comfort. Don’t overlook venting and combustion-air requirements, which are critical for safe operation. Another frequent error is neglecting the integration with domestic hot water and zoning controls, which can create hot-cold spots and inefficiencies. Finally, ensure your installer provides complete commissioning documentation, warranty details, and a maintenance plan.
Tools & Materials
- Personal protective equipment (PPE)(Gloves, eye protection, and flame-resistant clothing suitable for boiler work)
- Burner wrench set(Be sure to have the correct sizes for your burner and fittings)
- Pipe wrenches and adjustable wrenches(For disconnecting and reassembling pipework)
- Pipe sealant and thread tape(Use appropriate heat-rated sealants for fuel lines)
- Vent piping and fittings(New vent pipes must meet code requirements and fit the new boiler)
- Draft tester and manometer(Verify proper venting and combustion efficiency)
- CO detector and alarms(Install or re-check CO detectors near the boiler and sleeping areas)
- New expansion tank and fittings(Ensure system pressure remains within design limits)
- Electrical tester and a multimeter(Safe isolation and testing of wiring circuits)
- Drain pan and absorbent pads(Optional but helpful for minor spills during replacement)
- Permits and documentation(Pull relevant building and vent permits per local code)
Steps
Estimated time: 1-2 days
- 1
Prepare site and gather permits
Notify occupants and arrange temporary heating if needed. Gather all permit requirements and ensure access for the installation team. Verify there is a clear route from the boiler room to the outside vent and ensure the fuel supply is interruptible safely.
Tip: Confirm access to the boiler room for maneuvering the new unit and carrying heavy equipment. - 2
Shut down and isolate the system
Turn off electricity to the boiler at the breaker, shut off oil supply, and disconnect the fuel line. Relieve pressure safely and prepare for safe, controlled removal of the old boiler.
Tip: Have a fire extinguisher rated for electrical and oil/commercial fires within reach. - 3
Remove the old boiler and inspect the vent
Carefully detach the old unit, inspect the chimney or venting system for obstructions, and verify the flue is compatible with the new boiler. Address any rusted components and prepare the mounting area.
Tip: Document vent dimensions and take photos for reference during installation. - 4
Install the new boiler and secure mounting
Position the new boiler on a stable base, attach mounting brackets if required, and connect the fuel line, gas line (if converting), electrical connections, and condensate drain as specified by the manufacturer.
Tip: Double-check clearance from walls and ensure easy access for maintenance. - 5
Connect venting and combustion air
Install the vent system according to code, ensure proper slope, and provide fresh air intake as required. Seal joints and test for leaks.
Tip: Be sure the vent termination outdoors is installed to prevent backdrafts. - 6
Fill, bleed, and fill again
Fill the system with water, bleed air from radiators, and verify pressure within the design range. Inspect for leaks and adjust the expansion tank as needed.
Tip: Keep a pressure gauge in view and record initial readings for commissioning. - 7
Commission and test safety devices
Light the boiler, adjust the burner to optimal efficiency, run a full heat cycle, and test CO detectors and alarms. Confirm that warm air or water is distributed evenly.
Tip: Request a signed commissioning certificate and save for warranty needs. - 8
Document, educate, and maintain
Provide occupants with operation manuals, schedule ongoing maintenance checks, and set reminders for annual service. Record all settings, part numbers, and warranty information.
Tip: Set up a maintenance calendar and adhere to the manufacturer's service intervals.
Questions & Answers
What are the main options after deciding to replace an oil boiler?
You can replace with another oil boiler, convert to natural gas if available, or consider a heat pump or biomass option. Each path has different upfront costs, fuel availability, and long-term operating costs. A qualified installer can help you compare life-cycle costs and feasibility for your home.
You can replace with oil, switch to gas if you have a gas line, or consider a heat pump. Each has different upfront and ongoing costs. A pro can help you compare.
Do I need a permit to replace an oil boiler?
Most jurisdictions require permits for venting changes, fuel-line work, and boiler installation. Your installer should obtain these on your behalf, but verify permits with the local authority before work begins.
Yes, permits are usually required for venting and fuel-line work. Your installer should handle them, but confirm with your city or county.
How long does boiler replacement typically take?
Installation timelines vary by system complexity and fuel type, but a typical replacement spans one to two days, with commissioning taking additional hours for a complete setup and safety checks.
Most replacements take one to two days, plus a few hours for commissioning and safety checks.
What maintenance is needed after replacement?
Schedule annual service to inspect the burner, venting, and safety devices. Regular checks help prevent leaks, corrosion, and efficiency loss and extend the boiler’s life.
Annual maintenance checks the burner, venting, and safety devices to prevent issues.
Is it worth converting to a heat pump or gas after oil boiler replacement?
Conversion decisions depend on local energy costs, emissions goals, and available incentives. Gas can offer strong performance if a safe, affordable supply exists; heat pumps can deliver high efficiency but depend on climate and installation specifics.
Conversion can be worthwhile if gas is available and affordable, or if you want high-efficiency electric heating with a heat pump, depending on climate.
What safety concerns should I address with a replacement?
Key concerns include venting integrity, CO detector functionality, proper combustion air, and fuel-line safety. Ensure a licensed pro completes a full safety commissioning before use.
Venting, CO detectors, and proper fuel safety are essential. Have a licensed pro commission the system.
Can I finance a boiler replacement?
Financing may be available through local lenders or utility programs. Check for incentives or rebates for high-efficiency equipment, and ask your installer for any manufacturer financing options.
There are sometimes financing options and rebates for high-efficiency equipment; ask your installer about programs.
What should I ask my installer before starting?
Ask about license and insurance proof, past replacement projects, expected operating costs, warranty terms, and what permits will be required. A clear contract helps avoid surprises.
Ask for licenses, past work references, warranties, and permit responsibilities before starting.
Watch Video
Key Points
- Assess timing and options before replacing the boiler
- Size and efficiency selection drive long-term savings
- Permits, venting, and commissioning are critical safety steps
- Proper installation minimizes future repairs and downtime
- Maintain documentation for warranties and maintenance