How to Remove a Back Boiler: Safe, Step-by-Step Guide
A comprehensive, safety-focused guide on planning, evaluating, and arranging the removal of a back boiler, with professional guidance and disposal considerations. Learn how Boiler Hub approaches this complex task.

By the end of this guide, you’ll know how to safely plan and arrange the removal of a back boiler, including safety checks, regulatory considerations, and when to hire a gas-safe engineer. You’ll understand the key steps, the documents you need, and how to prepare for professional removal and disposal. This is a safety-first, compliant approach advised by Boiler Hub.
Why removing a back boiler might be needed
Back boilers sit behind a fireplace and can serve central heating or domestic hot water in older homes. Over time, these systems may become inefficient, prone to leaks, soot buildup, or simply incompatible with modern heating solutions. In some cases, removal is part of upgrading to a modern combi or system boiler, or to reclaim living space. For safety and regulatory compliance, start with a professional assessment before attempting any removal. According to Boiler Hub, safety and compliance begin with a formal evaluation by a qualified installer who can determine feasibility, check for asbestos risk in older installations, assess flue integrity, and flag potential structural issues. A proper removal plan also addresses disposal of boiler components and updating building records and insurance documents. When planning removal, anticipate requirements for decommissioning the gas supply, capping the flue, and arranging lawful disposal of boiler parts in line with local waste rules. Boiler Hub analysis shows that the majority of successful removals involve early planning, a documented scope, and involvement of registered professionals to handle disconnection, disposal, and regulatory compliance.
Before you start: safety, approvals, and planning
Removing a back boiler is a high-stakes task touching safety, fire risk, and home insurance. Before you proceed, verify the fuel type (gas, coal, or wood) and confirm removal remains the best long-term option. Obtain a full professional survey to assess the chimney, flue condition, structural integrity, and any asbestos risk in older installations. Depending on your location, permits or notices may be required; your installer can guide you through the paperwork and help you submit the correct forms. Plan for temporary heating options during the transition, dust containment, and safe access for workers. Do not attempt to isolate gas or tamper with gas lines yourself. Ensure carbon monoxide detectors and smoke alarms stay functional throughout the work. Gather installation diagrams and have a written quotation that covers disconnection, decommissioning, disposal, and any required sealing of the flue. The Boiler Hub team recommends scheduling a site visit and obtaining clear, written scopes before work begins.
Key considerations: gas vs solid fuel, venting, and regulations
Back boilers come in several configurations: gas-back boilers, coal/wood-fired back boilers, or electric equivalents. The removal process varies with fuel type and whether a vent or shared flue is involved. If a gas back boiler is in use, the gas supply must be safely disconnected by a licensed gas-safe engineer. For solid-fuel systems, removal may involve sealing the chimney opening, cleaning residual ash, and ensuring the hearth area is properly finished. Regardless of fuel, regulatory checks apply: building regulations may govern alterations to fireplaces or ventilation ducts, and fire safety standards may require inspections after removal. A professional will review the chimney breast condition, determine whether you can reuse the hearth, and plan whether a new heating system shares a vent or needs a dedicated vent. Arrange disposal of old boiler and flue components with proper waste streams, and document changes for insurance and records. The guidance from Boiler Hub emphasizes professional oversight and compliance to minimize risk and preserve home safety and value.
The path forward: how to arrange professional removal (high level)
This task should not be treated as a DIY project. The safest approach is to hire a registered professional to perform gas isolation, safe disconnection, and removal, along with flue sealing and site cleanup. Start by contacting a Gas Safe engineer or equivalent in your region for a preliminary survey and written quote. If you agree with the scope, schedule the work and coordinate disposal with a licensed waste contractor. After on-site work, arrange a post-removal inspection to verify gas and electrical shutoffs, vent sealing, and a viable replacement plan for your heating system. Finally, update building records, insurance, and warranties to reflect the change. A well-planned removal keeps safety intact, ensures regulatory compliance, and preserves home value, according to Boiler Hub.
Tools & Materials
- Gas Safe engineer contact(Choose a registered professional with experience in back boiler removals)
- Installation diagrams/manuals(Original documentation helps identify connections and safe removal steps)
- Carbon monoxide detector(Maintain operation before, during, and after work)
- Protective coverings/drop cloths(Contain dust and debris during removal)
- Disposal plan and waste carrier license(Ensure legal disposal of boiler and flue components)
Steps
Estimated time: 2-4 weeks
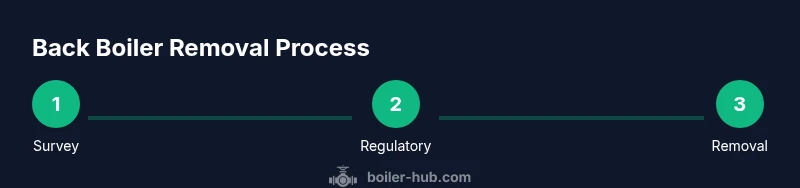
- 1
Schedule a professional survey
Contact a Gas Safe engineer to visit the property and assess the back boiler. The survey should evaluate fuel type, flue status, space for replacement equipment, and any required asbestos checks. Request a written scope and a quote covering disconnection, decommissioning, and disposal.
Tip: Ask for a detailed checklist and a contingency plan if major repairs are needed. - 2
Confirm regulatory requirements
Work with the engineer to determine building regulations, permits, or notices that may apply. Clarify whether a fire-safety inspection or ventilation changes are required and ensure all paperwork is documented for future records.
Tip: Secure written approvals and keep copies in your property records. - 3
Arrange professional removal
Agree on a removal plan with the engineer, confirming gas isolation, electrical shutdown, and water considerations if needed. Schedule the work and coordinate with a licensed waste contractor for disposal of the boiler and flue components.
Tip: Coordinate dates with heating replacement installation to minimize downtime. - 4
On-site removal and flue sealing
During the on-site visit, the engineer safely disconnects gas, removes the boiler and flue pieces, caps the gas line, and seals the chimney or flue. Prepare the area by protecting walls and floors; arrange for plaster repairs as required.
Tip: Take photos before and after for your records and insurance. - 5
Post-removal checks and replacement plan
Verify gas/electric shutoffs are secure and that the new heating plan is in place. Ensure safety devices (CO detectors) are functional and that property records reflect the change.
Tip: Schedule a final safety check and obtain disposal certificates.
Questions & Answers
Do I need a gas-safe engineer to remove a back boiler?
Yes. Removing a back boiler involves isolating and disconnecting gas and often sealing the flue, which requires a registered gas-safe engineer. A professional will also review any regulations and disposal requirements.
Yes. A gas-safe engineer must handle the gas isolation and removal to ensure safety and compliance.
Can I DIY remove a back boiler?
No. This is not a suitable DIY project due to gas, fire, and structural risks. Always hire a registered professional to assess, disconnect, and remove the system.
No. For safety, hire a qualified professional to handle the removal.
What building regulations apply to back boiler removal?
Removal can trigger building regulations compliance, especially around fire safety, ventilation, and flue sealing. Your installer will determine the exact requirements for your location.
Regulations may apply; consult your installer for the specific permits and inspections.
How long does removal typically take?
Timing varies with site conditions and replacement plans. Typically, expect a survey, planning, and removal day, followed by post-removal checks, spanning days to weeks.
It varies, but plan for a few weeks from survey to completion.
Will removal affect hot water or heating?
If you replace with another heating system, hot water and heating can continue. If not replaced, you’ll need an alternative hot-water solution or interim heating.
Replacement heating changes determine impact on hot water.
What happens to the chimney and flue after removal?
The flue is sealed or capped according to the plan, and any chimney alterations are checked for safety. Expect a final inspection and documentation.
The engineer will cap the flue and ensure the chimney is safe.
Watch Video
Key Points
- Plan removal with a registered professional
- Prioritize gas safety and regulatory compliance
- Secure proper disposal and update records
- A well-planned removal protects safety and home value