Boiler Replacement: A Step-by-Step Guide for 2026
Learn step-by-step how to plan, size, and replace a boiler safely. This Boiler Hub guide covers permits, installation tips, costs, and maintenance for homeowners and facility managers seeking reliable guidance.

Today you will replace an aging boiler with a safely installed, properly sized unit that meets your home’s heating needs and code requirements. This project includes planning, correct sizing, equipment selection, permits where required, professional installation, and a thorough commissioning. By following a structured process, you’ll improve reliability, efficiency, and long-term comfort.
Why boiler replacement matters
An aging boiler often costs more to run than a modern unit and can compromise home comfort. According to Boiler Hub, older boilers typically operate with lower efficiency, require frequent repairs, and may fail during shoulder seasons, leaving you without heat. The Boiler Hub Team emphasizes that a considered replacement can deliver better reliability, lower energy bills, and improved safety through updated venting and combustion controls. In practice, homeowners and facility managers notice fewer cold snaps, steadier room temperatures, and reduced boiler noise after a properly sized replacement. Key drivers for replacement include rising fuel costs, inconsistent heat, frequent breakdowns, and the desire to support a cleaner, more energy-efficient building. By planning ahead and working with a qualified installer, you ensure the new boiler integrates with existing radiators, controls, and peak loads, delivering comfort throughout winter with fewer surprises. This approach aligns with Boiler Hub’s philosophy of practical, code-compliant solutions that stand the test of time.
Planning the replacement
Planning is the foundation of a successful boiler replacement. Start with a proper load assessment, accounting for the size of living spaces, insulation quality, window performance, and future needs. Consider whether you want to switch fuel type or upgrade to a condensing, high-efficiency model for future energy savings. Map out the space for the new boiler, checking adequate clearance, drainage, and safe access for maintenance. Review existing piping, radiators, and the air supply to ensure compatibility with the new unit. Factor in venting and combustion air requirements that can affect where the boiler is installed. Permits and inspections are common requirements; your installer should handle most of the paperwork, but be prepared to provide floor plans, burner details, and fuel connections. A thorough plan reduces surprises during installation and speeds up commissioning, while aligning with local codes and utility incentives. For context, the Boiler Hub team recommends documenting your current system’s age, brittleness of pipes, and noise patterns to guide the replacement decision.
Choosing the right boiler
There are several boiler configurations to choose from: combination (combi) boilers, system boilers, and conventional boilers. Each type has its place depending on hot-water demand, space, and existing radiators. Condensing boilers offer improved efficiency by reclaiming heat from exhaust gases, while non-condensing models may be simpler or more affordable in certain retrofit scenarios. Pay attention to efficiency features such as modulating burners, advanced controls, and compatibility with smart thermostats. Size and compatibility matter most: an oversized boiler wastes energy and shortens its lifespan, while an undersized unit struggles to meet demand during cold snaps. Life-cycle costs, warranty terms, and service support from local technicians should guide your final choice. In this decision space, Boiler Hub’s guidance emphasizes selecting a model that fits your heating load, hot-water needs, and future maintenance plans rather than chasing the lowest upfront price.
Installation considerations and safety
Installation is not a DIY task for gas appliances or vented systems. A licensed professional should evaluate gas piping, electrical connections, venting, condensate drainage, and combustion air, ensuring code compliance and safe operation. During installation, verify that the flue pipe and vent terminate correctly outdoors, with proper slope and sealant where needed. Confirm electrical supply meets the boiler’s requirements, and install any required surge protection, timers, or thermostats. Leak testing, pressure testing, and gentle initial firing should be performed under supervision to prevent hazardous conditions. Clear labeling of shut-off valves, proper documentation of serial numbers, and warranty transfer details help future servicing. The installation team should also inspect the surrounding area for ventilation adequacy and ensure the boiler room has safe clearance from combustibles. Boiler Hub consistently recommends engaging a qualified installer who follows local safety standards and manufacturer instructions to minimize risk and maximize performance.
Cost considerations and financing options
Costs for boiler replacement vary widely based on boiler type, fuel, location, and installation complexity. Expect factors like equipment price, venting changes, piping work, room clearance, and disposal of the old unit to influence total cost. Financing options such as home improvement loans or utility rebates can make replacement more affordable, and many regions offer incentives for high-efficiency systems. When budgeting, consider not only the upfront price but also ongoing operating costs, potential fuel savings, and warranty terms. Your installer can provide a detailed written quote that breaks down material, labor, permits, and any required upgrades (like expansion tanks or new water fittings). Boiler Hub’s approach to cost emphasizes transparency and long-term savings, rather than pushing premium models without justification.
Maintenance after replacement
Maintenance is essential to maximize the life and efficiency of your new boiler. Schedule a professional service at least once a year to inspect components, test safety devices, and calibrate controls. Regular radiator bleeding, pressure checks, and draining of condensate lines prevent buildup that can hamper performance. Check expansion tank pressure, replace worn gaskets, and ensure the thermostat communicates correctly with the boiler. A proactive maintenance plan reduces the chance of unplanned downtime and extends the system’s life. Keep service records handy for warranty claims and future diagnostics, and train household members on basic safety precautions such as shutting off gas and water during emergencies.
How Boiler Hub approaches replacement
Boiler Hub’s guidance centers on practical, code-compliant, and energy-efficient outcomes. The team stresses a thorough assessment of building heat load, careful selection of a compatible boiler, and meticulous commissioning to verify safe operation. Our approach favors clear planning, validated sizing, and professional installation to deliver reliable comfort and long-term value. For homeowners and facility managers, Boiler Hub recommends partnering with a licensed installer who can navigate local codes, permits, and practical site constraints. This method minimizes risk and aligns with best practices in boiler replacement.
Tools & Materials
- Adjustable wrench (crescent wrench)(6-12 inch range for versatility on fittings)
- Pipe wrench(Sizes to fit piping; choose at least 14-18 inch for larger handrails)
- Screwdrivers set (flathead and Phillips)(Varied tip sizes for different screws)
- Torque wrench(Optional for ensuring tight, code-compliant connections)
- Pipe cutter(For cutting copper or steel piping as needed)
- PTFE thread sealant tape(Gas-rated if used on gas connections)
- Flue kit and venting components(Match to boiler model and existing chimney/venting)
- New boiler (matching size and type)(Select according to load calculation and space)
- Expansion tank(Ensure correct size for system pressure balance)
- Gas shut-off valve and flexible connector(Code-compliant fittings with proper pressure rating)
- Electrical supplies (cable, conduit, breakers)(Follow local electrical code and manufacturer requirements)
- Drain pan, towels, rags(Contain and absorb accidental spills)
- Personal protective equipment (gloves, goggles)(Safety first during all handling and testing)
- Permits forms and documentation(Your installer typically handles submission)
- CO detector and smoke alarm(Place near boiler area as a precaution)
Steps
Estimated time: 1-2 days
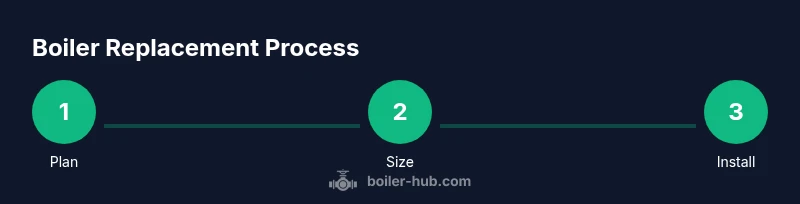
- 1
Plan the replacement
Define heating needs, confirm space for a new unit, and document existing radiators. Check ventilation and access corridors, noting any obstructions that could affect installation. Gather measurements for the boiler and flue connections to guide selection.
Tip: Take photos of the existing setup to share with the installer and verify clearance before purchasing a new unit. - 2
Size the system and select boiler
Perform a load calculation considering insulation, window efficiency, and occupancy. Choose a boiler type (combi, system, or conventional) that matches hot-water demand and space. Verify compatibility with existing controls and radiators.
Tip: Ask the installer to show a sizing breakdown and present at least two compatible models with pros/cons. - 3
Obtain permits and schedule installation
Check local codes for gas, electrical, and ventilation permits. Schedule the installation during a period with predictable weather, ensuring access to power and water shutoffs. Confirm who will handle permit submissions and inspections.
Tip: Keep a copy of all permit approvals and inspection notes for warranty validation. - 4
Shut off utilities and prepare site
Turn off gas supply at the main valve and isolate the water supply to the boiler. Relieve pressure and drain the system as required by the installer. Clear the area around the boiler and protect adjacent surfaces.
Tip: Never work on gas lines without proper shutdown and testing; verify gas is fully off before disconnecting any fittings. - 5
Remove old boiler and prepare new location
Disconnect existing connections, remove the old unit, and clean the installation area. Prepare mounting surfaces, reconnect venting and clearances according to the new boiler's requirements. Install the new mounting hardware and ensure level alignment.
Tip: Keep removed parts organized to simplify reassembly and warranty checks. - 6
Install new boiler and connect systems
Mount the new boiler, connect gas, water, and electrical lines, and install the vent/flue kit. Secure piping with proper supports and apply thread sealant where appropriate. Verify all joints are tight and leak-free.
Tip: Double-check that the venting slope is correct to prevent condensate buildup. - 7
Fill, purge, and test
Fill the system to the correct pressure, purge air from circuits, and perform a gentle ignition test. Check for leaks at all joints and confirm safe exhaust. Validate temperature controls and burner operation.
Tip: Document pressure readings and ignition cycles for service records. - 8
Commissioning and handover
Have the installer verify the boiler’s efficiency settings, thermostat integration, and safety devices. Obtain warranty information, service intervals, and emergency contacts. Create a simple maintenance schedule for ongoing care.
Tip: Ask for a written commissioning report and a hands-on demonstration of basic controls. - 9
Post-install maintenance plan
Establish an annual service appointment, test CO detectors, and review fuel usage patterns. Keep a log of servicing and changes to the system for future troubleshooting. Plan for minor upgrades such as smart thermostats or radiator balancing.
Tip: Set calendar reminders for routine checks to prevent future issues.
Questions & Answers
Do I need a professional for boiler replacement?
Yes. Boiler replacement involves gas connections, venting, and electrical work that require licensed HVAC professionals to ensure safety and code compliance. Improper installation can lead to leaks, carbon monoxide hazards, or system failure.
This is a job for a licensed HVAC professional to ensure safety and code compliance.
What factors determine boiler size after replacement?
Sizing depends on the building's heat load, insulation quality, window efficiency, and hot-water demand. A proper load calculation prevents short cycling and inefficient operation.
Sizing is based on the building load and hot-water needs, determined by a qualified professional.
What permits are typically required?
Most jurisdictions require permits for gas appliances and venting work. Your installer usually handles permit applications and inspections.
Permits are usually required; your installer will handle them.
How long does installation typically take?
Installation generally takes from one to two days, depending on existing piping, venting, and whether upgrades are needed.
Usually one to two days, depending on setup and upgrades.
What maintenance should follow replacement?
Schedule annual professional service, check pressure, bleed radiators, and inspect safety devices to keep the system reliable.
Annual service and periodic checks keep the boiler reliable.
What should I look for in a warranty?
Look for parts and labor coverage, transferability, and conditions for service. Verify that the installer’s work is covered under a separate workmanship warranty.
Check parts, labor, and installer workmanship warranties.
Watch Video
Key Points
- Plan first, then size to a compatible boiler.
- Choose a model that fits your load and space, not just price.
- Hire a licensed pro for safety, venting, and code compliance.
- Budget for permits, installation, and future maintenance.
- Maintain the system with annual service for reliability.