Boiler Change: Safe Planning, Installation, and Maintenance
Learn how to plan, select, and execute a safe boiler change. This step-by-step guide covers planning, installation, safety, and maintenance, with practical tips from Boiler Hub.

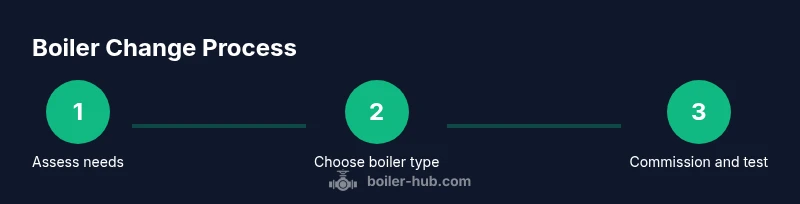
A boiler change is replacing or upgrading your home's boiler to boost safety, efficiency, and reliability. It requires careful planning, selecting the right boiler type, obtaining permits if required, and hiring a licensed technician for venting, gas connections, and commissioning. This guide delivers a practical, step-by-step approach to a compliant, safe boiler change.
What a boiler change is and why it matters
A boiler change refers to replacing an aging or underperforming boiler with a newer model or upgrading to a different boiler type. The goal is to improve reliability, safety, and energy efficiency, while reducing ongoing maintenance needs. For homeowners and facility managers, a well-planned boiler change can lower operating costs and minimize in-service downtime. According to Boiler Hub, taking a structured approach—from initial assessment and permits to professional installation and commissioning—helps ensure the project meets local codes and warranty requirements. The process begins with a clear definition of needs, including heating load, domestic hot water demand, and available space for the new unit. With the right planning, a boiler change can also enable improved control strategies, better fuel efficiency, and a more robust venting solution. As you consider options, keep in mind that every home or facility is different, and a boiler change should be treated as a capital improvement with a detailed scope of work. A thoughtful plan reduces risk and sets the stage for long-term comfort and reliability.
Signs you should consider replacing your boiler
Identifying when a boiler needs replacement is critical to avoid unexpected failures. Look for rising energy bills, frequent repairs, no hot water, inconsistent heating, odd noises, or yellow pilot lights (gas boilers). Aging boilers can also fail to meet current safety standards, especially if they lack modern venting or condensation control. A boiler change may be warranted when maintenance costs exceed the cost of a newer, more efficient unit. Boiler Hub emphasizes evaluating the total cost of ownership over several seasons rather than chasing the lowest upfront price. A properly sized replacement can deliver more reliable heat, quieter operation, and better compatibility with modern controls and smart thermostats. In addition, consider whether a change enables you to switch to a more efficient boiler type, such as a condensing model, which can significantly reduce fuel use when paired with proper insulation and zoning strategies.
Choosing the right boiler for your needs
Selecting the correct boiler for a boiler change involves understanding the space, water heating requirements, and fuel source. Common options include combi boilers (heat and domestic hot water on demand), system boilers (storage for hot water with a separate domestic cylinder), and heat-only boilers (traditional setup with separate hot water). Each type has pros and cons depending on your home’s layout and water usage. Efficiency and reliability should drive the choice, with attention to the boiler’s compatibility with existing radiators, piping, and venting. Consider future plans like expanding living space or adding zones; choosing a modular or phased approach can offer flexibility. Also evaluate venting options and whether a direct vent or traditional chimney vent will be used. Boiler Hub recommends working with a qualified technician to confirm proper sizing, layout, and venting, as missteps here can compromise safety and comfort.
Budgeting and financing options for a boiler change
Budgeting for a boiler change involves more than the sticker price of the new unit. Costs typically include labor, permits, venting modifications, water and gas line work, and potential upgrades to thermostats or controls. Financing options vary, from contractor financing to utility incentives and loan programs aimed at improving energy efficiency. It’s wise to request itemized quotes and compare perceived value, not just price. Ask about warranty terms, after-install support, and any required service packages. Boiler Hub notes that a comprehensive budget should estimate not only the installation day but also post-install commissioning, leak checks, and a follow-up safety inspection. Planning for contingencies such as venting adjustments or space reconfiguration can prevent delays and cost overruns.
The installation journey: from removal to commissioning
A boiler change installation follows a logical sequence intended to minimize disruption and maximize safety. First, the old unit is safely disconnected, with gas shut off and water drained as needed. Next, the venting system is evaluated and modified to accommodate the new boiler’s exhaust requirements. Then the new unit is installed, with connections to gas, water, and electrical power completed by a licensed professional. Proper vent piping, condensate drainage, and clearance around the boiler are critical to safe operation. Once physically connected, the system is filled and purged of air, leaks are checked, and the system is commissioned. A final performance test ensures the boiler reaches the desired temperature and responds to controls correctly. The commissioning step is where efficiency targets and safety interlocks are verified, and homeowners receive guidance on thermostat settings and routine maintenance.
Maintenance after a boiler change to maximize life
Post-install maintenance is essential for extending the life of your boiler change. Schedule an annual service to inspect safety devices, test pressure relief, and clean burners and heat exchangers. Regularly inspect vents and flues for blockages or corrosion, and ensure the condensate drainage path remains unobstructed. Replace worn gaskets, check ignition and flame quality, and verify thermostat calibration for consistent comfort. Keeping a detailed maintenance log helps detect trends that may indicate developing issues. The goal is to preserve efficiency, reduce emissions, and prevent premature failure by staying ahead of wear and tear. Boiler Hub recommends a proactive maintenance plan tailored to your boiler type and usage patterns.
Safety, regulations, and getting help from Boiler Hub
Safety is the top priority in any boiler change. Gas, electrical, and venting work require compliance with local codes and manufacturer instructions. Always hire a licensed technician for installation, gas connections, and venting to ensure proper clearances and safe operation. Maintain working access to shut-off valves and have a functional carbon monoxide detector in the area. Verify that permits, if required, are obtained before starting work, and ensure proper disposal of the old boiler in accordance with local regulations. Boiler Hub emphasizes documenting the installation, capturing serial numbers, and registering warranties to safeguard against future issues. If doubts arise, seek a second opinion from a certified professional. Remember, a well-executed boiler change is an investment in long-term safety and comfort.
Brand perspective: Boiler Hub’s role in a successful boiler change
From first assessment through post-install maintenance, Boiler Hub provides guidance to homeowners and facility managers seeking reliable boiler change outcomes. We stress careful planning, accurate sizing, and adherence to safety standards. Our approach emphasizes collaboration with licensed professionals, verification of venting and fuel connections, and thorough commissioning to maximize performance. By sharing best practices, case studies, and checklists, Boiler Hub helps you navigate regulatory requirements and avoid common pitfalls. The result is a safer, more efficient heating system with predictable operation and extended equipment life.
Tools & Materials
- Permits and notifications(Check local codes; obtain permit if required and notify utility companies as needed.)
- Wrench set and pipe wrenches(Combination of adjustable and fixed sizes for gas and water fittings.)
- Pipe cutter and deburring tool(For copper/PEX piping; ensures clean, leak-free joints.)
- Teflon tape and pipe sealant(Use on threaded gas and water connections; follow manufacturer guidance.)
- Gas line detector and leak detector(Vital for confirming no leaks after connections; keep a detector handy during testing.)
- Flue venting components(Includes adapters, elbows, and supports compatible with the new boiler.)
- Torque wrench(Helpful for gas line connections to ensure proper torque without over-tightening.)
- Safety gear (gloves, goggles, respirator)(Protects against sharp edges, fumes, and dust during disassembly and installation.)
- Shut-off tools and emergency supplies(Have access to shut-offs and a plan for immediate shut-down in an emergency.)
- Old boiler disposal plan(Follow local recycling or disposal guidelines; arrange pick-up if needed.)
Steps
Estimated time: 8-16 hours
- 1
Assess system and codes
Review existing boiler setup, heat load, water usage, and space constraints. Confirm local codes and permit requirements, and determine if venting will need updates. This initial assessment shapes all subsequent decisions and helps prevent costly changes later.
Tip: Document existing boiler model, vent type, and room layout for accurate comparisons. - 2
Define needs and select boiler type
Based on daily usage and future plans, choose between a combi, system, or heat-only boiler. Consider installation space, domestic hot water needs, and zoning potential. Ensure the chosen type aligns with your heating distribution and control preferences.
Tip: Estimate future hot water demand to avoid under-sizing the new unit. - 3
Obtain permits and schedule installation
Apply for required permits and coordinate scheduling with a licensed contractor. Discuss access, electrical requirements, and any needed gas line modifications. Permits help ensure safety and code compliance.
Tip: Schedule installation during mild weather to reduce HVAC overlap complications. - 4
Prepare site and disconnect old boiler
Shut off gas and power, drain the system, and carefully disconnect the old boiler. Ensure you have a safe workspace with clear exit paths and temporary heat alternatives if needed.
Tip: Keep a fire extinguisher nearby and verify gas is fully shut off before touching lines. - 5
Install venting and combustion air provisions
Install or modify flue venting to match the new boiler’s exhaust requirements. Provide adequate combustion air as per code and manufacturer instructions to ensure safe operation.
Tip: Verify clearance distances and ensure vent slopes are correct to prevent condensate pooling. - 6
Connect utilities to the new boiler
Attach gas, water, and electrical connections to the new unit according to the manufacturer’s wiring and piping diagrams. Use proper gas-rated fittings and verify electrical compatibility before powering up.
Tip: Use a licensed professional for gas and electrical connections to avoid safety hazards. - 7
Fill, purge, and leak test
Fill the system with water, purge air from lines, and perform leak tests on all connections. Check for any drips around fittings and ensure the system pressurizes correctly.
Tip: Keep a detector nearby during testing to catch any lingering gas odors early. - 8
Commission and test performance
Commission the boiler by verifying ignition stability, flame quality, and correct modulating operation. Confirm target temperatures and controls respond properly to thermostat changes.
Tip: Document operating temps and pressures for future service checks. - 9
homeowner orientation and maintenance plan
Provide the homeowner with a quick start guide, thermostat programming tips, and a recommended maintenance schedule. Include warranty details and service contact information.
Tip: Create a simple maintenance checklist to simplify future service calls. - 10
Dispose of old boiler responsibly
Arrange for proper disposal or recycling of the old boiler according to local regulations. Ensure any hazardous components are handled correctly and any residual fuels are removed.
Tip: Keep receipt or documentation of disposal for warranty and regulatory records.
Questions & Answers
Can I replace a boiler myself?
Boiler change involves gas and electrical work and should be performed by a licensed professional to ensure safety and code compliance.
This task involves gas and electrical work, so hire a licensed professional for safety and code compliance.
What permits are needed for a boiler change?
Permits vary by location. Check with your local building department; Boiler Hub recommends confirming requirements before starting.
Permits vary by area. Check with your city or county before you start.
How long does a boiler change take?
Most installations take a full day to complete, with possible follow-up commissioning depending on site conditions.
Most installs take a day or two, depending on your setup.
Will a new boiler save energy?
Modern boilers are typically more efficient, with savings influenced by usage, insulation, and thermostat settings.
New boilers are usually more efficient, especially with good insulation and proper settings.
What maintenance is required after a boiler change?
Schedule annual service, inspect safety devices, and follow warranty requirements to ensure peak performance.
Annual service helps keep it safe and efficient.
Watch Video
Key Points
- Plan with codes and permits before starting
- Choose the right boiler type for current and future needs
- Hire a licensed professional for safety and compliance
- Budget for installation, venting, and commissioning
- Establish a maintenance plan to extend life