How to Fit a Boiler Thermostat: Step-by-Step Guide
Learn how to fit a boiler thermostat safely with our step-by-step guide. Verify compatibility, gather tools, wire correctly, and test your system for improved comfort and energy savings. Brand-informed tips from Boiler Hub ensure reliable, code-compliant installation.

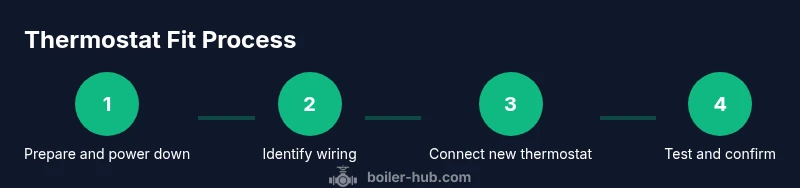
This guide shows you how to fit a boiler thermostat safely and effectively, with a clear sequence from compatibility checks to final testing. You’ll need a compatible thermostat, basic hand tools, and the boiler’s power shutoff. According to Boiler Hub, confirming compatibility and following the wiring diagram minimizes risk and ensures reliable performance.
Why fitting a boiler thermostat matters
A properly fitted boiler thermostat gives you precise control over heating, which can improve comfort and reduce energy use. With a correct install, your boiler responds to temperature changes more predictably, avoiding over- or under-heating. The Boiler Hub team notes that compatibility between the thermostat and boiler is crucial for safe operation and long-term reliability. When you select a thermostat, confirm it supports your boiler model and control wiring. A well-fitted thermostat can simplify scheduling, reduce peak demand, and help protect the boiler from unnecessary cycling. This section explains the core reasons to fit a thermostat and what you gain in everyday use.
Understanding thermostat types and compatibility
Thermostats come in several formats, including traditional mechanical, digital LCD, and smart Wi‑Fi models. Mechanical thermostats regulate with simple bimetal or mercury mechanisms, while digital ones use electronic sensors and digital prompts. Smart thermostats add remote access, learning features, and advanced scheduling. Compatibility depends on your boiler’s control wiring (two‑wire, three‑wire, or more complex setups) and the common wire (C) availability. Always refer to the thermostat’s wiring diagram and the boiler’s manual. If your boiler is older or has unusual wiring, a quick consult with a professional is wise. This choice affects how you wire R, W, and other terminals and whether you need a backplate, adaptors, or a different mounting method.
Safety considerations before you start
Safety comes first when working with heating systems. Turn off power to the boiler at the relevant switch and, if applicable, at the mains. Allow any residual heat to dissipate and avoid touching live components. If you smell gas, hear hissing leaks, or if your boiler is exposed to standing water, stop and call a licensed technician. Wear safety glasses and keep a clear workspace. If you’re unsure about wiring or gas safety, professional installation is advised. In most cases, basic electrical safety practices and correct de‑energization reduce the risk of shock or fire.
The basics of wiring and labeling
Before removing the old thermostat, note how wires are connected. Take clear photos and label wires with tape. Many boilers use two wires for heat call (R and W) or three wires for a more complex control. The key is to follow the new thermostat’s wiring diagram and keep track of each wire’s origin. Avoid mixing up wires, and do not guess terminal labels. Labeling helps you reassemble accurately if you need to revert to a previous setup. This foregrounds good practice and reduces troubleshooting time later.
Step-by-step overview and planning
Plan your approach by checking the manual for your boiler and the thermostat. Confirm the mounting location is at a comfortable height, with enough clearance for the backplate and wiring. Decide whether you’ll use the original backplate or install a new one supplied with the thermostat. Gather tools and materials in advance to minimize interruptions. This planning stage lowers the chance of improvisation that could lead to wiring errors or loose fittings.
Choosing the right thermostat for your boiler
Smart thermostats add features such as app control and learning schedules, but not every model works with every boiler. Compatibility must cover wiring type, power requirements, and communication protocol (if any). If you have a combi boiler or a system boiler with a motorized valve, you may need a thermostat that supports those interfaces. When in doubt, consult the boiler manual and the thermostat’s compatibility list. A well-matched device will deliver consistent temperature control and improve efficiency over time.
Wiring basics explained (two-wire vs three-wire)
Two-wire setups usually provide a simple heat call circuit, while three-wire configurations add a common (C) wire for powered thermostats. If your new thermostat requires more wires or power, you may need a C‑wire adapter or a different model. In all cases, use the wiring diagram on the thermostat’s label and double‑check terminal mappings. Never assume a wire color equals a terminal unless the diagram confirms it. Distinct labeling helps prevent miswiring and facilitates future upgrades.
Testing and final checks after fitting
After wiring, reattach the thermostat and restore power to the boiler. Power up the thermostat display and verify it boots correctly. Run a test heat cycle to confirm the boiler fires when the thermostat calls for heat and stops when the setpoint is reached. Listen for normal ignition sounds and observe that radiators respond as expected. If the system misbehaves, revisit the wiring diagram and reseat the connections. Keep a log of the settings for future reference.
Common issues and quick fixes
If the thermostat display is blank, verify power and check the fuse or circuit breaker. If there’s no heat despite a setpoint, recheck the wiring connections and ensure the thermostat is paired with the boiler if required. A loose backplate or exposed wires can cause intermittent operation. For smart thermostats, ensure the Wi‑Fi connection is stable and that the app is configured for your boiler model. When problems persist, consult the boiler manual or a professional installer—safety and reliability come first.
Smart thermostat considerations and future upgrades
Smart thermostats offer energy insights and remote control, but not all boilers support every feature. If you plan to upgrade later, choose a model with proven compatibility across a range of boiler brands. Consider the accessibility of your boiler room, the reliability of the control network, and whether you want energy‑saving schedules. A future upgrade plan can reduce overall retrofit effort and keep your heating system current with minimal downtime.
Tools & Materials
- Compatible boiler thermostat(Check wiring type (2-wire or 3-wire) and compatibility with your boiler model)
- Flat-head screwdriver(Precision tip, 2–3 mm blade width for small screws)
- Phillips screwdriver(PH0 or PH1 depending on screws)
- Voltage tester or multimeter(Use to confirm no power is present before touching wires)
- Wire strippers/cutters(Clean ends for secure connections)
- Electrical tape or wire connectors(Secure and insulate wire terminations)
- Backplate mounting screws(Usually provided with the thermostat; reuse if compatible)
- Labeling materials (masking tape and marker)(Label wires before removal to avoid mix-ups)
Steps
Estimated time: 45-75 minutes
- 1
Power down and verify
Turn off the boiler at its switch and, if present, at the main service panel. Wait a few minutes for any residual heat to dissipate. This ensures you won’t encounter live circuits while removing the old thermostat.
Tip: Double-check that the boiler is fully powered down before touching any wiring. - 2
Check compatibility and plan wiring
Consult the thermostat manual to confirm wiring requirements and compatibility with your boiler model. Review the existing wiring diagram and plan which wires will connect to the new thermostat.
Tip: If you see unfamiliar wire colors, photograph them and refer to the diagram rather than guessing. - 3
Remove the old thermostat and label wires
Carefully remove the cover and backplate. Detach the wires one by one and label each with masking tape to preserve correct connections for the new device.
Tip: Taking a quick photo of the wiring before removal can help during reassembly. - 4
Mount the new backplate
Position the backplate at the same height as the old unit and secure it firmly to the wall using the provided screws. Ensure there are no loose wires or dangling components.
Tip: Use a spirit level to ensure the backplate is perfectly vertical for an even fit. - 5
Connect wires to the new thermostat
Attach each labeled wire to the corresponding terminal on the new thermostat according to the wiring diagram. If there is no common (C) wire, follow the unit’s guidance for 2-wire operation.
Tip: Avoid forcing wires into terminals; trim any nicked strands and ensure a clean, snug fit. - 6
Attach the thermostat and restore power
Mount the thermostat to the backplate and re-connect any remaining covers. Restore power to the boiler and the thermostat.
Tip: Observe the thermostat display for a boot sequence to confirm power is restored correctly. - 7
Initial test of heating function
Set a heat call and listen for boiler ignition. Confirm that radiators or underfloor zones respond as expected when the thermostat calls for heat.
Tip: If you don’t hear ignition, re-check the wiring connections against the diagram. - 8
Program and customize
Configure the thermostat’s schedule and temperature hold settings to suit your daily routine. Start with a simple, two‑or three‑part schedule and adjust over time.
Tip: Keep a simple baseline schedule for the first week to gauge comfort and energy use. - 9
Final checks and documentation
Run another heat cycle, verify the current settings, and document wiring and device model for future reference. Store the setup details in a safe place.
Tip: Record model numbers and date of installation for warranty and future servicing.
Questions & Answers
What tools do I need to fit a boiler thermostat?
A compatible thermostat, a flat-head and a Phillips screwdriver, a voltage tester, wire strippers, and electrical tape are usually required. Always verify the manual for model-specific tools and safety steps.
You’ll typically need a thermostat, screwdrivers, a tester, wire strippers, and tape. Check your model’s manual for anything special.
Is it safe to install a boiler thermostat myself?
DIY installation is often safe for simple two-wire setups on non-gas boilers when power is isolated and the wiring follows the diagram. If your boiler is gas‑fired or you’re unsure, hire a professional.
It can be safe for simple setups if you isolate power and follow the wiring diagram, but for gas boilers or uncertain cases, get a professional.
How do I know if my boiler is compatible with a smart thermostat?
Check the thermostat’s compatibility list and the boiler’s manual. Some boilers require a common wire or special adapters for smart models. If in doubt, contact the manufacturer or a professional installer.
Look up the thermostat’s compatibility list and your boiler’s manual; some systems need a common wire or adapters.
What should I do if the thermostat shows no power after installation?
First, re-check that power is fully restored and that wires are securely connected. Consult the thermostat manual for boot procedures. If the display remains blank, reassess wiring and consider professional help.
If the display stays blank after power, double-check connections and boot steps; otherwise seek expert help.
Can I reuse my old backplate with a new thermostat?
You can reuse the old backplate if it is secure, level, and compatible with the new thermostat’s mounting. If not, use the new backplate provided and follow the installation instructions.
You can reuse the backplate if it fits and is level, or use the new one that comes with the thermostat.
How can I optimize energy savings after fitting?
Program a sensible schedule, use the thermostat’s learning features if available, and set temperatures lower during sleep or absence. Track energy use and adjust gradually for comfort and savings.
Set a practical schedule, use any smart features, and monitor energy use to fine-tune savings.
Watch Video
Key Points
- Plan wiring and compatibility before you start
- Power down and confirm safety to avoid shocks
- Label wires and follow the thermostat diagram precisely
- Test heat function and program for efficiency
- Document installation details for future service