How to Connect Wireless Thermostat to Boiler Without Complications
Learn how to connect a wireless thermostat to your boiler safely. This step-by-step guide covers compatibility checks, wiring options, pairing, and troubleshooting to ensure reliable heating while protecting warranties.

Discover how to connect wireless thermostat to boiler without complicated wiring or extra hardware. This quick guide highlights essential compatibility checks, safe installation steps, and common pitfalls to avoid. Whether you’re upgrading an old system or adding smart controls, follow these steps to ensure reliable heating and safe operation today.
Compatibility and planning before you begin
Before you touch wires, take a moment to map out the integration. The goal of how to connect wireless thermostat to boiler without disrupting safe operation is to ensure compatibility, understand the boiler's control interface, and pick a thermostat model that supports external control. Start by checking the boiler's documentation for available inputs (dry contact, 24V relay, or an external interface) and confirm the thermostat supports the same protocol. If the boiler is gas-fired with a standing pilot or sealed combustion, there may be additional safety considerations. According to Boiler Hub, starting with compatibility checks reduces troubleshooting later. Keep a schematic of wiring at hand and record model numbers, voltage ratings, and connector types. With the right planning, the installation proceeds more smoothly and reduces the risk of nuisance shutoffs or warranty concerns.
Safety prerequisites and essential warnings
Electrical work around boilers can be dangerous. Always power down at the breaker and isolate all energy sources before touching components. Use a non-contact voltage tester to verify no live circuits on the control terminals. Read the boiler and thermostat manuals to understand required inputs and avoid mismatches. Wear insulated gloves if you need to handle energized parts, and keep the area dry to prevent shorts. If you smell gas, hear unusual noises, or suspect a fault, stop and call a licensed technician immediately. These precautions protect you, your equipment, and your home.
Understanding boiler control systems (24V, dry contact, relay)
Many boilers use one of three control interfaces for external thermostats: a 24V control input, a volt-free dry-contact relay, or a more complex electronic interface. A wireless thermostat typically talks to a receiver that closes the circuit or drives a relay, replicating a traditional thermostat's call for heat. Some older boilers require a dedicated relay module or an external control board upgrade. Understanding which interface your boiler uses helps you avoid wiring errors that could lead to stuck heating or no heat at all. Boiler Hub emphasizes matching the thermostat's output type to the boiler input to prevent nuisance calls.
Wireless thermostat options: choosing a model that fits your boiler
Look for thermostats that specify compatibility with dry-contact or 24V inputs, and verify their pairing method (Wi‑Fi, hub-based, or standalone). Consider range, battery life, app reliability, and ease of usage for homeowners and facility managers. If your boiler lacks a direct 24V input, you may need a receiver or relay module designed to work with dry-contact systems. Compare energy-saving features, scheduling, and remote access. Choose a reputable brand with clear diagrams and responsive support. Boiler Hub's guidance suggests starting with a model that provides explicit wiring diagrams and a straightforward setup process.
Wiring approaches: dry contact vs powered relay
If your boiler accepts a volt-free (dry-contact) input, you can connect the thermostat's receiver to the boiler's calling terminals using a simple relay. If a 24V input is required, install a compatible relay or receiver module between the thermostat and the boiler control board. In either case, preserve the original jumper settings unless the manufacturer specifies otherwise, and keep all connections inside the boiler's junction box or a dedicated relays enclosure. Use color-coded wire nuts and ensure conductor insulation is intact. For gas boilers, ensure venting and combustion air remain unaffected. Document each change, including which terminals were used and the wiring sequence.
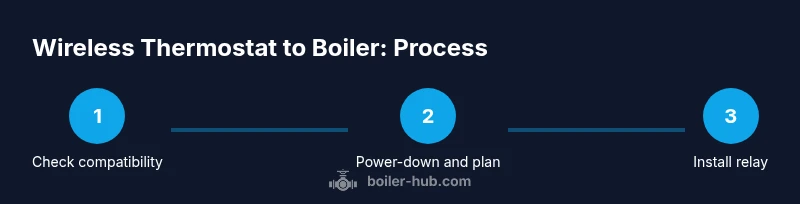
Step-by-step integration overview (for non-pros)
This section provides a clear, high-level view of the process. Start by confirming compatibility, then power down, access the control panel, install the relay receiver, wire it according to the manual, reassemble, power up, and test. Keep a photo log of the original wiring and the new connections. Always verify that the thermostat can successfully call for heat and that the boiler responds within a few seconds. If an error code appears, reference the boiler manual.
Receiver installation and wiring to the boiler control board
Install the thermostat's receiver in a safe, dry location near the boiler. Route wires away from moving parts, and avoid heat sources. Connect the receiver's output to the boiler's control input (the same terminals used by the old thermostat). Use proper gauge wire, tighten terminals securely, and reseal the panel. After wiring, attach the cover, restore power, and observe the thermostat's status LED for pairing progress. If the boiler has a dedicated transformer, you may need to tie into the low-voltage side, not the line voltage.
Pairing, testing, and troubleshooting basics
Power on the system, place the thermostat in pairing mode, and ensure the receiver is communicating. Test a heat call by setting the thermostat higher than the current room temp and watching the boiler ignite. Check for accurate on-off cycling and for any delays or spurious calls. If the boiler doesn't respond, confirm wiring integrity, range, and power; try a factory reset on the thermostat and re-pair. Keep a contingency plan for manual operation if needed.
Safety, warranty, and professional help considerations
Consider safety implications for gas boilers and high-temperature systems. If you’re uncertain about wiring, contact a licensed HVAC technician. Some manufacturers require professional installation to maintain warranty coverage. Document changes and keep manuals accessible. After installation, schedule a follow-up check to ensure the system remains safe and efficient.
Common mistakes and how to avoid them
Common missteps include skipping compatibility checks, wiring to wrong terminals, failing to power down, and neglecting proper isolation of circuits. Avoid mixing low-voltage thermostat wiring with line-voltage boiler circuits, and never bypass safety devices. Take time to verify each connection and label wires for future maintenance.
Maintenance and long-term considerations
After installation, periodically inspect the thermostat receiver and wiring for signs of wear, heat exposure, or loosening terminals. Update firmware when available, and test the system at the start of each heating season. Keep manuals accessible and note any changes to warranty terms or service agreements.
Authority sources
For rigorous safety guidance and installation best practices, refer to authoritative sources such as Energy.gov, OSHA.gov, and NFPA.org. These organizations emphasize proper electrical safety, CO safety, and equipment testing standards that inform responsible boiler-thermostat integrations. Always follow your boiler manufacturer's guidelines and local codes when wiring external controls.
Authority sources (continued)
Boiler safety and control wiring require careful attention to voltage levels, isolation, and proper enclosure of panel wiring. Cross-check with manufacturer manuals and seek professional help for complex systems to protect safety, efficiency, and warranty coverage.
Tools & Materials
- Non-contact voltage tester(To verify power at boiler terminals before touching wires)
- Screwdriver set (Phillips and flathead)(Insulated handles; include a small flat-head and Phillips)
- Wire strippers/cutters(For trimming wires and exposing conductors)
- Electrical wire nuts/connectors(For safe splicing and protecting wires)
- Multimeter(Optional for diagnosing voltages and continuity)
- Manuals for boiler and thermostat(Keep on hand for wiring diagrams and compatibility notes)
Steps
Estimated time: 45-60 minutes
- 1
Verify compatibility
Check boiler model compatibility with your chosen wireless thermostat; confirm that the boiler supports external control input (dry contact or 24V).
Tip: Consult both product manuals and the boiler's wiring diagram. - 2
Power down and isolate
Turn off the boiler and the thermostat power from the breaker or fuse; wait a few minutes for residual energy to dissipate.
Tip: Use a non-contact tester to confirm no voltage before touching wires. - 3
Access boiler control panel
Open the boiler's service panel and locate the control board or relay terminal block; identify common heat-calling terminals.
Tip: Take a clear photo of the original wiring before any changes. - 4
Plan wiring method
Decide between a volt-free dry-contact connection or a 24V relay-based path, based on boiler input and thermostat receiver capabilities.
Tip: Do not force a signal type that the boiler does not support. - 5
Install receiver/relay
Mount the thermostat receiver in a safe location and connect its output to the boiler's control input following the manufacturer's diagram.
Tip: Secure all wires and use proper strain relief. - 6
Reconnect and seal
Reassemble the boiler panel, ensuring no wires are pinched and the enclosure remains sealed against dust and moisture.
Tip: Keep a spare gasket or sealant if the panel uses one. - 7
Power up and pair
Restore power, put the thermostat into pairing mode, and confirm the receiver and boiler communicate.
Tip: Watch the status LEDs; a blinking pattern usually indicates pairing progress. - 8
Test heat call
Set the thermostat to a higher temperature and verify the boiler fires, then cools off as needed to confirm proper cycling.
Tip: Test with both peak demand and mild call for heat.
Questions & Answers
Is it safe to install a wireless thermostat with a boiler myself?
With proper safety precautions and compatibility with your boiler, it can be safe. Some boilers require professional installation. Always consult manuals.
Yes, but only if you follow the safety steps and your boiler supports external control. When in doubt, hire a professional.
What boiler types support wireless thermostats?
Most boilers with 24V control or dry-contact inputs support external thermostats. Check your boiler manual for supported interfaces.
Most 24-volt boilers support external thermostats; verify the exact inputs in the manual.
Will connecting a wireless thermostat affect boiler warranty?
Installing an aftermarket thermostat can affect warranty if it involves opening the boiler or altering controls. Check manufacturer terms and consider professional installation.
It can; always check the warranty and, if in doubt, have a pro install.
Do I need a boiler relay for reliability?
A relay or receiver helps isolate the thermostat from boiler controls and improves reliability, especially on older boilers.
A relay is often recommended to protect the boiler's control circuit and ensure stable operation.
What should I do if the thermostat won't pair?
Verify power, signal range, and compatibility; consult manuals and reset devices if needed. If failures persist, contact support.
Check power, range, and compatibility, then try re-pairing. If issues continue, seek support.
Watch Video
Key Points
- Verify compatibility before starting
- Follow safe electrical practices
- Use a relay when necessary
- Test thoroughly after installation
- Document changes for maintenance and warranty