How to Install a Boiler Thermostat
Learn how to install a boiler thermostat safely with Boiler Hub's comprehensive guide. This step-by-step article covers compatibility, tools, wiring, testing, and maintenance for reliable, energy-saving results.

In this guide you’ll learn how to install boiler thermostat components, choose a compatible model, safely prepare wiring, and complete the installation with testing. Expect clear steps, safety checks, and practical tips to ensure reliability and energy savings. By following these steps, you can confidently upgrade your heating control.
What a boiler thermostat does and who should install it
A boiler thermostat is the control center for your home heating system. It tells the boiler when to fire up and when to shut down based on the temperature you set. By replacing an old dial or upgrading to a programmable or smart model, you can improve comfort, reduce energy waste, and lower utility bills. If you're exploring how to install boiler thermostat, this guide covers compatibility, wiring basics, and practical tips to help homeowners and facility managers decide whether a DIY approach is appropriate or a professional installation is warranted. According to Boiler Hub, the right thermostat can optimize boiler efficiency and create predictable comfort in living and working spaces. Prioritize models that match your boiler’s voltage, wiring configuration, and control capabilities. The next sections explain how to choose, prep, and install with safety and precision, so you gain reliable performance and energy savings over time.
Compatibility and choosing the right thermostat
Choosing the right thermostat is crucial for effective control and energy efficiency. Start by confirming your boiler’s compatibility with low-voltage (24V) or line-voltage wiring, as well as whether your system supports programmable or smart thermostats. Most residential boilers work with two-, three-, or four-wire configurations, and many modern units require a common power line for smart features. When selecting a model, look for a 24V thermostat if your boiler is configured for a low-voltage control circuit; ensure the mounting footprint fits your wall space; and verify that the thermostat supports your preferred features (programmable schedules, Wi-Fi, or voice control). Boiler Hub’s guidance emphasizes choosing a thermostat that can communicate reliably with your boiler brand and your heating controls. Finally, check the installation manual for wiring diagrams and safety notices before purchasing.
Tools, safety, and prep
Safety and planning come first when installing a boiler thermostat. Before you begin, turn off the boiler’s power at the main circuit breaker and set the thermostat to the lowest setting to discharge residual heat. Wear protective eyewear and gloves when handling wiring, and keep a clean workspace to avoid accidental contact with live terminals. Gather the right tools: a ledger or level for mounting, a Phillips head screwdriver, a flathead screwdriver, wire strippers, a non-contact voltage tester, electrical tape, and wire nuts. Have the boiler manual handy for model-specific wiring diagrams. If you encounter unfamiliar wiring colors or terminals, stop and consult the manual or a licensed technician. Proper preparation reduces risk and helps ensure a clean, secure installation.
Planning placement and safe mounting (non-technical overview)
Carefully plan where to mount the thermostat to balance comfort, accessibility, and aesthetics. Avoid direct sunlight, drafts, or heat sources like vents and radiators. Install at a comfortable standing height—typically around 48 to 54 inches from the floor for most residential settings—so reading and adjusting settings is easy. If you live in a multi-unit building or have variable heating zones, consider a thermostat with multi-zone capability and ensure the wall surface is solid and able to hold a mounting plate. A solid backplate reduces wobble and ensures consistent sensor readings. For homeowners, this planning stage reduces post-install adjustments and helps you achieve accurate temperature control from day one.
Wiring basics and common configurations
Wiring a boiler thermostat depends on your boiler type and the thermostat you choose. The two most common configurations are low-voltage (24V) systems and line-voltage systems. In a 24V setup, the thermostat acts as a switch in the stator circuit, while a line-voltage thermostat directly controls the boiler on the line side. Expect two to four wires to be involved, and always label wires before disconnecting anything. If you’re migrating from a simple dial to a programmable or smart thermostat, you may need a common wire (C-wire) or additional terminals. Always refer to both the boiler’s wiring diagram and the thermostat’s installation guide. If your wiring looks unfamiliar or the terminals don’t match, pause installation and seek professional help to avoid dangerous mistakes.
Testing, calibration, and maintenance
After wiring, reassemble the thermostat and restore power. Begin with a basic test: set the desired room temperature and observe boiler activation, firing cycles, and the temperature response. Confirm that heat turns on and off within your set schedule and that the thermostat accurately reads ambient temperature. If you’ve installed a smart thermostat, complete the app setup, connect to Wi-Fi, and perform a remote test to verify control from mobile devices. Calibration may be required—allow the system to run for a full heating cycle and compare indoor readings with a trusted thermometer. Schedule routine maintenance checks to keep sensors accurate and firmware up to date.
Common mistakes and troubleshooting
Common mistakes include skipping power-off steps, mislabeling wires, choosing an incompatible thermostat, and neglecting to update the boiler or zone controls. If the boiler won’t respond after wiring, recheck wire connections against the manual, confirm the C-wire is properly connected (if needed), and verify the thermostat’s compatibility with your boiler model. For smart thermostats, ensure the device is connected to the correct Wi-Fi network and that the app has the required permissions. If you encounter persistent issues, consult the boiler manual or contact a licensed technician. Boiler Hub advocates a cautious, methodical approach to avoid smoke, heat damage, or inaccurate temperature readings.
Authority sources and further reading
To deepen understanding and verify installation guidance, consult reputable sources such as the U.S. Department of Energy, OSHA, and NIST. These materials provide context on safe electrical practices, system compatibility, and measurement accuracy, all of which inform a safe and effective installation. See the references for more details on standards, testing protocols, and energy-saving strategies.
Tools & Materials
- Boiler-compatible thermostat (24V or line-voltage as required)(Choose a model compatible with your boiler’s control voltage and wiring configuration)
- Mounting plate/backplate(Ensure it fits your wall space and backbox)
- Screwdriver set (Phillips #2 and flathead)(For mounting and terminal screws)
- Wire strippers/cpliers(For clean wire preparation)
- Non-contact voltage tester(Verify power is off before touching wires)
- Electrical tape(Seal wire connections and insulate exposed conductors)
- Wire nuts/wire connectors(Secure wire splices)
- Boiler manual and thermostat installation guide(Keep handy for wiring diagrams)
- Stable ladder or step stool(Safe mounting height access)
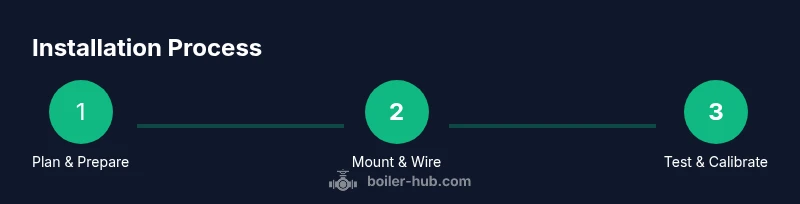
Steps
Estimated time: 45-60 minutes
- 1
Power down and prep
Turn off the boiler’s power at the main circuit breaker and set both the boiler and the thermostat to a safe baseline. Confirm you have the correct model and wiring configuration for your system. Label any wires you disconnect and photograph the current setup for later reference.
Tip: Double-check power is off with the voltage tester before touching terminals. - 2
Remove old thermostat or access wiring
Carefully detach the old thermostat from the wall or remove the faceplate to access the wiring terminal block. Identify each wire by color and function, and compare against the new thermostat’s wiring diagram. If a C-wire is present, determine if it’s required for your smart model.
Tip: Take a clear photo of the wiring before disconnecting anything. - 3
Mount the new base and prepare wires
Mount the thermostat base on the wall using the provided screws or mounting hardware. Strip insulation from any exposed conductors and ensure wires are clean and straight for terminal insertion. If necessary, trim wires to a consistent length to fit the terminal block.
Tip: Ensure the mounting surface is solid; loose mounting causes sensor drift. - 4
Connect wires to the new thermostat
Connect wires to the corresponding terminals on the new thermostat according to its diagram. If the new unit requires a C-wire for power, attach it firmly. Do not leave exposed conductors; use wire nuts for splices and secure all connections with electrical tape as needed.
Tip: Label wires by terminal and color to prevent future miswiring. - 5
Attach the thermostat and restore power
Snap the thermostat onto its mounting plate and reattach the faceplate. Restore power at the circuit breaker and set the device to a safe initial temperature. If using a smart thermostat, follow the app setup prompts to connect to Wi-Fi and configure basic schedules.
Tip: Start with a conservative temperature and adjust gradually after testing. - 6
Test, calibrate, and confirm operation
Test activating heat from the thermostat and monitor the boiler’s response. Check that the system heats to the target setpoint and then cycles off as the room cools. Calibrate the thermostat if readings differ from a trusted room thermometer and finalize the configuration.
Tip: Run a full heating cycle to ensure consistent performance.
Questions & Answers
Is it safe to install a boiler thermostat myself?
DIY installation is possible for those with basic electrical skills and strict safety practices. Always shut off power first, follow diagrams, and consult a professional if you encounter unfamiliar wiring or uncertain compatibility.
You can install it yourself if you’re comfortable with basic electrical work, but if you’re unsure, hire a professional.
Do smart thermostats work with all boilers?
Most modern boilers support smart thermostats, but you must verify compatibility with your boiler’s control system and wiring. If in doubt, check the manual or contact the boiler manufacturer.
Smart thermostats work with many boilers, but you should confirm compatibility with your model before buying.
What wiring configurations are common for boilers?
Common setups include two-wire low-voltage controls and three- or four-wire configurations for advanced features. Always follow the thermostat’s wiring diagram and your boiler’s terminal layout.
Two- or four-wire setups are common; follow the diagrams carefully.
What are typical mistakes during installation?
Mistakes include powering on before wiring is complete, mislabeling wires, choosing an incompatible thermostat, and skipping app setup for smart models. Thorough preparation reduces these risks.
Common mistakes are not powering down properly or miswiring; prepare carefully.
How long does installation usually take?
Most installations take 45-90 minutes depending on system complexity and whether a smart thermostat requires app setup. For complex systems or first-time installers, plan for longer.
Most installations run under an hour, but plan for longer if wiring is tricky.
Watch Video
Key Points
- Choose a thermostat compatible with your boiler and wiring
- Power off before touching wiring and test after installation
- Follow wiring diagrams and use proper connectors
- Calibrate and test to ensure accurate temperature control