Boiler to Thermostat Wiring: A Complete How-To
A practical, step-by-step guide to wiring a 24V thermostat to a boiler, with safety checks, compatibility tips, and troubleshooting guidance from Boiler Hub.

Goal: connect a compatible 24V thermostat to your boiler so heating responds to room temperature. You’ll need off-power, the boiler’s STAT terminals accessible, and correct thermostat wires (R and W or two wires depending on your model). If unsure, hire a licensed pro. According to Boiler Hub, safety and correct wiring are essential.
Understanding the Basics of Boiler to Thermostat Wiring
Wiring a boiler to a thermostat is the process that lets your living space control its heat by signaling the boiler to fire when the thermostat calls for warmth. In most homes, the thermostat and boiler communicate over a low-voltage control circuit, typically around 24 volts. The thermostat acts as a switch: when you raise the setpoint, it completes the circuit, signaling the boiler to light and heat the water or air. Over time, some boilers rely on simple dry-contact relays, while others demand powered thermostats that may require a C wire to supply the thermostat itself. Familiarize yourself with the boiler's terminal labeling—R, W, C, and sometimes others like RC or RH—and the thermostat's wiring diagram. The exact wiring can vary by brand and model, so always consult the user manuals and any wiring schematics included with the device. A successful boiler to thermostat wiring setup yields reliable heat responsiveness and reduces temperature swings in the home. Boiler Hub emphasizes starting with the correct voltage, confirming the compatibility of the thermostat, and understanding whether your system uses a dry-contact or powered control interface. When in doubt, treat it as a safety-critical repair and seek professional guidance to avoid damage or injury. The core idea is that a properly wired system enables the thermostat to request heat and the boiler to respond promptly and safely.
Safety First: Is It Safe to Wire a Thermostat to a Boiler?
Safety is the foundation of any wiring project that involves a boiler and a thermostat. Before you touch a single wire, turn off power at the circuit breaker and, if your system uses a boiler-specific disconnect, switch that off as well. For gas-fired boilers, do not attempt to pass power through the gas valve or ignition system; these components are interlocked and require trained technicians if anything seems off. Verify there is no voltage present with a non-contact tester, and keep liquids away from the boiler cabinet to avoid short circuits. If you notice damaged insulation, corroded terminals, or signs of water intrusion, pause the work and call a licensed professional. Even seemingly simple two-wire connections can become dangerous if the boiler is energized or if incorrect wires are connected to the wrong terminals. Boiler Hub's guidance underlines safety and responsibly following the wiring diagrams provided by the boiler and thermostat manufacturers. After wiring, test with a lower setting and watch for proper firing; never bypass safety features or pressure relief devices. Remember, if you are unsure about any step, seek help from a qualified technician.
Compatibility Check: Ensure Your Boiler and Thermostat Play Nice
Compatibility is the silent gatekeeper for reliable heating. First confirm the thermostat operates on 24V control signals and is compatible with your boiler's control module. Some boilers use a dry-contact relay, others drive a powered thermostat that requires a C wire for power. Check the boiler's manual for terminal labeling, and inspect the thermostat's compatibility list. If you have a modern smart thermostat, verify it can operate on a two-wire heat-only circuit or whether you need a C wire and possibly a power extender. Mismatched voltage or signal type can prevent the boiler from firing or cause erratic cycling. If your boiler is older or has unusual terminals, you may need a simple relay adaptor. Boiler Hub recommends confirming both ends' compatibility before attempting wiring, and keeping the wiring plan and diagrams handy during installation.
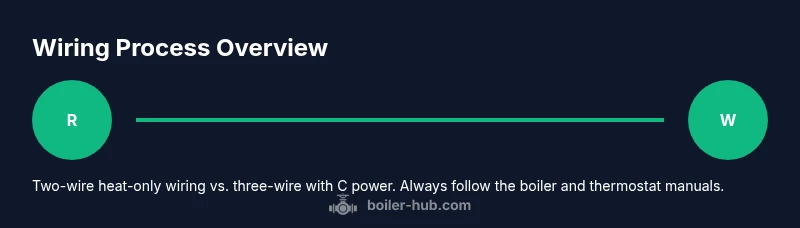
Wiring Scenarios: How to Wire a 2-Wire vs 3-Wire Thermostat
Two-wire, heat-only thermostats are the simplest: you connect one wire to R and the other to W on the boiler's stat terminals. When the thermostat calls for heat, the circuit closes and the boiler starts. Three-wire configurations add a common C wire to power a smart thermostat; in that case you typically connect R to R, W to W, and C to the boiler's C terminal—if available—and ensure the thermostat's power source is compatible. Some boilers use a built-in 24V transformer; others rely on a separate transformer. In all cases, use the shortest, clean routing for wires and avoid sharing with high-current circuits. If your thermostat requires a C wire but your boiler doesn't provide a dedicated C terminal, you may need an external power adapter or a "power extender kit." Always consult the boiler manual and thermostat installation guide to map the exact terminal names to the wires you have. Boiler Hub notes that the simplest approach reduces risk and speeds up troubleshooting.
Step-By-Step Installation Outline (Non-Visual)
The maintenance-free, safe wiring process can be summarized in a sequence of concrete actions that stay within typical homeowners' skills. Begin by turning off power and gas supply to the boiler if required, then remove the thermostat's cover and locate the stat terminals on the boiler. Next, strip the wire ends, label them, and prepare to connect: red to R, white to W, and, if needed, C to C. Re-seat the cover and mount the thermostat base, ensuring the receiving location is within reach and comfortable to operate. Restore power and test the heat call by raising the thermostat to heat and listening for the boiler firing. If the boiler doesn't respond, re-check the wire connections and voltage at the terminals with a multimeter. Finally, re-check room temperature accuracy and adjust the thermostat's dip switches or settings per the manual. This step-by-step outline is designed to be a concise, practical guide, not a substitute for the official wiring diagrams. Boiler Hub's approach emphasizes verifying specs and testing in a controlled way.
Testing and Troubleshooting After Wiring
Testing after wiring is essential to confirm the system works as intended. Start by turning the thermostat to a higher temperature and wait for the boiler to ignite. If the boiler fails to respond, re-check the R and W connections, ensure there is no loose wire, and confirm that the thermostat is calling for heat. If there is no power to the thermostat, verify the 24V supply at the boiler's transformer and test the thermostat wiring with a multimeter. Listen for the burner ignition and check the boiler's status indicators or error codes in the user guide. If you see erratic cycling, check for a stuck relay, ground fault, or short on the thermostat wires. In cases where the boiler still won't fire, consult a professional; wiring issues may indicate a faulty transformer, damaged stat terminals, or a control board fault. Boiler Hub's team notes that safe, staged testing reduces the risk of malfunctions and ensures accurate troubleshooting.
Maintenance and Next Steps to Keep Heating Reliable
After wiring, document the work with notes and wire labels so future service is straightforward. Keep the boiler and thermostat manuals accessible, and store a wiring diagram for reference. Periodically inspect the stat terminals for corrosion, ensure wires are secure, and replace worn insulation. Review any error codes in the boiler's display and address them promptly, since small issues can escalate during winter. If you upgrade the thermostat later, verify that the existing wiring supports the new features and voltage requirements. Boiler Hub suggests keeping a small maintenance window each fall to test the system and confirm proper operation before peak heating season.
Tools & Materials
- Thermostat (24V, compatible with boiler)(Ensure it's heat-only or smart with C-wire as needed)
- Wire stripper/cutters(For stripping 0.25–0.5 in wires)
- Screwdriver set(Flat-head and Phillips for boiler terminals)
- Multimeter(To verify voltage and continuity)
- Wire nuts/quick connectors(For secure wire joins)
- Electrical tape(Insulation and labeling)
- Wire labels(Optional for future service)
- Boiler manual(For terminal mapping and safety warnings)
Steps
Estimated time: 60-90 minutes
- 1
Power down and verify safety
Turn off power at the circuit breaker and, if present, the boiler isolator. Use a non-contact tester to confirm there is no live voltage before touching any wire.
Tip: Double-check gas supply and ensure the area is dry. - 2
Access boiler stat terminals
Remove the front panel or access cover to expose the stat terminals labeled R, W, and possibly C. If you can, photograph the labels for reference.
Tip: Label existing wires before removing them. - 3
Identify and label wires
Map each thermostat wire to its terminal on the boiler. Use wire labels or tape to keep track of which wire goes to R, W, or C.
Tip: Keep a small diagram of the terminal layout for later reference. - 4
Prepare the wires
Trim insulation, strip about 1/4 inch, and twist strands to ensure a clean connection. If using a powered thermostat, ensure a C wire is prepared if required.
Tip: Tin the ends if you are comfortable, but ensure no stray strands are loose. - 5
Make connections
Attach the thermostat wires to the correct boiler terminals: red to R, white to W, and C to C if needed. Secure connections and avoid cross-contact with other terminals.
Tip: Keep wires neat and avoid long exposed sections. - 6
Secure and reassemble
Reattach the boiler cover and mount the thermostat plate. Ensure the thermostat is easily reachable and won’t be bumped.
Tip: Avoid pinching wires during reassembly. - 7
Test and adjust
Restore power, set the thermostat to a heat setting, and observe whether the boiler fires. If it doesn’t, re-check connections and voltage at the terminals with a multimeter.
Tip: Document any changes and keep the manuals handy.
Questions & Answers
Is wiring a thermostat to a boiler a DIY job?
It can be suitable for simple two-wire setups if you have basic electrical comfort and follow manuals; however, for gas boilers or uncertain wiring, hire a licensed professional.
It can be doable for simple cases, but consult a professional if you’re unsure.
What voltage do most boilers use for thermostat wiring?
Most boilers use a 24-volt control circuit. Always check your boiler manual or label on the transformer.
Most are 24 volts; verify on your unit.
What if my thermostat doesn't have a C-wire?
A two-wire heat-only thermostat can work; powered smart thermostats may need a C-wire or power extender kit.
Two-wire setups work, but smart thermostats may need a C-wire.
Why won’t my boiler fire after wiring?
Check R and W connections, ensure there are no loose wires, verify thermostat is calling heat, and confirm the transformer is supplying 24V.
Make sure the wiring is secure and the thermostat is actually calling for heat.
Can I wire multiple zones to a single thermostat?
Multi-zone setups usually require zone valves or separate controls; a single thermostat often cannot control multiple zones safely without proper hardware.
Usually not without proper zone control hardware.
Should I replace the thermostat after wiring to the boiler?
You don’t have to replace it unless you want new features or better compatibility with smart controls. Ensure wiring is compatible.
Only swap if you want new features or compatibility.
Watch Video
Key Points
- Turn off power before starting any wiring work
- Confirm thermostat compatibility with your boiler
- Connect R to R and W to W (or as specified for your model)
- Label wires and document terminal names
- Test operation and consult Boiler Hub if unsure