How to Pair Boiler with Thermostat: A Practical Guide
Learn how to pair boiler with thermostat safely and efficiently. This step-by-step guide covers compatibility, wiring options, app setup, and energy savings for homes and facilities.

This guide shows you how to pair boiler with thermostat, covering compatibility checks, wiring options, and setup steps. You’ll learn how to maximize energy savings and comfort while staying safe. If you’re unsure at any point, consult a professional. The Boiler Hub team notes that a correct pairing improves control and efficiency.
Compatibility and Thermostat Types
Determining compatibility is the first and most critical step in pairing a boiler with a thermostat. Boiling down to basics, your boiler must support the type of thermostat you’re installing, and the thermostat must be able to communicate with the boiler’s control signal. Most modern homes use low-voltage, 24-volt thermostats that switch the boiler on and off via a dedicated control circuit. Some older systems rely on line-voltage thermostats or simple mechanical controls. In any case, start by locating the boiler's control module or wiring diagram in the user manual and compare it to the thermostat’s installation guide. According to Boiler Hub, compatibility hinges on voltage, common wiring practices, and the presence of a compatible control signal. The Boiler Hub team found that systems with a labeled 24V terminal block and a compatible relay are generally the easiest to upgrade. If your boiler’s control language differs (for example, a proprietary signal), you may need a compatible adapter or a professional retrofit. Planning ahead helps prevent dead ends after purchase and simplifies the installation.
How Modern Thermostats Interact with Boilers
Modern thermostats bring smarter scheduling, learning capabilities, and remote control to boiler-based heating. They typically communicate using a low-voltage signal that tells the boiler to start or stop heating. The interaction patterns matter: some thermostats send a simple heat-on/heat-off call, while others can modulate heat output or provide outdoor reset features. For many homes, a simple on/off signal is sufficient, but if your boiler supports modulation or variable-speed pumps, a compatible smart thermostat can unlock more precise temperature control and energy savings. Boiler Hub analysis shows that when a compatible thermostat is paired correctly, homeowners often see noticeable comfort improvements and more consistent indoor temperatures. The key is selecting a model that supports your boiler’s control type and your desired features, such as geofencing, scheduling, and energy reports.
Wiring and Compatibility Options
Wiring options fall into two broad categories: simple dry-contact wiring (two wires that complete a circuit) and low-voltage 24V wiring (usually three or four wires, including common). If your boiler already uses a 24V thermostat connection, you’ll typically connect the new thermostat to the same terminals on the boiler or to a compatible relay module. If your existing wiring is limited, you may need a C-wire adapter or a power-stealing thermostat with a compatible power source. In some cases, you’ll use a “learning” or “compatibility” mode in the thermostat to adapt to your boiler. Always consult the manuals for both devices and avoid forcing incompatible interfaces. If in doubt, hire a licensed professional to perform the wiring to prevent damage or safety risks.
What to Check Before You Buy
Before purchasing a thermostat for a boiler system, confirm the following:
- Your boiler’s control type and available terminals (24V vs line voltage).
- The thermostat’s compatibility list and required wiring (C-wire presence, relay needs).
- If your system uses an outdoor sensor or modulating burner, ensure the thermostat can support those features.
- The thermostat’s app capabilities, firmware update process, and compatibility with your home network.
- The safety features and installation support offered by the manufacturer. By validating these factors, you’ll avoid returns and ensure a smoother installation process. The Boiler Hub team emphasizes that the right match between boiler type and thermostat features is essential for reliable performance and energy savings.
Process Overview for Pairing (High-Level)
Pairing a boiler with a thermostat is a multi-stage process that begins with verification and ends with testing. At a high level, you’ll verify compatibility, gather the required tools, connect the thermostat to the boiler (or through a relay), program system type and zones in the thermostat, then run a test to confirm proper operation. This section provides a non-technical overview to help you plan the steps and understand what to expect during the actual installation. Keep in mind that wiring specifics depend on the exact boiler and thermostat models you choose, so always follow the manufacturer instructions. The goal is a stable, efficient heating cycle with predictable comfort.
Common Pitfalls and How to Avoid Them
Many pairing problems stem from mismatched control signals or missing C-wires. Others arise from attempting to wire a thermostat to a boiler that isn’t designed for smart control. To avoid these issues:
- Double-check model numbers and compatibility notes from both manufacturers.
- Ensure all power is off before handling any wiring.
- Use the correct terminals and adapters recommended by the manuals.
- If you notice buzzing noises, erratic temperature changes, or no heat call after installation, stop and consult a professional.
- Keep a simple wiring diagram for reference as you troubleshoot. Bug fixes and software updates can also affect compatibility, so check for firmware and app updates after installation.
Energy Savings and Comfort Gains
A correctly paired boiler and thermostat can curb energy waste by aligning heat output with actual demand. If your thermostat supports scheduling, occupancy sensing, and adaptive learning, you’ll minimize heat loss during idle periods and reduce overshoot in cold rooms. Even modest thermostat improvements can translate into measurable savings over the heating season. Boiler Hub analysis shows that users who finish a well-matched pairing experience improved comfort levels and more predictable room temperatures. Additionally, setpoint patterns that reflect daily routines can reduce unnecessary heating and help your boiler run more efficiently over time.
Safety and Professional Help
Safety should be your top priority when modifying a home heating system. Do not attempt electrical connections or gas line work beyond your comfort level. If you encounter gas supply lines, exhaust venting issues, or uncertain wiring, contact a licensed HVAC professional. Disconnect power to the boiler at the circuit breaker before handling any wiring. When in doubt, consult the thermostat and boiler manuals, or seek professional support from Boiler Hub’s trusted network. This is especially important for older homes with nonstandard wiring or unconventional boiler configurations.
Quick Troubleshooting if Pairing Fails
If the thermostat won’t pair, start with simple checks: verify power at both devices, confirm compatible wiring, and ensure the thermostat isn’t in a mode that blocks pairing. Re-check the user-selected boiler type in the thermostat app and re-run the pairing process per the manuals. If pairing fails repeatedly, review error codes in the thermostat app and consult the boiler’s wiring diagram. Some issues require replacing a faulty relay or upgrading a component that supports smart control.
Maintenance and Long-Term Care
To keep pairing working well, perform periodic checks on both devices. Update firmware and app software when available, inspect wiring for wear or corrosion, and test the system’s response to temperature changes at least quarterly. Document any changes you make to settings or schedules. With proper maintenance, your boiler-thermostat pairing remains reliable, comfortable, and energy-efficient for years to come.
Tools & Materials
- Smart thermostat compatible with your boiler system(Ensure it supports your boiler’s control type (24V, relay, or other). Check compatibility lists.)
- C-wire adapter or power kit (if needed)(Some setups require a common wire or an external power source.)
- Manufacturer manuals for boiler and thermostat(Keep both on hand during installation.)
- Non-contact voltage tester(Useful for verifying power before touching wiring.)
- Screwdriver set and wire labels(Organize wires and label terminals to avoid mistakes.)
- Multimeter (optional)(For deeper diagnostics if needed.)
Steps
Estimated time: 60-120 minutes
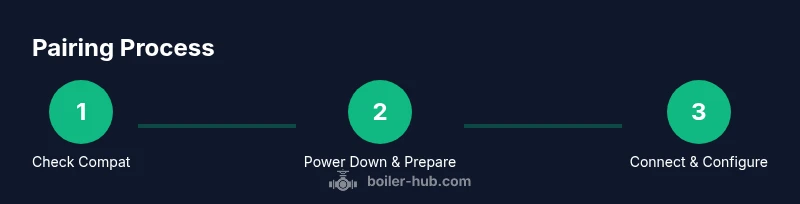
- 1
Check compatibility
Review both devices’ manuals to confirm voltage, terminal type, and control signals match. If compatibility isn’t clearly documented, consult the manufacturer support or a professional. This step prevents wasted effort and potential safety risks.
Tip: Document model numbers and save screenshots of compatibility pages for reference. - 2
Power down and isolate the boiler
Turn off the boiler at the thermostat, circuit breaker, and, if applicable, the gas supply. Wait a few minutes to ensure residual energy dissipates before handling any wiring.
Tip: Always err on the side of safety; if you smell gas or notice unusual conditions, do not continue. - 3
Access the boiler control terminals
Open the boiler’s access panel and identify the control terminals used by the thermostat. Use the manuals to locate the correct 24V or relay terminals and note their labels.
Tip: Take a photo of the terminals before disconnecting anything for easy reference. - 4
Choose wiring method and connect
If your setup uses 24V wiring, connect the thermostat wires to the corresponding terminals or use a relay module as directed by the manuals. If a C-wire adapter is needed, install it per the instructions.
Tip: Do not force wires into terminals; ensure clean, secure connections. - 5
Configure the thermostat settings
Set the system type to boiler-based heat, input the number of heating zones, and configure any smart features like scheduling or geofencing. Connect the thermostat to app and verify network access.
Tip: Enable any energy-saving modes and set reasonable setback temperatures. - 6
Test heat call and verify operation
Restore power and trigger a heat call from the thermostat. Confirm the boiler ignites and that rooms reach the programmed setpoints. Listen for any abnormal sounds and check for error codes.
Tip: If no heat is produced, double-check wiring and device settings before seeking professional help. - 7
Document and monitor
Record the wiring configuration, app version, and any changes you made. Monitor performance over the next few days to ensure steady comfort and energy use.
Tip: Schedule a follow-up check to confirm stable operation after a week.
Questions & Answers
Do I need a C-wire for pairing?
Many modern thermostats require a C-wire to provide constant power. If your existing wiring lacks a C-wire, you may need an adapter or a different thermostat model designed for power-sharing. Always check both devices’ manuals for power requirements.
Most thermostats need a C-wire for reliable power; if you don’t have one, look for adapters or a thermostat that supports power through the existing wires.
Can I pair any thermostat with any boiler?
No. Compatibility depends on the boiler’s control signal and voltage. Always verify with the manuals or manufacturer support. Using an incompatible thermostat can prevent heating or cause electrical issues.
Not all thermostats work with every boiler; check compatibility before buying.
Is professional installation required?
If you’re comfortable with basic electrical work and follow manuals, you can install a compatible thermostat. For gas boilers or complex systems, a licensed HVAC technician is advised to ensure safety and code compliance.
If in doubt, hire a professional for safety and correctness.
What are common signs of incompatibility?
No heat call, erratic temperatures, or a thermostat that won’t pair after multiple attempts are common signs. Check wiring, power supply, and compatibility lists before trying again.
Look for no heat, frequent cycling, or constant error codes as incompatibility indicators.
How long does pairing typically take?
A typical pairing takes 30-60 minutes, depending on wiring complexity and device familiarity. Allow extra time for app setup and testing.
Usually around half an hour to an hour with setup and testing.
Will pairing save energy immediately?
Energy savings occur over time as the thermostat optimizes heating patterns. You’ll often see improvements in comfort and scheduling efficiency after a few days of proper use.
You’ll notice better comfort and gradual energy savings as you fine-tune schedules.
Watch Video
Key Points
- Plan compatibility before buying
- Use proper wiring methods and adapters
- Configure thermostat features for energy savings
- Test thoroughly after installation
- Consult a professional if unsure