How Long Does It Take to Install a New Boiler? A Timelines Guide
Learn realistic timelines for installing a new boiler, including permits, prep work, and common delays. Boiler Hub’s expert guidance helps homeowners plan downtime and stay on schedule.

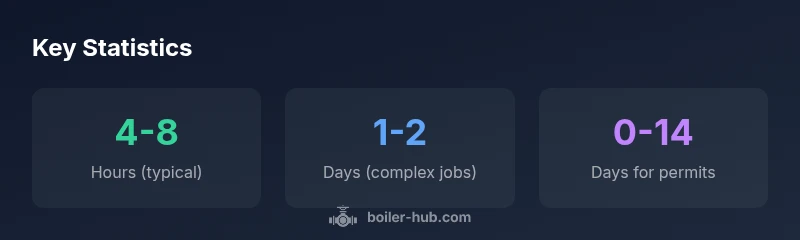
Typically, a standard boiler replacement requires four to eight hours of on-site labor, with an extra half-day for setup and testing. If venting, gas line, or electrical work is needed, plan for 1–2 days of work, plus potential delays from permits or inspections. Final commissioning and safety checks add 1–3 hours when a full retrofit is performed.
What to expect during a boiler installation project
Installing a boiler is a multi-step project that varies widely by home, boiler type, and local requirements. If you're asking how long does it take to install a new boiler, the short answer is: plan for a day or two for a standard replacement in a typical home, with more complex jobs extending into a second day or longer. The exact duration depends on several factors: the current heating system, accessibility of the boiler room, gas supply and venting configurations, and whether the job includes new zoning, controls, or a modern condensing unit. According to Boiler Hub, practical scheduling should assume a buffer for site preparation, delivery delays, and safety checks. This means even a straightforward replacement benefits from a pre-install walkthrough and a clearly defined work plan. In practice, you should expect on-site work to begin after a confirmed appointment window and culminate in commissioning and leak-testing before the system can be turned back on.
Factors that influence installation time
Several variables govern how long a boiler installation will take. The simplest case—a direct replacement with no changes to piping, venting, or electrical connections—will move quickly. More time is required when the existing system uses older venting that needs upgrading, gas lines require upgrading to meet current codes, or electrical controls must be replaced to accommodate a high-efficiency unit. Building type matters too: a multi-story home, a condo, or a commercial space with limited access can add hours or days to the schedule. Availability of parts and the installer’s crew size also affect the timeline. Boiler Hub analysis shows that permitting, scheduling your inspections, and coordinating with utility providers can add unexpected weeks in some regions, even when the on-site work is short. Plan contingencies accordingly.
Preparation steps you can take to save time
Homeowners can shave days off the timeline with proactive preparation. Start by confirming the exact boiler model and fuel type well in advance and ensure delivery eligibility. Clear a wide, unobstructed path to the equipment room; move furniture, clear the access route, and provide safe space for a crane or forklift if needed. Gather the contractor’s permits, warranty documents, and the existing boiler’s manual for reference. If your home has unique drainage or a tight crawl space, inform the installer ahead of time. Finally, arrange temporary heating or hot water options during the swap to minimize discomfort during downtime. These steps, recommended by the Boiler Hub team, reduce miscommunications and reduce the chance of delays on install day.
The installation process: stages from start to finish
A typical boiler installation unfolds in clearly defined phases. First: site prep and boiler removal, typically 1–3 hours. Next: rough-in for venting and venting system compatibility, 2–6 hours. Then: mounting the new boiler, connecting gas and electrical services, and configuring controls, 2–6 hours. After that comes leak testing, pressure checks, and system commissioning, 1–3 hours. If the job involves upgrading venting to meet newer efficiency standards, add additional time for liner work and chimney adjustments. Finally, a safety briefing and walk-through with the homeowner completes the process. This sequence emphasizes careful sequencing to avoid backtracking and ensures that safety checks are not rushed; efficiency improves when teams communicate and coordinate early.
Permits and inspections: timing and expectations
In many locales, boilers require permits for installation and annual inspections post-install. The timing of permits can dramatically affect the overall timeline. If you already have an approved plan on file, the permit process may be resolved within days; otherwise, expect a wait period that can stretch into weeks. Once the permit is granted, inspections are typically scheduled within a few days, though this can vary by jurisdiction and workload. The best approach is to factor permit timelines into your project plan from the outset and maintain open communication with your installer and the authority having jurisdiction. Boiler Hub's guidance emphasizes starting the permitting process early and coordinating with your contractor to avoid duplicated visits.
Common delays and how to avoid them
Delays frequently arise from miscommunications, missing parts, or unexpected site conditions. When a crew discovers that a venting stack needs upgrading or that access is blocked by plumbing, the schedule can slide. Weather can also impact outdoor work, especially if equipment must be delivered by truck in poor conditions. To minimize delays, provide a clear access path, confirm utility shutoffs, and have the exact boiler model and fuel type ready for ordering. Pre-ordering essential parts and scheduling the work during the off-peak season can help. As Boiler Hub notes, most delays are preventable with upfront planning and a well-structured project calendar that aligns with permitting and inspection windows.
How to minimize downtime for occupants
Reducing downtime starts with planning and proactive communication. Installations during shoulder seasons with mild weather can ease temporary heating needs. Consider temporary heating devices, like portable heaters, and ensure hot water is preserved where possible. Schedule work during daytime hours when crews are freshest, and arrange for a temporary hot-water source for outages. Ensure the installer communicates a clear daily plan, including what time the crew will arrive and what will be accomplished that day. These practices minimize discomfort and shorten overall downtime.
Aftercare: testing, warranties, and safety checks
After the boiler is installed, expect a comprehensive set of tests: pressure tests, leak checks, and thermostat and control calibration. The crew should walk you through the operating instructions and confirm gas leak and CO safety checks before leaving. Confirm that all warranty paperwork is properly filed and that the system is registered with the manufacturer if required. If any issues arise during initial startup, contact the installer immediately. A well-documented commissioning ensures you maximize efficiency, safety, and long-term reliability.
Quick reference: time ranges by scenario
- Standard direct replacement: 4–8 hours on-site, with 0–1 day for setup and teardown.
- Venting or gas-line upgrades: 1–2 days, depending on access and materials.
- Permitting and inspections: 0–2 weeks extra, depending on locality and workload.
- Complex multi-unit installs: 2–3 days, with potential staging for equipment delivery.
Remember, these are typical ranges and can vary by home, local code, and contractor scheduling. The overall timeline should include permit processing, delivery, and safety checks; always build in a buffer.
Time estimates for boiler installation stages
| Stage | Estimated Time | Key Delays |
|---|---|---|
| Pre-install planning | 0.5-1 day | Permits, site survey |
| Removal of old boiler | 1-3 hours | Access, drainage |
| Rough-in and venting | 2-6 hours | Vent adjustments |
| Install and connect utilities | 2-6 hours | Gas line, electrical prep |
| Testing and commissioning | 1-3 hours | Leaks, controls setup |
Questions & Answers
How long does it typically take to install a boiler?
For a standard replacement, plan 4-8 hours of on-site work. Permits and inspections can add time, and complex jobs may extend to 1-2 days. Local factors and access can make a big difference.
A typical job is about a half to a full day, with more time for complex setups.
Can a boiler install be done in one day?
Yes, a straightforward replacement with pre-ordered parts and no venting or gas-line changes can often be completed in a single day. Most scenarios extend to a second day when upgrades are required.
Yes, if everything goes smoothly, it can be done in a day.
What factors add time to a boiler install?
Key factors include venting upgrades, gas-line modifications, electrical work, access constraints, permit processing, and coordinating with inspections. Each adds a layer that can push timelines from hours to days.
Venting, gas lines, and permits are the main time sinks.
Do I need permits for boiler installation?
Most areas require some form of permit for installation and may require post-install inspections. The exact requirements vary by locality, so check with your installer and local authority.
Usually yes; check with your local authority.
How long is downtime without hot water during installation?
Downtime typically ranges from a few hours to a full day, with longer timelines possible for complex or multi-unit installs.
Usually a few hours to a day.
How can I minimize installation time?
Prepare by confirming model and fuel type, clearing access, gathering manuals, and pre-arranging temporary heating or hot water options. Order parts in advance and align with permit windows to avoid backtracking.
Plan ahead, secure permits early, and keep access clear.
“Efficient boiler installations come from upfront planning and clear coordination among gas, electrical, and venting contractors.”
Key Points
- Plan for a 1- to 2-day window for standard replacements.
- Obtain permits early to avoid weekend delays.
- Coordinate with gas, electrical, and venting professionals.
- Expect possible delays from complex venting or inspections.
- Schedule post-install testing and commissioning as part of the project.