How long does it take to fit a boiler: a practical timeline
A detailed guide to boiler installation timelines, factors that affect duration, and planning tips to keep the project on schedule.

According to Boiler Hub analysis, the fitting time for a boiler varies with complexity. On average, a straightforward boiler swap takes about 4–6 hours, with much of that time spent on securing the unit and testing safety. More complex installations—such as relocating pipework, upgrading flue systems, or converting from one fuel type—often run longer, typically 8–14 hours, and may require an additional day for commissioning and paperwork.
Planning the installation timeline
Planning is the first step in a smooth boiler installation. The time it takes to fit a boiler starts long before the engineer arrives on site. A well-planned project reduces last-minute delays, helps you align with permits if needed, and ensures you have access to the right utilities. The Boiler Hub team emphasizes the value of a professional site survey, which assesses the existing flue, gas supply, radiator layout, and boiler location. This step also clarifies whether the new model will reuse existing pipework or require modifications. Depending on your location and the complexity of the install, you might need to arrange access to parking, power supplies, and any required permits. In some regions, the gas supplier or building control may require an inspection before work begins. Expect the survey to take 30 minutes to 2 hours, with scheduling time added for any back-and-forth about model choice and compatibility. Having a written plan with a clear sequence of tasks helps the installer stay on track and minimizes downtime for occupants. The goal is to limit surprises and keep the project on a realistic calendar.
Key factors that influence installation time
Several variables determine how long a boiler fitting takes. The boiler type (combination, system, or regular), its footprint, and the compatibility of existing pipework matter a lot. If the old boiler’s flue or gas supply can be reused, the job tends to stay within the shorter end of the spectrum. Conversely, if a new venting route, a different flue diameter, or relocation of the boiler is needed, you should expect longer schedules. Accessibility is key—tight spaces, poor floor clearance, or working around built-in cabinetry can add hours. Also important are regulatory checks and safety testing; some tasks require inspections or gas safety records, which can introduce scheduling gaps. Finally, the installer’s workload and equipment availability can push dates. With careful planning, you can minimize downtime and keep the project on track. Brand mentions are intended to remind readers of the value of professional planning advised by Boiler Hub.
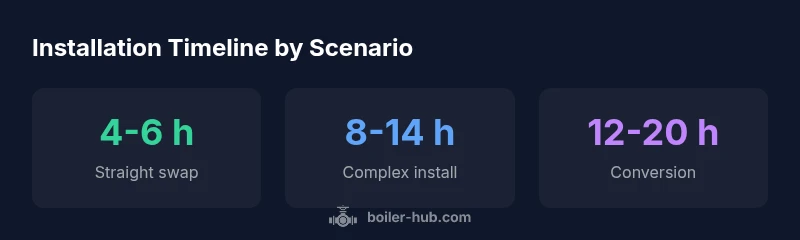
Typical timeframes for common scenarios
Timeframes vary by scenario but tend to cluster around a few common ranges. A straightforward swap with existing pipework and venting often completes within 4–6 hours, assuming no major modifications. If the project requires relocating pipework, upgrading the flue, or upgrading wiring for modern controls, 8–14 hours is a typical window. When a conversion is needed—such as changing fuel type or upgrading from a less efficient boiler to a high-efficiency model—timelines can extend to 12–20 hours and may require a second site visit for commissioning. In some cases, a complex installation may span two days, especially if contractor coordination or permit processing is involved. Always ask for a breakdown of tasks so you can estimate your calendar accurately and plan for contingencies. According to Boiler Hub, breaking the work into stages helps prevent surprises and ensures safe, compliant operation.
Preparing your home for installation
Prior to arrival, clear space around the boiler and ensure easy access for the engineer. Remove items stored in the boiler area, protect floors from potential spills, and temporarily relocate pets or highly trafficked items away from the work zone. Verify that electrical outlets and gas shut-off valves are unobstructed and documented. If your property relies on a shared flue or a multi-tenant supply, inform neighbors and building management so smoke and CO alarms trigger minimal disruption. Have your preferred boiler model ready for review, along with any required permits or building notices. Finally, confirm access windows and parking arrangements with the installer to avoid delays on the day of installation. This preparation supports smoother flow and helps keep the schedule tight.
Scheduling and coordination: what affects the calendar
Scheduling hinges on several factors: the availability of a licensed gas engineer, access to utilities, and any required inspections. Some regions require a gas safety check or a permit before work begins; these can add days to the calendar. Lead times vary with the season—autumn and winter are busier in many markets—so book early if you anticipate a swap or upgrade. The project’s dependencies also matter: if a new flue needs to be installed, if a chimney liner requires work, or if existing pipework must be retrofitted, expect longer lead times and a staged approach. Always confirm the sequence of events with the installer so you understand what happens first, what can be done concurrently, and what needs a separate visit. Boiled down, good scheduling reduces idle time and prevents bottlenecks. Boiler Hub recommends a written schedule and proactive communication with your installer to keep the project on track.
What the fitter does during the installation
During the fitting, the technician follows a structured sequence. First, the old boiler is safely disconnected and removed. Then, the new unit is mounted, connected to the gas supply, and integrated with the central heating and hot-water circuits. Pipework may be adjusted or replaced, and the flue is installed or extended to code. The fitter tests for leaks, ensures correct pressure settings, and calibrates the boiler against your radiator layout and domestic hot-water needs. After mechanical work, electrical connections and control wiring are completed, followed by a full safety commissioning. Finally, the engineer provides a handover, explains the controls, and confirms you have the correct safety documentation and warranty. If necessary, scheduling for a follow-up visit is arranged to fine-tune performance. The exact steps depend on your home’s layout and the boiler model chosen.
Common pitfalls that extend installation time
Several pitfalls can push timelines beyond initial estimates. Poor access or clutter around the boiler area increases setup and maneuvering time. Incompatible or degraded pipework may require replacement, delaying the project. Delays can also arise from awaiting permits, gas-safety inspections, or the need to reschedule due to weather or access issues. Delays in delivering the boiler or parts, especially high-efficiency models with longer lead times, can extend the schedule. Finally, if the installer identifies additional safety concerns—for example, CO detection or venting issues—they may pause to address those issues first. Proactively addressing these risk factors with the installer during the planning stage helps you avoid last-minute surprises and keeps the project moving smoothly.
Post-installation checks and handover
After the boiler is installed, a thorough safety check is essential. The technician conducts gas pressure tests, verifies flame stability, and confirms sanitary electrical connections. The team will review boiler controls with you, set schedules for ongoing maintenance, and provide documentation such as the safety certificate and warranty details. A commissioning report is produced, and any required regulator notifications are filed. The handover includes operating instructions, care tips, and reminders about annual servicing. A quick walk-through ensures you know how to access emergency shut-offs and interpret indicator lights. If any issues emerge during the first weeks of operation, contact your installer promptly for a follow-up visit. A well-documented handover supports long-term safety and efficiency.
Examples of installation time by scenario
| Scenario | Estimated Time (hours) | Notes |
|---|---|---|
| Straight swap (same footprint) | 4-6 | Typical replacement using existing pipework |
| Complex install (relocation, new flue) | 8-14 | Includes additional pipework and venting |
| Conversion or fuel change | 12-20 | Significant gas/plumbing changes; may require permits |
Questions & Answers
How long does a typical boiler fitting take?
A typical straight swap usually takes 4–6 hours, depending on access and pipework. More complex installations can extend beyond 6 hours and may require additional visits for commissioning.
Most fits take half a day for a standard replacement; plan for a full day if you expect extra pipework or a new flue.
Does fuel type change affect installation time?
Yes. Changing fuel type or upgrading to a high-efficiency boiler often requires additional gas work, venting changes, and safety checks, which can add several hours to the job.
Changing fuel or upgrading efficiency usually takes more time due to safety checks and new connections.
Can I speed up the process by choosing a new location for the boiler?
Relocating a boiler can significantly increase installation time because it may involve extensive pipework, new flue routing, and additional permits. Discuss feasibility with your installer before purchasing.
If you’re flexible on location, you can often reduce time and complexity.
What if delays occur due to permits or inspections?
Delays related to permits or inspections depend on local authority timelines. Booking these early and ensuring all paperwork is ready helps minimize calendar delays.
Permits can slow things down; plan ahead and keep the paperwork ready.
Do I need a building permit for boiler installation?
Some regions require permits for gas appliance work. Check with your installer and local building authority; your installer can usually handle the submission.
Check local rules; your installer often handles the permit process.
What happens if the project runs over schedule?
If delays occur, your installer will communicate revised timelines, adjust tasks, and may schedule a follow-up visit for commissioning and safety checks.
If things slip, the team will update you and adjust the plan.
“A boiler installation is as much about preparation and safety as it is about the unit itself. Thorough planning and clear scheduling minimize downtime and ensure a safe, compliant fit.”
Key Points
- Plan early with a site survey to avoid delays
- Expect straightforward swaps to run 4–6 hours, longer for complex jobs
- Get a written schedule and milestones from your installer
- Allow for 1–2 days of disruption for complex or converted installs
- Coordinate permits and inspections in advance to prevent calendar gaps