Boiler Connection: Safe Installation Guide
A practical step-by-step guide to making a safe boiler connection, covering safety codes, required tools, and post-installation checks for homeowners and facility managers.

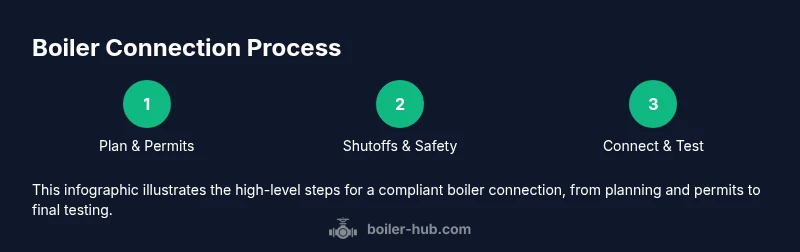
With this guide, you will understand how to approach a boiler connection safely and compliantly. The steps focus on planning, selecting compatible components, securing permits where required, and coordinating with licensed professionals for gas-related work. Boiler Hub's guidance emphasizes safety and code compliance throughout the process. It also highlights proper venting, leak testing, and documentation for easy review by inspectors.
Understanding the boiler connection
A boiler connection refers to the assembly of pipes, valves, and fittings that bring fuel, water, air, and exhaust together to operate a boiler safely and efficiently. For the home or facility, a correct boiler connection minimizes energy waste, prevents leaks, and reduces risk of carbon monoxide exposure. In this context, we define core components: the water supply line, the fuel or electrical feed, the combustion air path, the vent or chimney, and the return line. The connection also includes expansion tanks and pressure relief devices as part of the hydraulic and safety loop. When we discuss a boiler connection, we address both the physical joinery and the control interfaces that keep pressure and temperature within safe ranges. Every system is unique, so layouts depend on boiler model, building design, and local climate. This is not a one-size-fits-all task; manufacturer instructions and local regulations must guide the project. The Boiler Hub team emphasizes thoughtful planning as the first step in any connection project.
Safety standards and codes you must follow
Safety is the cornerstone of any boiler connection. Before touching gas lines or venting, confirm that you have the necessary permits and inspections from your local authority having jurisdiction. In many regions, a licensed professional is required for gas-related work and for final commissioning. Always verify the boiler’s manual for clear instructions on clearances, vent sizing, and combustion air requirements. Use gas detectors and carbon monoxide alarms as a baseline for safety. Boiler Hub analyses show that adherence to safety codes and documented procedures reduces risk, protects occupants, and supports long-term reliability. Keep a written record of all permits, test results, and commissioning checks to simplify future maintenance or resale.
System compatibility: matching boiler, fittings, and venting
A successful boiler connection depends on proper compatibility across several subsystems: the boiler unit, piping material, fittings, shutoff valves, venting, and expansion components. Check that pipe sizes align with the boiler manufacturer’s recommendations and that venting materials meet the pressure and temperature ratings. Materials like copper, stainless steel, or approved plastics must be rated for hot-water or steam service, with appropriate corrosion resistance. Fitments such as elbows, tees, unions, and adapters should be corrosion-resistant and installed with secure, leak-free joints. Venting paths must be clear and unobstructed, with an appropriate slope to aid exhaust flow. The goal is a seamless, code-compliant connection that minimizes heat loss and reduces chance of backdrafting. Always consult the boiler’s installation guide and a licensed professional if in doubt about compatibility or venting.
Materials and tools you should have on hand
Before beginning any connection work, assemble essential tools and materials to reduce delays and maintain safety. Required items include a boiler installation manual or equivalent documentation, pipe wrenches of the correct size, adjustable wrenches, a torque wrench for threaded joints, thread sealant or PTFE tape appropriate for gas or water lines, leak-detection solution, and a calibrated manometer if pressure checks are part of your plan. Have gas-safe rated fittings and shut-off valves readily available, along with vent piping that meets local codes. Safety gear such as gloves, eye protection, and non-slip footwear is non-negotiable. Also keep a clean workspace with adequate lighting and a clear path for gas and electrical service entry. Having a well-planned tools kit reduces on-site errors and speeds up the connection process.
Sizing and pressure considerations
Correct sizing and pressure management are critical to boiler performance and safety. The system’s water supply, loop design, and expansion strategy influence pump selection and pipe sizing. Pressure should stay within the boiler’s rated range; excessive pressure can stress joints and safety devices, while too-low pressure can impair heat delivery. An expansion tank compensates for thermal expansion and helps maintain stable pressure during heating cycles. For gas or oil-fired boilers, ensure the supply line and shut-off valve are properly sized and rated for the appliance’s maximum input. Always verify that the vent and flue are sized to handle the expected exhaust volume. If you’re unsure about pressure or sizing, consult the boiler manual or a licensed technician to avoid undersizing or over-pressurizing the system.
Step-by-step overview: preparation and setup
This section provides a high-level view of the preparation and setup needed for a boiler connection. Begin with a thorough plan that includes layout sketches, permit checklists, and a binding timeline. Confirm the availability of gas, electric, and water service shutoffs, and verify that all energy sources can be safely isolated. Review the manufacturer's installation manual to align with required clearances, venting routes, and component compatibility. Prepare the workspace by cleaning around the boiler, securing necessary hand tools, and laying out components in the order of assembly. Do not bypass steps or improvise with non-approved parts. The goal is to create a clear, auditable workflow that a licensed professional can follow without ambiguity. For visual guidance, refer to diagrams in the manufacturer’s guide and the project plans provided by your installer.
Common issues during connections and how to avoid them
Common problems during boiler connections include leaks at threaded joints, misaligned fittings, incorrect venting, and inadequate combustion air. Leaks are often caused by insufficient torque or improper sealing compound; misalignment occurs when pipes or unions do not seat fully. Venting problems can cause backdrafting or poor draft, reducing efficiency and increasing CO risk. To minimize issues, verify all joints with leak-detection solution, double-check torque specs, and ensure a proper vent slope. Use manufacturer-approved parts and confirm that all components are rated for the intended temperature and pressure. If you encounter a stubborn leak or suspect a venting problem, stop work and involve a licensed professional immediately.
Post-installation testing and commissioning checklist
Commissioning the boiler connection involves several checks to ensure safe and reliable operation. Confirm that all gas and electrical connections are secure and that shut-offs function. Perform a leak test on water and gas lines, using approved detector solutions. Inspect the venting system for proper routing and absence of obstructions. Start the boiler on a test run and monitor pressure, temperature, and combustion efficiency. Verify safety devices such as high-limit switches and pressure relief valves operate as designed. Document all test results and obtain required sign-offs from a qualified professional. A thorough commissioning process reduces malfunctions and extends equipment life.
Maintenance strategies for long-term reliability
Long-term reliability comes from routine maintenance and timely replacements. Schedule annual inspections of seals, gaskets, and joints; check expansion tanks for proper pre-charge; inspect venting for creosote buildup or corrosion; and verify CO detectors are functional. Keep a maintenance log with dates, findings, and any parts replaced. Address minor issues promptly to prevent bigger failures. Regularly review the boiler manual for service intervals and recommended part replacements. Adopting a proactive maintenance mindset helps avoid costly downtime and preserves energy efficiency over the boiler’s life.
Safety reminders and when to call a professional
Safety is non-negotiable when it comes to boiler connections. If you smell gas, hear hissing, or notice sizzling noises around joints, evacuate and contact emergency services. Do not attempt to tighten gas fittings or bypass safety devices. For anything involving gas lines, combustion air, or venting, always hire a licensed professional. The complexity of modern boilers and the risk of improper installation necessitate expert oversight. When in doubt about any step—especially those that involve gas, pressure, or exhaust—seek professional evaluation to protect occupants and property.
Troubleshooting quick-reference guide
When issues arise, start with the basics: confirm power and fuel supply, inspect visible joints for leaks, and verify vent clearance. If leaks persist, isolate the affected area and consult the installation manual for torque specs and sealant guidelines. For poor draft or unusual odors, reassess vent routing and combustion air availability. Maintain a log of symptoms and corresponding actions to speed up future diagnostics. If conditions remain unresolved after these checks, schedule a professional inspection to ensure safety and code compliance.
Tools & Materials
- Boiler installation manual(Keep on-site for reference)
- Pipe wrenches (various sizes)(Have both adjustable and fixed wrenches)
- Torque wrench(Use to meet manufacturer torque specs)
- PTFE tape or appropriate sealant(Gas-rated where needed)
- Leak-detection solution(For water and gas joints)
- Gas-rated shut-off valves(Before and after the boiler connection)
- Vent piping and fittings(According to venting requirements)
- Expansion tank(Match system volume and pressure)
- Pressure gauge / manometer(Only if testing pressure is planned)
- Safety gloves and eye protection(Personal protective equipment)
- Carbon monoxide detector(Install in living/occupied spaces)
- Fire extinguisher(Keep accessible in boiler room)
- Diagram or schematic of existing piping(Helpful for planning)
Steps
Estimated time: 3-6 hours
- 1
Verify local codes and permits
Review local regulations and the boiler installation manual. Gather permits if required and document the approvals before touching any equipment. This step ensures compliance and reduces the risk of penalties or safety issues later.
Tip: Consult the building department early to avoid delays; many jurisdictions require a licensed gas fitter for final inspection. - 2
Shut off power and fuel supply
Isolate electrical power to the boiler and close the gas or fuel shut-off valve. Confirm there is no energy flow to minimize the risk of accidental ignition or electric shock during the work.
Tip: Lockout-tagout procedures prevent accidental re-energization; never bypass safety devices. - 3
Prepare the work area and gather tools
Clear the boiler room, remove clutter, and lay out tools in order of use. Prepare leak-detection solutions and protective gear. Having a clean, organized space reduces mistakes and speeds up the process.
Tip: Place a spill tray for water connections to contain any moisture promptly. - 4
Inspect the boiler and existing connections
Check the current piping, seals, and venting. Look for corrosion, worn gaskets, or mismatched components. If any issue is found, document it and decide whether to replace parts or upgrade the setup.
Tip: Refer to the manufacturer’s drawings to confirm component compatibility. - 5
Install the connection components
Attach new shut-off valves, unions, and piping as specified. Use appropriate sealants and torque to manufacturer specs. Ensure all joints are clean and free of debris before tightening.
Tip: Do not over-tighten threaded joints; apply even torque to avoid cracking seals. - 6
Seal joints and check for leaks
Apply leak-detection solution to all joints; look for bubbles at each joint. If a leak is detected, re-tighten or re-seal and retest until no leaks are observed.
Tip: Allow joints to settle before re-testing; some leaks appear temporarily as seals cure. - 7
Test venting and combustion air path
Inspect the vent path for obstructions and verify adequate combustion air supply. Ensure vent connectors are properly supported and slope toward the exterior to prevent condensation.
Tip: Avoid installing vent runs with sharp bends that impede airflow. - 8
Commission and finalize documentation
Perform a final test run, monitor pressure and temperature, and record results. Obtain any required signatures and keep a file with all test data and permits for future reference.
Tip: Keep a digital copy of all documents for quick accessibility.
Questions & Answers
What is a boiler connection?
A boiler connection is the network of pipes, valves, and fittings that supply water, fuel, air, and exhaust to the boiler, ensuring safe and efficient operation. It includes venting, expansion devices, and safety controls conforming to manufacturer instructions and codes.
A boiler connection is the system of pipes, valves, and vents that lets the boiler work safely by bringing water, fuel, air, and exhaust together as designed.
Do I need a permit to install a boiler connection?
In many areas, a permit is required for any new boiler connection work, especially when gas lines are involved. Check with your local building department and obtain approvals before starting.
Permits are often required for boiler connections, particularly for gas work; verify with your local authority before starting.
Can I connect a boiler gas line myself?
Gas line work should be performed only by a licensed professional due to the risk of leaks, fire, and carbon monoxide exposure. Do not attempt DIY gas connections.
No. Gas line work requires a licensed professional to prevent dangerous leaks and CO risks.
What are common signs of a faulty boiler connection?
Common signs include persistent leaks at joints, unusual gas smells, backdrafting, and inconsistent heat delivery. If you notice any of these, stop work and consult a professional.
Look for leaks, strange smells, poor heat, or drafts. If you see these, call a pro.
How often should boiler connections be inspected?
Annual visual inspections and periodic performance checks are recommended, with a full professional service at least once per year or as advised by the boiler manufacturer.
Have a professional inspect annually or per the manufacturer’s guidelines.
What should I do if I notice a leak after completion?
Shut off the affected supply, ventilate the area, and contact a licensed professional to assess and repair the leak promptly.
Turn off the supply and call a pro right away if you spot a leak.
Are there safety devices I should not bypass?
Do not bypass any safety devices such as pressure relief valves or CO detectors. These are critical for preventing dangerous over-pressurization or poisoning.
Never bypass safety devices; they prevent dangerous conditions.
Watch Video
Key Points
- Define boiler connection scope before touching equipment
- Follow local codes and manufacturer instructions
- Use licensed professionals for gas-related work
- Test thoroughly and document results
- Maintain records for ongoing safety and maintenance