Installation of Gas Boiler: A Practical Guide for Homeowners
Step-by-step guide to safely installing a gas boiler, covering planning, permits, venting, gas supply, wiring, testing, and commissioning for homeowners and facility managers.

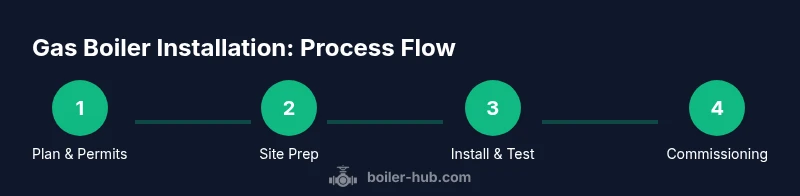
This guide outlines the installation of gas boiler and what you need to complete it safely and legally. You will learn planning, permits, venting, gas supply, electrical grounding, and commissioning steps. Whether you’re a homeowner or a facility manager, follow these steps to prepare, verify clearances, and reduce risk. Always prioritize safety and local code compliance.
Planning the installation of gas boiler
Planning is the foundation of a safe, compliant installation. You’ll choose the boiler type (combi, system, or regular), estimate heat load, and ensure space for maintenance and service access. According to Boiler Hub, thorough planning reduces risk and speeds up permitting. Assess the room for ventilation, spare wall space for clearances, and ensure the existing gas line and electrical circuits can accommodate the new unit. If you’re replacing an older boiler, map out shutoff points, drainage, and a temporary power shutoff plan to minimize downtime during replacement. Document local code requirements early to avoid rework later. This planning phase also helps you anticipate future service needs and warranty requirements.
Safety, codes, and permits you must know
Gas boiler installation carries real safety risks if done incorrectly. Many jurisdictions require a licensed professional to perform gas work and to obtain permits before starting. Verify combustion air and ventilation requirements, flue sizing, and CO monitoring needs. Boiler Hub Analysis, 2026 emphasizes the importance of proper venting and sealing to prevent carbon monoxide exposure and gas leaks. Do not attempt DIY gas work; mistakes can lead to leaks, fires, or asphyxiation. Prepare an emergency plan and confirm shutoff locations before work begins. Always keep a clear separation between the work area and living spaces to limit exposure to any incidental hazards.
Sizing, venting, and efficiency considerations
Accurate boiler sizing avoids short cycling and wasted fuel. A professional should perform a heat-loss calculation and match the boiler output to demand. Venting should use an approved flue with proper slope, clearances, and a frost-free condensate drain. Condensing boilers capture more heat from exhaust gases, but they require a dedicated condensate drain and correct piping to prevent freezing. Efficiency improvements also depend on piping insulation, system design, and correct use of controls. You’ll need to plan for future expansion or heat loads from additional zones and radiators. Always verify compatibility with existing radiators and piping layout before purchase.
Tools, materials, and site preparation
Before you begin, assemble essential tools and verify you have the right materials. Keep a copy of the boiler’s installation manual on-site. Use gas-rated fittings and sealants, and ensure all piping is properly supported. A dedicated electrical circuit and proper bonding are critical for safe operation. Store detergent for pressure tests, a bubble solution for leak checks, and CO detectors near the boiler space. Keep a clear workspace free of combustibles and ensure adequate lighting for accuracy. Preparing a checklist helps ensure nothing is missed and reduces delays during inspection.
Commissioning, documentation, and handover
Commissioning validates that the installed boiler operates safely and to specification. Perform leak tests, ignition checks, and combustion analysis to confirm efficiency and emissions meet manufacturer targets. Record test results, serial numbers, and installation certificates for compliance records. Provide the property owner with manuals, warranty paperwork, and a simple maintenance schedule. The Boiler Hub team recommends engaging a licensed gas fitter for final commissioning and sign-off to ensure safety and code compliance. A well-documented handover reduces risk and makes future servicing straightforward.
Authority sources
- U.S. Department of Energy: https://www.energy.gov
- Occupational Safety and Health Administration: https://www.osha.gov
- National Fire Protection Association: https://www.nfpa.org
Tools & Materials
- Gas shutoff valve(Installed upstream of the boiler inlet; easily accessible)
- Gas-rated flexible connector(Sized to boiler inlet; comply with local codes)
- Vent/Flue kit(Includes components and sealant; compatible with your boiler brand)
- Gas leak test solution (soapy water)(Used to check every joint after installation)
- Combustion analyzer or manometer(Used to verify proper gas pressure and flue performance)
- Electrical tester and multimeter(Confirm power supply and bonding per code)
- Thread sealant rated for gas(Only use approved gas-rated sealants; do not use regular plumber's tape on gas threads)
- Piping materials (copper/PEX), fittings, and supports(Appropriate sizes per boiler and local code)
- Personal protective equipment (PPE)(Gloves, eye protection, and hearing protection)
- Manufacturer's installation manual(Keep on-site for reference during work and commissioning)
Steps
Estimated time: 4-8 hours
- 1
Prepare site and secure permits
Survey the space to ensure ventilation and clearance for service access. Gather the boiler manual, confirm permits with local authorities, and prepare a temporary shutdown plan. Verify gas supply and electrical readiness before work begins.
Tip: Create a written plan with milestones and often-visited shutoffs identified. - 2
Shut off gas and power safely
Turn off the main gas supply and disconnect electrical power to the installation area. Verify that the area is depressurized and use a gas detector to confirm no residual gas activity before handling fittings.
Tip: Never bypass gas shutoff valves or energize circuits in a live gas space. - 3
Install venting and flue connections
Attach the vent kit to the boiler with manufacturer-approved adapters. Ensure proper slope, ventilation clearances, and that joints are sealed according to code. Test fit before final sealing.
Tip: Use only manufacturer-approved flue components and sealants. - 4
Connect gas supply and water connections
Connect the gas line to the boiler inlet with an isolation valve. Attach cold water supply and the return loop, following the correct pipe sizes and fittings. Check for leaks with a soap solution after tightening.
Tip: Leak tests should cover all gas joints and the entire supply line. - 5
Electrical hook-up and controls
Connect the boiler to a dedicated circuit and install the thermostat/control wiring per the manual. Ensure bonding and grounding meet local electrical codes and that safety devices are wired correctly.
Tip: Label wires clearly and use a test lamp to verify control signals. - 6
Commission and test
Power up the system, perform gas leak tests, ignition sequence checks, and combustion analysis. Adjust settings for safety and efficiency, and document all readings for records.
Tip: Keep a running log of test results and any required adjustments.
Questions & Answers
Is it legal to install a gas boiler myself?
In many areas, gas boiler installation requires a licensed professional. Check local codes and permits before starting.
Most areas require a licensed installer; consult your local authority for specifics.
What permits are required?
Permits vary by location; typically building and gas safety permits are required. Your local authority can provide the exact list.
You may need building and gas permits depending on your area.
How do I know if my space is suitable?
Space should have adequate ventilation, proper clearance around the boiler, and easy access for service. Follow the boiler manufacturer’s clearance guidelines.
Space must allow venting, service access, and proper clearance.
Can I replace an old boiler with a newer model?
Yes, but you must re-evaluate sizing, venting, and clearances. Permits and possibly updated piping are common requirements.
A replacement requires rechecking sizing and venting.
What safety checks occur after installation?
Expect gas leak testing, ignition checks, combustion analysis, and CO monitoring as part of commissioning.
Leak tests, combustion checks, and safety devices are verified.
How long does commissioning take?
Commissioning can take several hours depending on system complexity and accessibility of connections.
It may take a few hours to complete testing and adjustments.
Watch Video
Key Points
- Plan thoroughly before starting
- Use licensed professionals for gas work
- Verify venting and safety checks
- Document all tests and compliance