Using a Boiler Timer: A Practical Step-by-Step Guide
Discover how to use a boiler timer to save energy, keep heating reliable, and avoid wasted cycles. This guide covers timer types, setup steps, programming basics, safety tips, and troubleshooting for homeowners and facilities managers.

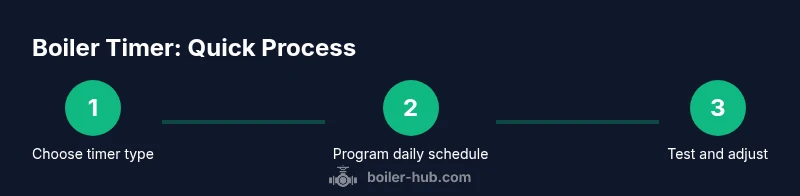
You can optimize comfort and cut energy use by learning how to use a boiler timer. This quick guide shows selecting the timer type, setting schedules, programming holidays, and testing safety shutoffs. Follow the step-by-step process to ensure reliable heat while avoiding unnecessary boiler cycles. This snippet is for homeowners and managers, and it emphasizes safety and energy efficiency.
Understanding boiler timers: basics and benefits
A boiler timer is a control device that turns your boiler on and off according to a schedule. It's designed to match when you actually need heat, which reduces wasted runs and helps manage energy bills. According to Boiler Hub, using a timer can lower unnecessary cycling and improve comfort when used correctly. The timer can be mechanical (dial-based) or digital, and modern digital models often offer more flexible programming, holiday modes, and remote access. Before you start, confirm your boiler's service manual supports a timer and identify the control terminals you will connect.
Types of timers and where they fit in your boiler system
There are several timer options: mechanical 24-hour dials, digital clocks with daily programs, and smart timers that integrate with Wi‑Fi or home automation. Each type has pros and cons: mechanical timers are simple and cheap but less precise; digital timers are flexible but require setup; smart timers offer remote programming and data logging but need network compatibility. Boiler Hub analysis shows that the most important factor is compatibility with your boiler model and existing thermostat wiring. Always check your system's wiring diagram before purchasing.
Basic programming concepts
Time setting is crucial: ensure the clock is accurate, or heating may run at the wrong times. Programs are built from blocks (on/off intervals) that you can copy for weekdays vs weekends. Start with a simple schedule, such as heating 6–8 am and 6–9 pm on weekdays, then adjust based on comfort and energy use. Modern timers offer holiday modes to reduce energy use when spaces are unoccupied.
Safety considerations and testing
Safety should come first: always disable power at the breaker before touching timer wiring. If your timer is not interlocked with the boiler's safety controls, verify that manual mode cannot bypass safety features. After installation, run a controlled test: watch that the boiler turns on and off as scheduled, confirm the thermostat and timer communicate correctly, and monitor for any unexpected calls for heat. The Boiler Hub Team notes that proper wiring and interlocks are essential for safety.
Troubleshooting common timer problems
Common issues include missed cycles due to incorrect clock time, inconsistent heat from misconfigured blocks, or failure to turn on because wiring connections are loose. Start by verifying the current time and active program; ensure power is on and the timer is linked to the boiler control circuit. If the problem persists, consult the timer manual and consider professional assistance.
Tools & Materials
- Boiler timer (mechanical or digital)(Ensure compatibility with your boiler model and wiring.)
- Screwdrivers (Phillips and flat-head)(For removing cover plates and terminal screws.)
- Wire nuts/connectors(Secure and insulate wiring connections.)
- Voltage tester(Use to confirm power is off before working.)
- User manual or wiring diagram(Reference wiring and terminal layout.)
Steps
Estimated time: 30-60 minutes
- 1
Power off and safety verification
Turn off the boiler at the main breaker and disconnect from the power source. Confirm there is no live voltage before touching the timer wiring. This prevents electric shock and accidental boiler relight during installation.
Tip: Use a voltage tester to double-check that power is fully off. - 2
Remove timer cover and locate terminals
Carefully pry off the timer cover and identify the input, output, and common terminals. Note which wires connect to the boiler control circuit so you can match them on the new timer.
Tip: Take a quick photo of the wiring before removal for reference. - 3
Connect timer to boiler control wires
Connect the timer's corresponding terminals to the boiler's control wires, ensuring solid, secure connections and proper insulation. Do not swap wires unless your wiring diagram specifies it.
Tip: Use proper wire nuts and strip insulation to expose only the needed conductor. - 4
Set current time and initial daily schedule
Set the clock to the correct time and program a basic daily schedule (e.g., heat on 6:00–8:00 a.m., 6:00–9:00 p.m.). Keep this initial schedule simple for testing.
Tip: Synchronize with the house clock to avoid drift. - 5
Program holidays and seasonal adjustments
Add holiday or seasonal profiles if your timer supports them. This reduces energy use during unoccupied periods and keeps comfort when occupants return.
Tip: Name profiles clearly (Holiday2026) for easy identification. - 6
Test, verify, and finalize
Restore power and run a test cycle to verify the timer follows the programmed schedule. Observe boiler firing times and adjust blocks if needed.
Tip: Record a quick log of start/stop times for reference.
Questions & Answers
What is a boiler timer and what does it do?
A boiler timer controls when your boiler turns on and off according to a predefined schedule. It helps align heating with occupancy and reduces energy waste. Pairing it with a thermostat improves overall efficiency.
A boiler timer turns your heating on and off based on a schedule, helping you save energy. It's most effective when paired with a thermostat.
Can I use a boiler timer with any boiler?
Most timers fit common boilers, but check your boiler's wiring diagram and control system for compatibility. Some units require adapters or professional wiring.
Most timers work with many boilers, but always check compatibility with your unit.
Do I need a professional to install a timer?
If you are not comfortable working with electrical connections, hire a licensed technician. Improper wiring can damage the boiler or create a safety hazard.
If you're not experienced with wiring, hire a professional.
What maintenance does a timer require?
Keep the timer dry and dust-free, replace batteries if the model uses them, and test the schedule monthly to ensure accuracy.
Keep it clean, test monthly, and replace batteries if needed.
How can a timer save energy?
By reducing boiler running times during unoccupied periods and optimizing heat delivery to match occupancy patterns.
Timers trim boiler runtime, saving energy when you don't need heat.
Should I set holidays or seasonal schedules?
Yes. Program holidays and seasonal changes to match occupancy and weather, maximizing efficiency.
Program holidays so heat runs only when needed.
Watch Video
Key Points
- Identify your timer type and compatibility first
- Program a simple daily schedule before adding holidays
- Test the timer after programming and fine-tune blocks
- Review settings regularly to preserve energy savings