How to Put Boiler On: Step-by-Step Startup Guide
A comprehensive, safety-first guide to starting your boiler. Learn pre-start checks, ignition steps, troubleshooting, and maintenance tips from Boiler Hub.

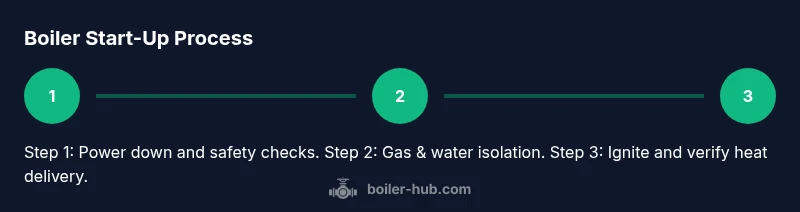
Putting a boiler on safely begins with a clear plan: verify electrical power is isolated, confirm gas and water supplies are safe, and perform a structured start-up sequence with proper safety checks. This guide from Boiler Hub outlines the essential steps, from pre-start checks to ignition and initial heat delivery, so homeowners can start their boiler reliably and safely.
Understanding the Start-Up Process
Turning on a boiler is more than flipping a switch. It’s a controlled sequence designed to protect you, your home, and the heating system. When you start a boiler, you must confirm that electrical supply is steady, gas supply is safe, and all safety devices are ready to intervene if something goes wrong. According to Boiler Hub, the safest approach begins with a clear plan, a quick safety check, and readiness to stop if you detect any abnormal odor or alarm. Modern boilers include components like a pressure relief valve, an ignition system, a flame sensor, and safety interlocks that prevent ignition if a door or panel is open. Skipping these checks can damage the boiler, void warranties, or cause a hazardous situation. In this section, we’ll outline the general order of operations used by professionals, plus practical tips for homeowners who want to understand what the boiler is doing behind the panel. You’ll learn how to recognize normal startup behavior, what sounds or signs to listen for, and how to document unexpected observations so you can explain them to a technician later. This knowledge helps you put boiler on with confidence rather than guesswork.
Safety Fundamentals Before You Begin
Before any attempt to start a boiler, gear up with basic safety practices. Wear protective gloves and eye protection, and make sure children and pets are away from the area. Check for gas odors; if you smell gas or detect a hissing sound, evacuate and call the gas emergency line immediately—do not attempt to start or relight the appliance. Ensure the area around the boiler is clear of clutter, spills, or flammable materials. Confirm your smoke and carbon monoxide detectors are functioning and that there is adequate ventilation in the boiler room. If your boiler has an electrical panel, switch off power according to the manufacturer’s instructions before any intervention and use a non-contact voltage tester to verify the circuit is de-energized. Finally, review your owner’s manual for model-specific safety warnings and the correct start sequence. Safe practice is essential to avoid electric shock, gas leaks, or damaging the ignition system. If any doubt remains about a safe start, stop and contact a licensed technician. The Boiler Hub team emphasizes that safety is the first step, not an afterthought.
Tools and Materials You’ll Need (and Why)
You’ll want a small toolkit on hand and the right PPE to protect yourself during start-up. The essential items are listed in the Tools & Materials block, but here’s why they matter:
- PPE (gloves, safety glasses): protects you from sharp edges, hot surfaces, and unexpected sparks.
- Screwdrivers (Phillips and flat-head): used to open panels and secure wiring or terminals.
- Adjustable wrench and pliers: loosen or tighten fittings without rounding screws.
- Multimeter or non-contact tester: confirms power is off and later validates electrical signals.
- Gas shut-off key or valve wrench: allows rapid isolation if a leak is detected.
- Cleaning cloths and a flashlight: for visibility and wiping any condensation. Note: Always consult the boiler’s manual for model-specific tools and avoid improvising beyond your training. Optional items include a digital manometer if your system requires pressure verification, and a boiler service manual for reference during complex start-up sequences.
Step-by-Step Startup Narrative
A structured start-up keeps the process predictable and safe. Begin with a visual and sensor check: inspect the area for clutter, ensure the boiler cover is securely closed, and verify there are no error lights indicating active faults. Confirm the thermostat is set to the desired heat level and that the room has adequate ventilation. If your model includes a diagnostic display, take note of any fault codes and refer to the user manual for their meaning. When you proceed to power the unit on, listen for a brief ignition sequence and observe that the burner lights cleanly without sputtering or abnormal flames. Normal startup should show stable flame and steady heat within a few minutes. If the flame is intermittent, yellow, or fluctuating, stop and recheck connections or call a professional. Document the start-up outcomes, including any alarms or unusual sounds, so you can share them with a technician if needed. This deliberate approach helps you detect problems early and prevents unnecessary repairs or safety hazards.
Ignition Phase and Heat Delivery Verification
In the ignition phase, your boiler should ignite promptly using the chosen ignition method (spark or hot surface). Once ignition occurs, monitor for a consistent blue flame and verify that the heat exchanger begins transferring heat to the water circuit. If your boiler has a flame sensor, a healthy signal will confirm ignition while safety interlocks ensure the system will shut down safely if something goes wrong. During this phase, listen for any banging, popping, or gas odor and check that the venting system is releasing combustion byproducts properly. If ignition fails, consult the fault indicators and reset as instructed in the manual. Do not force shut-off sequences or bypass safety interlocks. After ignition, allow several minutes for the system to reach the target temperature and pressure, confirming that the supply pipes and radiators begin to warm. After successful ignition, perform a quick check to ensure there are no leaks around joints or valves and that the pressure readings stay within the expected range according to your model’s specifications.
Post-Start Checks and System Readiness
With the boiler running, perform post-start checks to confirm long-term reliability. Check for steady flame color and calm operation, confirm consistent water temperature at the taps, and verify that the expansion tank and pressure valve maintain appropriate pressure levels. Listen for unusual noises and watch for any visual signs of a leak around fittings or gaskets. If you notice reduced heating performance, air in the system could be the culprit; you may need to bleed radiators or recharge the pressure. Keep a maintenance log that records start time, temperature, pressure, and any anomalies. Regularly scheduled checks, even of a properly started boiler, help sustain efficiency and extend equipment life. The Boiler Hub team emphasizes documenting start-up outcomes so you can track improvements over time and catch creeping issues early.
Troubleshooting Scenarios and When to Call a Pro
Most home boiler start scenarios are straightforward, but some problems require professional attention. If you smell gas, hear a hissing sound, or notice a persistent error code that you cannot interpret, power down the unit and contact your gas provider and a licensed technician immediately. If the unit repeatedly fails to ignite or shuts down on safety interlocks, the issue may involve gas supply, ignition components, or combustion diagnostics that require specialized tools and training. Do not bypass safety controls to force ignition. For system-wide issues like poor heating performance, strange noises, or frequent cycling, a written log of symptoms can help a technician diagnose faster. The Boiler Hub team recommends erring on the side of caution when symptoms persist, and always prioritize proper ventilation, gas safety, and electrical safety during any start attempt.
Tools & Materials
- Gas valve shut-off key(Essential for rapid isolation if a leak is detected)
- Multimeter(Used to verify power is off and to test electrical signals)
- Non-contact voltage tester(Quick check for live circuits during setup)
- Screwdrivers (Phillips & flat-head)(Open panels and secure wiring connections)
- Adjustable wrench(Tighten or loosen fittings safely)
- Personal protective equipment (gloves, safety glasses)(Protection from sharp edges and hot surfaces)
- Flashlight(Illumination for dark corners and panel areas)
- Owner’s manual(Model-specific instructions and warnings)
Steps
Estimated time: 30-60 minutes
- 1
Power down electrical supply
Turn off the boiler at its power switch and, if accessible, at the main breaker. Use a multimeter or tester to confirm no voltage is present before touching any components.
Tip: Double-check the breaker label and test the area again after switching off. - 2
Shut off gas and water supplies
Close the gas shut-off valve and the boiler’s water supply to prevent leaks while you inspect or attempt a restart.
Tip: Keep a flashlight handy to inspect the valve area in dim light. - 3
Open service panel and inspect
Carefully remove the panel to access ignition components, burners, and sensors. Look for signs of damage, loose wires, or corrosion and reseat any loose connectors.
Tip: Never touch live terminals; if anything looks damaged, stop and call a professional. - 4
Set controls for startup
Set the thermostat to a comfortable heat level and ensure safety interlocks (doors/panels) are engaged. Reset any fault codes per the manual before attempting ignition.
Tip: If an error code persists, do not force ignition—consult the manual or a tech. - 5
Ignite and monitor
Power the unit back on and observe the ignition sequence. Listen for a solid ignition click and watch for a steady blue flame; monitor for unusual smells or sounds for several minutes.
Tip: If ignition fails, power down and re-check connections before retrying. - 6
Verify heat delivery and close up
Confirm radiators and taps warm within a reasonable time. Check for leaks around joints and ensure pressure remains within the recommended range. Close the panel and restore normal use.
Tip: Document outcome and any readings for future maintenance.
Questions & Answers
What should I check before turning on a boiler?
Ensure electrical power is isolated, gas and water supplies are safe, ventilation is adequate, and no alarms are active. Review the manual for your specific model and perform a visual inspection of ignition components.
Always start with power and gas safety checks, then inspect the ignition area before attempting ignition.
Why won’t my boiler ignite after turning on?
Common causes include gas supply issues, faulty igniter, sensor problems, or safety interlocks engaged incorrectly. Refer to fault codes in the manual and check connections, then attempt a safe reset.
Ignition failures often point to gas or sensor issues—check interlocks and fault codes per the manual.
Is it safe to start a boiler after a power outage?
Yes, but you should verify that voltage returns to normal and all safety devices are functioning before restarting. If the boiler requires a manual reset or pilot re-ignition, follow the manual instructions.
Power can return to normal after a outage, but verify safety devices and follow the manual before restarting.
Do I need a professional to start my boiler?
Most routine start-ups can be performed by homeowners who follow safety guidelines and the manufacturer’s instructions. If you detect gas smells, unusual noises, or repeated fault codes, contact a licensed technician.
For normal startups, you can do it yourself if you follow safety steps; call a pro for warnings or persistent faults.
How often should I perform start-up maintenance?
Regular start-up checks should align with the boiler’s maintenance schedule, typically at the start of each heating season or after service work. Keep a log of readings and any anomalies.
Follow the seasonal maintenance schedule and log your readings for future reference.
Watch Video
Key Points
- Verify power, gas, and water before starting
- Follow a clear start-up sequence to avoid hazards
- Monitor ignition and heat delivery for safe operation
- Document results and seek pro help for persistent issues