How to Clean Boiler Water: A Homeowner's Guide
A comprehensive how-to on cleaning boiler water safely and effectively, including flushing, testing water quality, inhibitor use, and maintenance tips to keep your boiler efficient.

Goal: learn how to clean boiler water safely and effectively. You’ll flush the system to remove sediment, test water chemistry, and apply proper inhibitors to protect heat exchangers. This guide covers essential safety steps, tool lists, step-by-step actions, and common mistakes, so homeowners and managers can keep boilers efficient and reliable.
Why Cleaning Boiler Water Matters
Regularly cleaning boiler water reduces scale buildup, improves heat transfer, and lowers energy consumption. The Boiler Hub team emphasizes that water quality directly affects boiler efficiency and component longevity. Sediment and mineral deposits insulate heat transfer surfaces, forcing the boiler to work harder and potentially shorten its life. Debris can lead to noisy operation and unpredictable cycling. In addition, poor water chemistry can accelerate corrosion of metal parts like the heat exchanger and pump seals. By flushing and treating boiler water according to manufacturer guidelines, you minimize these risks and maintain a stable pressure and temperature profile. For facility managers, establishing a documented flushing schedule and keeping a simple log of dates, readings, and any inhibitor use helps ensure consistent performance across a building or multi-unit system. In residential settings, homeowners who perform annual or semi-annual checks often notice quieter operation and more consistent hot water delivery. The goal is not to chase perfect chemistry but to maintain safe, efficient operation and reduce the chance of costly repairs later.
Understanding Boiler Water Chemistry
Boiler water chemistry centers on keeping scale and corrosion in check. When minerals like calcium and magnesium accumulate, they form hard deposits (scale) that impede heat transfer. Alkaline conditions (higher
Safety First: Precautions Before You Begin
Safety is non-negotiable when working on boiler systems. Before any cleaning, shut off power to the boiler and isolate the gas supply if applicable. Ventilate the area and ensure CO alarms are functional. Wear eye protection, chemical-resistant gloves, and non-slip footwear. Never work on a hot boiler—allow it to cool and relieve pressure where appropriate using the system’s relief valves only per manufacturer directions. Have a clean workspace with spill containment and a bucket ready to catch wastewater. If you’re uncertain about wiring, gas controls, or pressure relief, stop and call a professional. Boiler Hub emphasizes that safety and proper shutdown procedures protect occupants and prevent dangerous leaks or fires.
Tools and Materials You’ll Need
Gathering the right tools and materials before you start makes the process smoother. Essentials include a boiler drain key or appropriate wrench, PPE (gloves, eye protection, and protective clothing), a sturdy bucket, a garden hose,
Step-by-Step Approach to Draining and Flushing
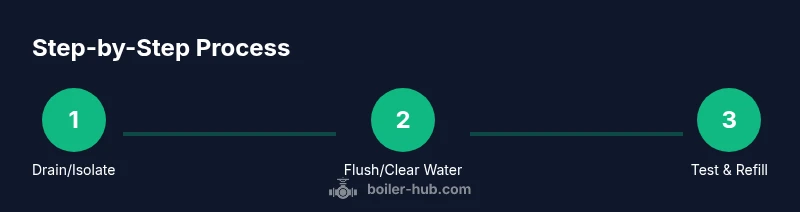
A structured approach keeps the process safe and effective. Begin by isolating the boiler power and closing the water supply. Next, relieve system pressure and open the drain valve to start draining a portion of the water. Collect the water in the bucket and observe its clarity. Once the initial drain is clear, attach the garden hose to the drain valve and flush with clean water until the water runs clear. After flushing, test the water quality and adjust chemistry as needed with inhibitors or cleaners according to the product instructions. Refill the system slowly, bleed air from radiators if present, and monitor for leaks. Finally, run the boiler briefly to ensure stable operation and recheck water chemistry.
Tip: Keep a detailed log of dates, test results, inhibitor amounts, and any observed issues to guide future maintenance. Time estimate: 60-120 minutes depending on system size and accessibility.
Flushing with Water: How to Flush the System Properly
Flushing removes settled sediment and helps restore heat transfer efficiency. With the system cool, open the purge points and drains and connect a hose to direct water to a safe drain. Start with a gentle flow and allow the water to run until it looks clear and free of debris. Do not rush this step; inertia can push sediment back into the system. If you have multiple loops or zones, repeat the flush for each circuit. After flushing, ensure you close all drains before refilling. The goal is to replace the majority of the circulated water with clean water without introducing air pockets that can disrupt circulation.
Using Chemicals and Inhibitors Safely
Chemical treatment supports long-term protection against scale and corrosion. Use only inhibitors or descalers intended for your boiler type and follow the manufacturer’s dosage instructions precisely. Never mix different products and avoid introducing chemicals into the system when there is still pressure. Some inhibitors also require a partial flush or a pre-dilution step; read the label carefully. Keep the chemical container closed when not in use and store away from heat sources. If you suspect a chemical incompatibility or experience an unusual reaction, stop and consult a professional.
Checking Water Quality and Re-initializing the System
After treatment, refill the boiler slowly while monitoring the pressure gauge. Once filled, re-pressurize the system to the manufacturer’s recommended setting and re-bleed radiators or air vents to remove trapped air. Recheck
Common Mistakes and How to Avoid Them
Common mistakes include skipping a proper shutdown, flushing too quickly, and ignoring safety precautions. Rushing the process can leave sediment behind or create airlocks. Over- or under-dosing inhibitors can cause ineffective protection or chemical imbalance. Failing to test water chemistry after treatment can hide problems that will worsen over time. To avoid these pitfalls, follow the step-by-step guide, use the right tools, and consult the manufacturer’s guidelines or Boiler Hub resources when in doubt.
Tools & Materials
- Boiler drain key or suitable wrench(Needed to operate the drain valve.)
- PPE (gloves, safety goggles, coverall)(Protection against splashes and hot surfaces.)
- Bucket or collection container(Catch wastewater safely.)
- Garden hose(Direct water to a safe drain.)
- pH test strips or digital tester(Monitor water chemistry.)
- Inhibitor/Descaler approved for boiler water(Follow manufacturer directions.)
- Soft towels or rags(Clean spills and wipe components.)
- Scale-remover (if recommended)(Only if your boiler manufacturer permits.)
Steps
Estimated time: 60-120 minutes
- 1
Isolate power and water
Power down the boiler and close the main water supply to prevent uncontrolled flow. Confirm there is no pressure present by carefully checking the pressure gauge and relief valves per the manufacturer’s instructions.
Tip: Always verify the boiler is cool before touching valves. - 2
Relieve pressure and drain
Open the drain valve slowly to relieve pressure, then collect the water in your bucket. Use caution as water can be hot if the boiler has been recently active.
Tip: Close the valve before refilling to prevent spillages. - 3
Flush with clean water
Attach a garden hose to the drain and flush the system until the water runs clear of sediment. This may require running several gallons through the loop depending on system size.
Tip: Inspect for flow consistency; erratic flow may indicate a blocked path. - 4
Test water quality
Use pH strips or a digital tester to verify pH and other indicators. Record readings to guide chemical dosing and future maintenance.
Tip: Take multiple readings across zones if you have a multi-loop system. - 5
Apply inhibitors or cleaners
Add inhibitors or cleaners exactly as directed by the product label. Avoid mixing products and never exceed recommended dosages.
Tip: After introduction, allow circulation for a period to ensure even distribution. - 6
Refill and repressurize
Close drains, refill slowly, and re-pressurize to the manufacturer’s setting. Bleed air from radiators or vents if present and check for leaks.
Tip: Keep an eye on pressure; rapid changes can indicate a leak. - 7
Final flush and test
Run the boiler for a complete cycle, then re-check water chemistry. Confirm there are no leaks and the system stabilizes at normal operating conditions.
Tip: Document the dates and readings for your maintenance log. - 8
Record-keeping
Note the chemicals used, dates, readings, and any observations. This helps plan future maintenance and track system health.
Tip: Set reminders for the next flush cycle based on system usage. - 9
When to call a professional
If you encounter persistent leaks, unusual noises, erratic pressure, or CO concerns, seek a licensed technician.
Tip: Safety first: if in doubt, step back and call for help.
Questions & Answers
Is it safe to flush my boiler water myself?
Yes, DIY flushing can be safe for simple boilers if you follow safety steps and shut off power. If your system is complex or you’re unsure, consult a professional.
Yes, you can flush a simple boiler yourself if you follow the safety steps and shut off power; for complex systems, hire a professional.
How often should I flush boiler water?
The frequency depends on water quality and system usage. Many homeowners perform a flush during annual maintenance, with adjustments as needed based on test results.
Flush frequency depends on water quality and use; many do it during annual maintenance and adjust based on test results.
What chemicals are safe for boiler water?
Use inhibitors or cleaners designed for boiler systems and follow the manufacturer’s directions. Do not mix products and avoid adding chemicals when the system is pressurized.
Use only boiler-approved inhibitors and cleaners per the label. Do not mix products and avoid adding chemicals when pressurized.
Can flushing prevent leaks?
Flushing reduces sediment and corrosion risk, which lowers the chance of leaks over time. Leaks can still occur from wear, so monitor and service as needed.
Flushing helps reduce leak risk by keeping corrosion down, but worn parts may still leak and require service.
What are signs I need to flush now?
Look for reduced efficiency, strange noises, cold spots, rusty water, or heavy sediment. If you notice these signs, inspect and consider flushing.
If you notice reduced efficiency, unusual noises, or murky water, consider flushing and testing the water.
Should I hire a professional to clean boiler water?
If you have a complex system or safety concerns, hire a licensed technician. For straightforward residential setups, careful DIY with guidance can suffice.
For complex systems, hire a licensed pro; for simple residential setups, you can do it yourself with proper guidance.
Key Points
- Isolate and safely depressurize the boiler before work.
- Flush until water runs clear to remove sediment.
- Test water chemistry and apply inhibitors as directed.
- Refill, bleed air, and verify system stability after treatment.
- The Boiler Hub team recommends documenting maintenance and seeking professional help when needed.