How to Clean a Boiler: Step-by-Step Guide
Learn how to clean a boiler safely, remove sediment, and improve efficiency. This Boiler Hub guide covers safety checks, tools, and a clear flush process for homeowners and managers.

Learn how to clean your boiler safely, remove sediment, and improve efficiency. This guide covers safety checks, required tools, and a step-by-step flush procedure you can perform as a confident homeowner or facilities manager. We'll explain when cleaning is necessary, how to avoid mistakes, and how to verify the boiler operates correctly after service.
Why a clean boiler matters
A clean boiler runs more efficiently, uses less fuel, and is less prone to unexpected breakdowns. Sediment, sludge, and mineral scale in the heat exchanger and hydronic circuits impede heat transfer and raise operating temperatures. Over time this can shorten equipment life and increase energy costs. According to Boiler Hub, neglecting routine cleaning is a common cause of reduced performance in residential and small commercial systems. Regular maintenance not only saves money but also supports safer combustion and lower emissions. If you’ve noticed nuisance noises, slower heating, or radiator cold spots, a cleaning may be appropriate. This section lays the groundwork for understanding what you’re removing, why it matters, and how to plan a safe cleaning strategy.
Safety first: before you start
Safety is non-negotiable when working on boilers. Always switch off the power at the main switch and lock out the circuit if possible. Allow the system to cool; hot surfaces and steam can cause severe burns. Vent any flammable gases according to local codes and keep a clear path away from occupied spaces. Wear eye protection and heat-resistant gloves, and keep children and pets away during the process. If you smell gas, notice a strong gas leak, or feel dizzy, stop immediately and call your gas provider or emergency services. These precautions protect you, your family, and your property while you perform routine maintenance.
Signs you need a cleaning and how to schedule it
Watch for indicators that sediment or corrosion is building up: slower heat delivery, strange banging or gurgling noises, radiator cold spots, or fluctuating boiler pressure. If you see discolored water, a persistent smell, or if the equipment cycles more often than usual, consider a cleaning. The decision to clean can also depend on water quality and boiler type. Homeowners can perform basic checks, but a thorough flush is best done by a qualified technician who can confirm system integrity and safety. Set a maintenance reminder and align cleaning with your annual service schedule.
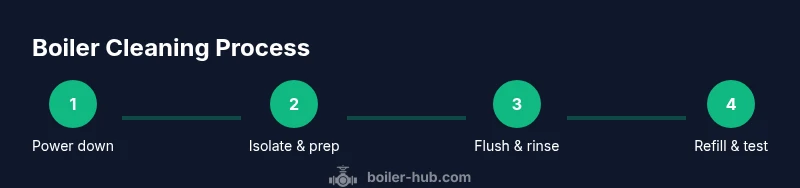
A high-level view of the flush process
This overview describes the key stages of a boiler flush without getting into hazardous details. The process typically involves isolating the boiler, connecting a discharge hose, draining the system to remove sludge, and recharging with clean water. Some installations use specialty cleaners to loosen sludge and scale, which are flushed out through the drain. The entire operation should be monitored for leaks, pressure changes, and proper venting. After completion, the system is refilled and bled to remove trapped air, then tested to confirm safe operation.
Common contaminants and their impact on performance
Sludge and mineral scale form from minerals dissolved in makeup water and from corroded metal byproducts. Sludge can settle in the boiler’s low-flow regions, reducing heat transfer and causing overheating. Scale forms a barrier that slows water flow and reduces efficiency. Both can lead to more frequent cycling, higher fuel usage, and potential hot spots that damage the heat exchanger. Understanding what you’re removing helps you communicate with a technician and ensures the right approach is taken for your boiler type.
Post-cleaning maintenance and ongoing care
After a cleaning, document the work, dates, readings, and any observations. Refill slowly, check for leaks, and bleed air from radiators as needed. Schedule a follow-up inspection per your boiler type and local regulations, and consider a professional annual service to validate burner settings, venting, and safety devices. Maintain a simple log of pressure readings, water quality, and any troubleshooting notes so future maintenance goes smoothly.
Tools & Materials
- Safety goggles(ANSI Z87.1-rated splash protection)
- Heat-resistant gloves(Protect hands from hot surfaces and cleaners)
- Bucket or drain pan(Collect wastewater; choose at least 2-3 gallons)
- Hose with clamps(4-6 ft length; ensure compatibility with drain)
- Adjustable wrench(For service valves and bleed valves)
- Screwdrivers (flat & Phillips)(Access covers and fittings)
- Pliers(Clamp hose and secure connections)
- Boiler flush kit (optional)(Contains cleaners and fittings if supported)
- Towels/absorbent rags(Clean spills and surfaces)
- Flashlight(Better visibility in tight spaces)
Steps
Estimated time: 60-120 minutes
- 1
Power down and isolate boiler
Turn off electrical power to the boiler and isolate the water supply. Allow the unit to cool before touching any parts to reduce the risk of burns or electric shock.
Tip: Verify power is off with a tester; never rely on a single pull switch. - 2
Close gas/fuel valve and service valves
Shut off the fuel supply and close the boiler's service valves to prevent backflow during the flush. This protects you and the system from pressure surges during the procedure.
Tip: Note the system pressure before closing so you can restore it accurately afterward. - 3
Attach the drain hose and position the bucket
Connect a discharge hose to the drain valve and secure it with clamps. Place a bucket or drain pan to collect wastewater and keep the area clean.
Tip: Ensure the hose has a steady downward slope away from electrical components. - 4
Open drain valve and begin flushing
Open the drain valve slowly and let water carry away sludge. Monitor the color and clarity of the effluent and stop if sludge is still heavy or pressure spikes.
Tip: Open slowly to avoid water hammer; stop if you notice unusual movement in gauges. - 5
Add cleaner (if recommended)
If the manufacturer or flush kit recommends a cleaner, add it according to the label. Run the system for the recommended dwell time before flushing again.
Tip: Never mix cleaners with other chemicals or with chlorine-based products. - 6
Rinse until water runs clear
Continue flushing with clean water until the effluent is clear and free of visible debris. This step ensures residual sludge is removed.
Tip: Keep the drain closed while rechecking for a while after the rinse to prevent backflow. - 7
Refill and bleed air
Close the drain, gradually refill the system to the proper pressure, and bleed air from radiators as needed. This prevents air pockets that reduce efficiency.
Tip: Use radiator keys to bleed and recheck pressure after filling. - 8
Test run and inspection
Power the boiler back on and observe burner operation. Look for leaks and listen for unusual noises; verify flame color is steady blue.
Tip: Record readings (pressure, temperature) and note any faults for future service.
Questions & Answers
Is cleaning dangerous for my boiler?
Cleaning a boiler can be safe if you follow safety steps and manufacturer guidelines. Do not work on gas lines or electrical components without proper training.
Cleaning a boiler can be safe when you follow safety steps and manufacturer guidelines. Avoid working on gas lines unless trained.
Can I flush a boiler myself?
A basic flush can be performed by a capable homeowner, but more complex or pressurized systems are safer in the hands of a professional.
A basic flush can be DIY, but for complex systems, hire a professional.
What are signs of a clogged boiler?
Slower heating, banging noises, radiator cold spots, and fluctuating pressure suggest buildup that may require cleaning.
Look for slow heat, odd noises, and radiator cold spots.
What chemicals are safe to use during a flush?
Use products recommended by your boiler manufacturer or a qualified technician; avoid mixing cleaners.
Only use manufacturer-approved cleaners; don't mix chemicals.
Do I need to bleed radiators after flushing?
Bleeding removes trapped air after a flush and helps restore even heating; check radiator valves and repressurize the system.
Yes, bleed radiators after flushing to remove air.
Will cleaning void my boiler warranty?
Warranty terms vary; check the documentation or contact the manufacturer. Some require professional service for coverage.
Warranty rules vary; read the terms or contact the maker.
Watch Video
Key Points
- Plan safety first and power down before work.
- Follow manufacturer guidance and avoid unapproved cleaners.
- Bleed radiators and verify system pressure after cleaning.
- Schedule annual maintenance for reliability and efficiency.