Boiler Flush: Step-by-Step Guide for Safer Heating
Learn how to perform a boiler flush safely, when it's needed, and a step-by-step approach to maintain efficiency and prevent breakdowns. Practical guidance from Boiler Hub.

A boiler flush helps remove sludge and scale to restore heat transfer and efficiency. It’s recommended when signs of buildup appear, after long periods of inactivity, or when water quality issues are suspected. Use the right cleaners or a professional service to avoid damage to seals, pumps, or the boiler itself. The process varies by system type (hot-water, system, or combi).
What is a boiler flush?
A boiler flush is a maintenance procedure designed to remove sludge, rust, and limescale from your heating system. In a typical hot-water or combi boiler, water circulates through radiators and a heat exchanger. Over time, minerals from hard water and corrosion byproducts form sludge that sticks to the inside of pipes and valves, restricting flow and absorbing heat. A flush uses a combination of water and cleaning agents to dislodge debris and carry it out of the system through a dedicated drain or radiator lock shield. If done correctly, it can restore heat transfer, improve boiler efficiency, and reduce the risk of cold spots or noisy radiators. At Boiler Hub, we emphasize that flushing should be performed with the right chemical balance and by honoring safety guidelines to avoid damage to seals, pumps, and the boiler itself. The exact steps vary by system type — hot-water, system boiler, or combi — so refer to your boiler manual and consider professional help for sealed systems.
Why a boiler flush matters for efficiency and longevity
A clean heating loop improves heat transfer, which means fewer cycles and steadier room temperatures. Sludge acts like insulation, reducing the boiler’s ability to transfer heat efficiently and forcing the pump to work harder. Over time, this can shorten component life and raise fuel or electricity bills. Boiler Hub Analysis, 2026, notes that a well-executed flush can reduce recurring maintenance needs and help maintain the system’s rated efficiency. The long-term benefits include fewer cold radiators, less noisy operation, and more predictable boiler performance. It’s worth noting that a flush is most effective when paired with a proper annual service and an assessment of water quality. Bojoule, a common term for hub-based guidance, is less important than following safe, manufacturer-approved methods. The Boiler Hub team stresses that any chemical cleaners must be compatible with your system materials and that a professional should handle sealed or high-pressure configurations to avoid leaks or pressure problems.
When to consider a boiler flush
Consider a boiler flush if you notice sludge on the discharge, cold spots across radiators, or if the system has not been serviced for several years. Signs include increased energy use, boiler cycling more often, noises from the boiler or radiators, and inconsistent heating output. For systems that have run on hard water for years, or after a major water quality issue, flushing can help restore proper flow. If you recently had a major heating-system repair or a radiator replacement, a flush post-work can ensure the new parts operate cleanly. If your home relies on a combi boiler, symptoms may appear as rads taking longer to heat up or uneven temperatures during hot water use. When in doubt, consult a boiler technician to assess whether a standard flush, a chemical flush, or a power flush is appropriate for your setup.
Types of flushes and cleaners
There are a few flush options, depending on system type and the degree of buildup. A water-only flush uses fresh water to scour the loops and radiators, which is gentler and suitable for light sludge. A chemical flush introduces cleaners designed to break down rust, sludge, and scale, then uses water to flush the contaminants out. A power flush employs higher flow and additional agitation with a machine; this is typically performed by professionals and may be recommended for heavily clogged systems or when other maintenance has been neglected. Always verify cleaner compatibility with your boiler materials, and follow label directions to prevent damage to seals, gaskets, or heat exchangers. The choice between these methods should consider the system’s age, water quality, and the presence of any corrosion inhibitors in the system fluid.
How a boiler flush can affect heating performance
A successful flush can restore radiant heat distribution and reduce boiler cycling, leading to more stable temperatures and potentially lower energy usage. Clean passages allow the heat exchanger to exchange heat more effectively, reducing the likelihood of cold spots in demanding zones. Reduced sludge also lowers hydraulic resistance, which can extend pump life and reduce noise. If you notice consistent improvements after flushing, keep up with an annual service and periodic checks of water quality to sustain gains. While a flush can bring noticeable benefits, it is not a cure-all; persistent issues may require additional repairs or component replacements. The goal is to maintain clean systems and prevent sludge buildup from recurring. Regular maintenance is a proactive approach that can save money over time by avoiding emergency repairs and inefficiencies.
Safety considerations and professional help
Always prioritize safety when handling heating systems. Gas boilers require licensed technicians for any chemical treatment or aggressive cleaning methods. If you smell gas, hear hissing noises, or notice a sudden drop in boiler pressure, stop work and contact your energy supplier or a gas engineer immediately. Electrical components should be de-energized before any work begins, and the system should not be opened beyond the manufacturer’s service clearances. Use appropriate PPE (gloves, eye protection) and avoid mixing cleaners with incompatible metals or materials. If you are unsure about the type of flush your system needs, or if you have a sealed or pressurized system, hire a qualified technician. The risk of leaks, pressure changes, or damage to gaskets can be high if the flush is performed incorrectly.
Maintenance integration: building a flushing schedule
Plan flushing as part of your overall boiler maintenance program. Use a service calendar to set reminders for inspections, cleaning, and water-quality testing. In homes with high mineral content or older systems, more frequent checks may be warranted, whereas newer boilers with good water treatment may require less frequent attention. When integrating flushing into your schedule, coordinate with your annual service, radiators bleed checks, and pressure testing to ensure a comprehensive approach. Always record the work done and the results, so you can track system health over time. Regular flushing helps maintain efficiency, extend equipment life, and preserve comfort in winter months. For most homes, a planned flush as part of a broader maintenance routine is a prudent investment in reliability and performance.
Tools & Materials
- Garden hose with shut-off valve(60–100 ft preferred; ensure hose end fits drain outlet and can withstand system pressure)
- Flushing cleaner or magnet cleaner (optional)(Choose a product compatible with boiler metal; follow label directions)
- Bucket and towels(Catch drips and keep work area clean)
- Protective gloves and safety glasses(For chemical handling and heat protection)
- Radiator bleed key or screwdriver(To vent radiators during and after flush)
- Adjustable wrench or pliers(Loosen hose fittings and drain valves)
- Drain pan or tray(Catches waste water if space allows)
Steps
Estimated time: 90-150 minutes
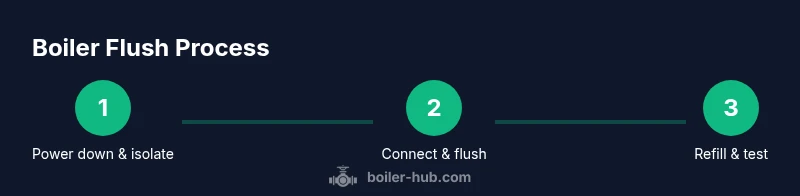
- 1
Power down and isolate
Shut off the boiler and switch off the electrical supply at the breaker. Close the feed valve to stop fresh water entering the system and carefully relieve pressure from the system using the designated drain point. This prevents hot water from spraying when connections are opened.
Tip: Double-check that the boiler is fully powered off and cooled before touching electrical components. - 2
Prepare the discharge path
Place the bucket or drain pan under the discharge point and attach the garden hose securely to guide waste water to a suitable drain. Have towels ready to catch any splashes and ensure the area is well-ventilated to minimize fumes from cleaners if used.
Tip: Test the hose flow before starting to avoid spills. - 3
Connect the flush apparatus
Attach the hose to the boiler drain valve or designated flush port. If using a cleaner, follow the product instructions for concentration and mixing. Ensure all connections are snug to prevent leaks during flushing.
Tip: Secure fittings with an adjustable wrench to prevent leaks. - 4
Flush the system
Open the flush valve slowly and begin the flush with clean water, allowing the mixture to circulate through radiators and loops for 15–30 minutes (or as directed by cleaner instructions). Monitor the discharge for clarity; continue until the water runs clear and free of sludge.
Tip: Do not exceed recommended flow; too aggressive flushing can damage seals. - 5
Refill, bleed, and test
Close the discharge valves and refill the system with clean water. Re-pressurize slowly and bleed air from radiators until steady, cold water comes from the vents. Check there are no leaks, then restore boiler power and verify correct pressure and temperature readings.
Tip: After refill, re-check pressure gauge and radiators; document the results for future reference.
Questions & Answers
Do I need a professional for a boiler flush?
For gas boilers or sealed systems, it’s best to hire a licensed technician. Improper cleaning can cause gas or pressure hazards. If you’re unsure, consult a qualified technician before proceeding.
For gas boilers or sealed systems, hire a licensed technician to avoid gas or pressure hazards.
Can I flush a combi boiler myself?
A basic water flush is possible for some combi boilers, but many models require professional handling due to compact piping and limited access. If in doubt, consult your boiler manual or a professional.
A basic flush might be possible, but check your boiler manual and consider a professional for safety.
What are signs that my boiler needs a flush?
Look for cold spots on radiators, sludge-like discharge, banging pipes, or rising energy use. If symptoms persist after service, a flush could help restore performance.
Cold radiators, sludge in discharge, banging noises, or higher energy bills can indicate a flush is needed.
How long does a boiler flush take?
A typical flush takes between 1.5 and 3 hours depending on system size and whether cleaners are used. A professional job may be faster with specialized equipment.
Usually a couple of hours, depending on your system and cleaning method.
Will flushing void warranties?
Flushing itself generally won’t void warranties if performed correctly and with manufacturer-approved cleaners. Avoid DIY methods that could damage seals or venting.
Flushing is usually fine if done properly, but avoid risky DIY methods that could affect your warranty.
Is a chemical flush necessary or can I just power flush?
Chemical flushes loosen deposits and are less invasive; power flushing uses higher flow and is more thorough but may require professional equipment. Your system type and condition determine the best option.
Chemical flushes loosen deposits; power flushing is more thorough and often done by pros depending on your system.
Watch Video
Key Points
- Identify buildup signs to decide on flushing
- Choose the correct flush method and cleaners
- Follow safety steps and call a professional if unsure
- Bleed radiators and verify system pressure after flushing
- Schedule regular flush checks to preserve efficiency