How to Clean Boiler Burners: A Step-by-Step Guide
A practical, safety-focused guide to cleaning boiler burners, covering prep, tools, methods, reassembly, testing, and ongoing maintenance to boost efficiency and reduce soot buildup.

Learn how to clean boiler burners safely and effectively, covering shutdown, access, cleaning, and reassembly. This step-by-step process helps improve efficiency and prevent soot buildup. You’ll need basic PPE, a well-ventilated area, and the right brushes and tools. Expect a thorough clean to take about 45–60 minutes for a typical residential boiler.
What burner cleaning achieves
Regular burner cleaning removes soot and deposits that impede combustion, reduces fuel waste, lowers emissions, and stabilizes flame. Clean burners improve heat transfer and boiler efficiency, help prevent puffbacks, and extend component life. In older boilers, neglecting cleaning can lead to uneven heating and more frequent service visits. By understanding typical burner designs and access points, you can plan a safe cleaning session.
Safety, prep, and environment
Safety is non-negotiable when working with gas appliances. Before you begin, power down the boiler and shut off the gas supply. Ventilate the area to avoid accumulating fumes, and wear PPE: safety goggles, gloves, and a particle mask. Keep a fire extinguisher reachable, and never bypass safety controls to speed up a cleaning.
Burner designs and common issues to inspect
Boiler burners come in various configurations (gas-fired with ignite/spark or hot-surface igniter, oil-fired with atomizing nozzles). Regardless of type, you should look for clogged ports, corrosion, warped components, and excessive soot. Uneven flame, yellow tipping, or smoky exhaust indicate cleaning is needed. If you notice damaged or worn parts, plan replacements as part of maintenance.
Tools and materials youll need
Gather a soft-bristle brush, a brass/nylon brush, a vacuum with a hose attachment, screwdrivers, wrenches, protective gear, and a non-abrasive cleaner suitable for boilers. Have rags or towels on hand to catch drips, and a soap solution or gas leak detector for leak checks after reassembly. Always follow the manufacturer’s cleaning guidelines.
Accessing the burner and removing panels (if required)
Carefully remove access panels to expose the burner assembly. Keep track of fasteners, label components if you remove multiple parts, and avoid forcing panels that are stubborn. Inspect gaskets for wear and replace them if needed to maintain a proper seal after reassembly.
Cleaning methods: removing soot and deposits
Use a nylon brush to loosen soot from burner ports, then vacuum debris with a hose attachment. For stubborn deposits, a brass brush can be used gently, but avoid aggressive scrubbing that can damage sensitive surfaces. Wipe surfaces with a damp cloth and a mild, non-abrasive cleaner, following the manufacturer’s instructions.
Reassembly, leak test, and restart procedures
Reattach panels, replace gaskets, and torque fasteners to manufacturer specs if provided. Before lighting, perform a leak test around joints using a soap solution or a gas detector; look for bubbles or a scent. If no leaks are detected, follow the startup procedure in the boiler’s manual and monitor flame stability for several minutes.
Maintenance best practices to prevent buildup
Establish a regular cleaning schedule based on usage and fuel type. Record service dates and any parts replaced. Keep intake areas clean and free of obstructions, ensure proper venting, and consider scheduling annual professional inspections for safety and efficiency.
Troubleshooting after cleaning
If the boiler still runs poorly after cleaning, check for ignition problems, fuel supply issues, or control faults. Yellow or unstable flames can indicate incomplete combustion or a misadjusted air-to-fuel ratio. If problems persist, contact a licensed technician to inspect the burner and related controls.
Tools & Materials
- Safety goggles or face shield(To protect eyes from debris)
- Nitrile gloves(Chemical and grime protection)
- Dust mask or respirator(For fine soot particles)
- Soft-bristle brush (nylon)(Gentle scrubbing of burner ports)
- Wire or brass brush(For tougher grime on refractory surfaces; use cautiously)
- Vacuum with hose attachment(Clean debris and soot)
- Screwdrivers set (flat and Phillips)(Access panels and mounting screws)
- Wrench or socket set(Disconnect fittings as needed)
- Soft cloths or rags(Wipe and dry surfaces)
- Non-abrasive boiler cleaner or mild detergent(Follow manufacturer guidelines)
- Gas leak detector or soap solution(Check connections after reassembly)
- Multimeter (optional)(For electrical controls)
Steps
Estimated time: 45-60 minutes
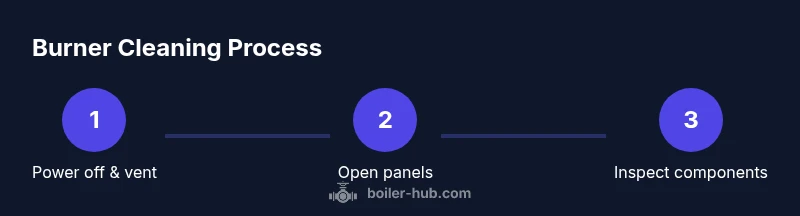
- 1
Power off and isolate the boiler
Turn off the boiler at the wall switch and shut off the gas supply. If your system has an electrical disconnect, switch it off as well. Verify there is no gas odor and that the area has good ventilation before you start.
Tip: Double-check with a non-contact tester that power is off; confirm the gas valve is closed. - 2
Access the burner assembly
Remove outer panels to expose the burner housing. Keep screws organized and avoid forcing panels. Label or photograph connections to ease reassembly.
Tip: Label connection points and take photos for easier reassembly. - 3
Inspect ports and nozzle
Look for soot buildup, clogs, corrosion, and worn hardware. Check the flame sensor and igniter for signs of wear or misalignment.
Tip: Do not poke ports with sharp objects; use a gentle brush instead. - 4
Clean burner components
Use a nylon brush to loosen soot, then vacuum debris. Wipe surfaces with a damp cloth and a mild cleaner. Avoid soaking components or using harsh solvents.
Tip: Avoid water pooling near electrical components. - 5
Clean gas passages (if accessible)
Gently clean around gas jets and manifolds without disassembling critical fuel passages. Use a soft brush and avoid squeezing or bending jets.
Tip: Keep protective gear on; do not distort jets. - 6
Reassemble burner and panels
Reattach panels, replace gaskets, and ensure all fasteners are snug but not overtightened. Check that seals are intact before restoring power.
Tip: Hand-tighten screws; use a torque wrench only if specified. - 7
Test safety devices and leak seal
Reconnect power and gas. Perform a leak check around joints with a soap solution or gas detector. Do not proceed if a leak is detected.
Tip: If you smell gas, shut off supply immediately and call a pro. - 8
Restart and monitor
Light the burner according to the manual and observe flame color and stability for several minutes. Look for a clean, blue flame with minimal smoke.
Tip: If the flame is yellow or unstable, power down and recheck the air-to-fuel balance.
Questions & Answers
Is it safe to clean boiler burners yourself?
With proper PPE, ventilation, and adherence to the manufacturer’s instructions, burner cleaning can be safe for a confident homeowner. If you smell gas or feel unsure, stop and call a licensed technician.
Yes, with proper safety gear and guidelines, but stop if you smell gas.
How often should burner cleaning be performed?
Most boilers benefit from periodic maintenance and annual professional service; more frequent cleaning may be needed if you observe soot buildup or reduced efficiency.
Annual service is common; clean sooner if you notice soot or inefficiency.
What are signs that burners need cleaning?
Look for yellow or flickering flames, excessive smoke, crusty soot on the boiler, or rising fuel bills and longer startup times.
Yellow flames or more soot means it’s time to clean.
Can cleaning burners fix a boiler not turning on?
Cleaning can improve combustion and reliability, but ignition or control failures may require professional inspection or component replacement.
Cleaning helps, but persistent start problems should be checked by a pro.
What safety steps should I take before cleaning?
Shut off power and gas, ventilate the area, and wear PPE. Never bypass safety devices to speed up work.
Power off, ventilate, wear PPE, and don’t bypass safety controls.
Do I need to remove the entire burner assembly to clean it?
Often you can clean accessible surfaces without full removal. Some issues require partial disassembly following the manual.
Sometimes you can clean without removing the whole assembly; follow the manual for specifics.
Watch Video
Key Points
- Power down and isolate gas before starting.
- Inspect ports and clean carefully with non-abrasive tools.
- Reassemble with proper gaskets and check for leaks.
- Test ignition and monitor flame color after cleaning.
- Maintain a regular cleaning schedule for ongoing efficiency.