How to Clean Boiler Heat Exchanger: A Step-by-Step Guide
Learn how to safely clean a boiler heat exchanger, restore heat transfer, and maintain efficiency with practical steps, tools, and pro tips from Boiler Hub.

Learn how to safely clean a boiler heat exchanger, including when to clean, needed tools, and safe methods for mechanical and chemical cleaning. This guide covers prep, flushing, post-clean checks, and maintenance tips to protect seals and optimize heat transfer. Follow Boiler Hub’s expert guidance for a reliable, home-friendly approach.
Why cleaning the boiler heat exchanger matters
If you’re wondering how to clean boiler heat exchanger, start with understanding how buildup affects performance. Mineral scale, rust, and sludge create insulating layers that reduce heat transfer, forcing the boiler to run longer and use more energy. Over time, this can shorten equipment life and lead to uneven heating across zones. Regular cleaning helps restore efficiency, lowers operating costs, and reduces the risk of overheating or cold spots. According to Boiler Hub, routine maintenance is a cornerstone of safe, reliable boiler operation. This section explains what deposits form, why they appear, and how a smart cleaning strategy fits into an annual maintenance plan. Boiler Hub analysis, 2026 shows that regular maintenance can help sustain heat transfer efficiency and extend boiler life.
How heat exchangers work in boilers
In a typical heating boiler, the heat exchanger is the core component that transfers heat from the burner to the water that feeds your radiators or underfloor system. Water passes through tiny tubes or plates as hot flue gases transfer energy to it. Because the exchanger is in constant contact with mineral-laden water in many homes, it is prone to mineral scale, rust, and organic buildup. A clean exchanger conducts heat more efficiently, reduces the boiler’s firing rate, and improves flow through the system. Understanding the basic flow helps you recognize when cleaning is likely beneficial and how long you might expect between cleanings. If you have a condensing boiler, keeping the exchanger free of deposits is even more critical, because efficiency gains are directly tied to the ability to extract heat from combustion products. Boiler Hub’s guidance emphasizes matching cleaning methods to your boiler design and water quality for best results.
Deposits that degrade heat transfer
The heat exchanger accumulates several types of deposits: mineral scale from hard water, sludge from tannin-rich water, and corrosion products from neglected maintenance. Scale crystals form a barrier on the metal surface, reducing heat transfer, while sludge can create flow restrictions. Rusty deposits may accompany leaks and reduce heat transfer as well as structural integrity. The exact mix depends on water chemistry, system temperature, and maintenance history. Deposits tend to accumulate near the inlet and outlet ports where water velocity changes and where flux is highest. Regular inspection and targeted cleaning help identify buildup early, preventing more serious issues such as reduced reliability or overheating. The goal of cleaning is to remove these deposits safely while preserving gaskets, seals, and coatings.
Safety and prep before you begin
Safety is non negotiable when working on boilers. Start by turning off the boiler and disconnecting power, then close the gas shutoff if applicable. Allow the unit to cool to a safe handling temperature. Vent any pressure according to the manufacturer’s directions and place a drain pan to catch returning fluids. Wear PPE: splash-resistant gloves, eye protection, and a respirator if your cleaner emits fumes. Keep children and pets away, and ensure adequate ventilation in the work area. Have a CO detector in place if your system uses natural gas or propane. If you’re ever unsure about your boiler’s wiring or gas connections, pause and seek professional help; a misstep can be dangerous.
Cleaning methods: mechanical vs chemical cleaning
There are two primary paths for heat exchanger cleaning. Mechanical cleaning uses brushes, scrapers, and flushing to dislodge deposits without chemical action. It’s often preferred for mild buildup and when you want to avoid chemical exposure. Chemical cleaning uses approved descalers or cleaners that dissolve mineral scale. Follow the cleaner’s instructions to mix concentrations, contact times, and flush volume. For most residential boilers, a combination approach—mechanical cleaning to loosen deposits followed by a targeted flush with a mild descaler—works well. Always verify compatibility with your boiler materials and seals. Boiler Hub notes that matching the method to water quality and exchanger design yields the most reliable results.
Post-clean verification and refilling
After cleaning, thoroughly flush the system with clean water to remove residues. Refill with the proper water and corrosion inhibitors as specified by the boiler maker, then re-pressurize slowly to avoid surges. Check all joints and gaskets for leaks, and reattach panels or covers. Restart at a low-fire setting and observe for abnormal sounds, vibrations, or smoke. If a preset CO detector alarms, shut down and reassess. Document the service, including products used and contact times. A successful clean should restore heat transfer efficiency and normal heating performance within a few cycles.
Maintenance scheduling to prevent buildup
In areas with hard water, plan a professional-scale cleaning annually or more often if the system experiences heavy use. For softer water, once every 2-3 years might suffice, but always follow the boiler manufacturer’s maintenance schedule. Use a water treatment plan to minimize scale formation, such as softened or conditioned water where appropriate. Keep a maintenance log with dates, tasks performed, and observed performance metrics like outlet water temperature and fuel consumption. Regular checks help catch early signs of deposits and keep the exchanger performing at peak efficiency. Boiler Hub analysis, 2026 shows that regular maintenance reduces unexpected failures and helps preserve efficiency.
When to call a professional
If you encounter persistent scale despite cleaning attempts, if you notice leakage around the exchanger, or if your boiler shows erratic cycling, it’s time to call a qualified technician. A pro can perform diagnostic tests, use non-destructive inspection methods, and, if necessary, perform a chemical or mechanical clean with equipment designed for your unit. Complex exchangers, sealed systems, or gas-fired boilers are best serviced by licensed boiler technicians who follow local safety regulations. Remember, professional service is an investment in long-term reliability and safety. The Boiler Hub team recommends scheduling annual heat exchanger checks as part of boiler maintenance.
Visual indicators and next steps
Watch for reduced heating performance, louder than usual boiler operation, higher energy bills, or unexplained odors near the unit. If you notice any steam or water leakage, shut off power and gas supply and call a technician immediately. After a successful clean, monitor performance for several days and compare to prior energy use to quantify improvement. The key is to maintain a regular maintenance cadence so deposits don’t reach levels that require more invasive measures.
Tools & Materials
- Personal protective equipment (PPE): safety goggles, gloves(Essential to protect eyes and skin from cleaners and hot surfaces)
- Boiler shutoff valves and power disconnect(Isolate boiler and prevent electrical shock)
- Garden hose with spray nozzle(For flushing and general rinsing)
- Non-metallic brush or soft-bristle brush(Avoid scratching heat exchanger surfaces)
- Descaling cleaner or manufacturer-approved cleaner(Use only cleaners approved for boilers)
- Bucket, towels, drain pan(Contain spills and catch effluent)
- Wrenches and screwdrivers(Access panels and fittings)
- Ventilation aid and CO detector(Recommended for gas boilers; improves safety)
- Water treatment inhibitors(Inhibitor to reduce corrosion and scale formation)
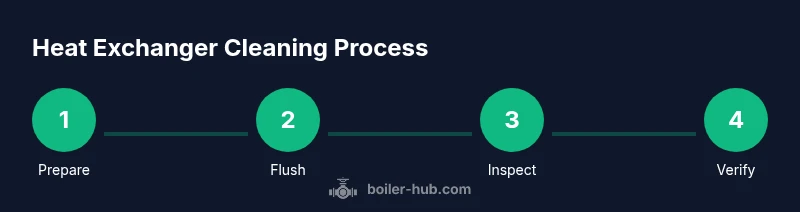
Steps
Estimated time: 45-75 minutes
- 1
Prepare the boiler and workspace
Review the boiler manual, gather tools, and clear the area. Confirm shutdown and lockout procedures, ensuring the area is well-ventilated. Label components that will be moved and set a clear workspace to avoid accidental re-energizing.
Tip: Document the equipment serials and cleaning date for future maintenance logs. - 2
Isolate power and depressurize safely
Turn off electrical supply to the boiler and close any gas valves if applicable. Allow the unit to cool and slowly release pressure according to the manufacturer’s guidelines. Place a drain pan to catch any residual water.
Tip: Never work on a hot boiler; burns are common and preventable. - 3
Access the heat exchanger and inspect
Remove access panels to expose the exchanger and visually inspect for scale buildup, corrosion, or damaged gaskets. Note the most accessible cleaning points and plan your cleaning route.
Tip: Photograph deposits for reference to track progress over time. - 4
Choose cleaning method and prepare cleaners
Select a cleaning method compatible with your exchanger and water chemistry. Mix cleaners per instructions and wear PPE. Set up a separate wash station for rinsing to avoid cross-contamination.
Tip: Start with mechanical cleaning to minimize chemical exposure if deposits are light. - 5
Apply cleaning method and flush
Apply the cleaner or mechanical agitation to loosen deposits, then flush with clean water or a controlled descaling rinse. Capture the effluent for disposal per local regulations and repeat as needed until water runs clear.
Tip: Avoid harsh scrubbing that could damage seals; gentler, thorough brushing is more effective. - 6
Reassemble, refill, and test
Reconnect panels, slowly refill with water, and re-pressurize. Check for leaks, restart at a low fire, and monitor for proper operation and venting. Verify that outlets reach expected temperatures and that there are no abnormal sounds.
Tip: Keep a log of readings and any adjustments made during the test run.
Questions & Answers
Is it safe to clean a boiler heat exchanger myself?
Cleaning can be safe if you follow the manufacturer’s guidelines, isolate power, and use proper cleaners. For complex or sealed systems, hire a licensed professional.
Yes, but only if you follow safety steps and the boiler maker's guidelines. For complex systems, seek a licensed professional.
What cleaners are safe to use on boilers' heat exchangers?
Use cleaners approved for boilers or descalers recommended by the boiler manufacturer. Avoid strong acids unless specified for your unit.
Only use cleaners approved by your boiler manufacturer; avoid acids unless stated.
How often should I clean the heat exchanger?
Frequency depends on water hardness and system use. Many residential systems benefit from annual checks as part of annual maintenance.
Most homes benefit from annual checks as part of a maintenance plan.
Can cleaning improve boiler efficiency?
Cleaning can restore heat transfer efficiency and reduce energy use, though gains vary with system design and condition.
Yes, it can improve efficiency, but results vary.
What signs indicate a dirty heat exchanger?
Frequent cycling, reduced output, higher energy bills, or odd smells can signal buildup. If you suspect a problem, inspect and clean as needed.
Look for less heat, noises, or higher bills and inspect the exchanger.
What safety steps are essential?
Shut off power, vent safely, and wear PPE. Do not open pressurized sections. If unsure, call a professional.
Safety comes first: power off, vent, PPE, and avoid pressurized work.
Watch Video
Key Points
- Plan safety first with shutdown and venting steps.
- Choose the cleaning method based on exchanger design and water quality.
- Flush thoroughly and verify performance after cleaning.
- Schedule regular maintenance to prevent buildup.