How to Check If Your Boiler Thermostat Is Working
Learn a clear, safety-focused method to verify your boiler thermostat is working, troubleshoot common issues, and decide when to replace. A practical guide from Boiler Hub for homeowners and managers.

Learn how to check if your boiler thermostat is working, including signs of trouble, safe testing steps, and when to call a pro. This quick guide covers visual checks, basic electrical tests, and how to verify that your boiler responds to temperature changes. By following these steps, you’ll determine if the thermostat is functioning properly or needs replacement.
Why Checking the Boiler Thermostat Matters
According to Boiler Hub, your boiler thermostat is the control center for comfort, energy use, and safety. If the thermostat isn’t reading correctly or failing to call for heat, your home may be either uncomfortably cold or wasting energy. A failing thermostat can also cause the boiler to short-cycle, which stresses the system and shortens its life. Learning how to check if boiler thermostat is working helps you catch issues early, protect occupants, and avoid surprise breakdowns. This guide emphasizes practical, safety-first testing and avoids risky DIY hacks. By understanding the thermostat’s role, you can distinguish between a simple calibration drift and a true sensor or wiring fault.
Tools and Safety Preparations
Before you begin, collect the essential tools and review safety steps. You’ll need a digital multimeter, a non-contact voltage tester, a screwdriver set, and a room thermometer for quick readings. Wear insulated gloves if you need to handle exposed wiring, and ensure the boiler area is well-ventilated. Always turn off power to the boiler at the breaker before inspecting wiring or terminals, and never bypass safety switches. If you smell gas, hear hissing, or notice flames, evacuate and call your gas supplier or emergency services. Following these precautions reduces the risk of electric shock or gas-related hazards. Remember: if you’re unsure about electrical work, contact a licensed technician.
Visual Inspections and Calibration Checks
A quick visual inspection can reveal obvious problems. Look for loose or corroded wires at the thermostat terminals, signs of discoloration, or a thermostat that feels warm to the touch. If you have a dial-type thermostat, rotate gently between the minimum and maximum settings to confirm the dial responds smoothly. Digital units should wake up quickly when you press a button or adjust the setpoint. If you notice a mismatch between the setpoint and the actual room temperature, or if the display is dim or unreadable, the thermostat may need recalibration or replacement. Keep a photo of the wiring and settings for reference when you consult a professional.
Electrical and Signal Tests You Can Safely Do
Testing the electrical signal from the thermostat helps separate sensor issues from wiring problems. With power safely restored for this portion, use a digital multimeter to check for continuity between thermostat terminals when the setpoint is changed. A non-contact voltage tester can confirm that the thermostat terminals are live when the system calls for heat. If readings are inconsistent or absent, a loose connection, damaged wire, or a faulty control board could be at fault. Do not force connections or modify the circuit; document any abnormalities before seeking professional help.
Verifying Boiler Response to Temperature Changes
The true test is whether the boiler responds appropriately to setpoint changes. Restore power, set the thermostat to a high temperature, and wait 60–90 seconds to see if the boiler ignites. Then lower the setpoint and observe whether the boiler shuts off after a short delay. Use a room thermometer to confirm that the observed changes align with the thermostat’s readings. If the boiler fires but never reaches the target temperature, or if it runs continuously despite the correct setpoint, there’s likely a control or sensor fault that requires replacement or repair.
Troubleshooting When Issues Appear
If you detect issues during any step, start with recalibrating or resetting the thermostat to factory defaults, then re-run the test. Loose wiring, aging sensors, or faulty control boards are common culprits. If recalibration doesn’t fix the problem, compare the thermostat’s age with the boiler’s age to decide whether to replace the unit. In systems with zone valves or multiple thermostats, a single faulty stat can disrupt the entire circuit. When in doubt, consult the boiler’s service manual or contact Boiler Hub for a professional assessment.
Maintenance Tips to Extend Thermostat Life
Regular maintenance can prolong thermostat life and improve accuracy. Keep the thermostat and surrounding area clean from dust, ensure it isn’t placed behind furniture or curtains, and replace batteries promptly if you have a wireless model. For programmable units, update schedules seasonally and verify that the program aligns with your actual living patterns. If you install a new thermostat, follow the manufacturer’s pairing steps and ensure a secure, labeled wiring match. Consistent maintenance reduces drift and minimizes unexpected operation problems.
Authority Sources
To deepen your understanding and verify guidance, consult reputable sources such as:
- https://www.energy.gov/energysaver/thermostats
- https://www.energystar.gov
- https://www.nist.gov/topics/building-automation-and-control-systems
Tools & Materials
- digital multimeter(Check continuity across thermostat terminals; use the manual for correct range settings.)
- non-contact voltage tester(Verify live circuits safely before touching wires.)
- screwdriver set (Phillips and flathead)(Open thermostat cover and terminals without damaging the casing.)
- room thermometer(Track actual room temperature vs. setpoint for drift checks.)
- camera or phone to document wiring(Take photos of wiring before adjustments for reference.)
- notebook and pen(Record settings, times, and observed responses.)
Steps
Estimated time: 30-45 minutes
- 1
Power off the boiler at the breaker
Begin by turning off power to the boiler at the main breaker or service disconnect. This reduces the risk of electric shock while you inspect wiring. If your system has a local switch near the boiler, turn that off as well. Confirm with the voltage tester that no live potential remains before touching components.
Tip: Use a non-contact tester to verify the absence of voltage before you touch wires. - 2
Open the thermostat cover and inspect wiring
Gently remove the cover and visually inspect the wiring at the thermostat terminals. Look for loose, frayed, or corroded connections and note the terminal order. If you have a photo of the original setup, compare it to the current wiring to spot changes.
Tip: Take a high-quality photo of the wiring before making any changes. - 3
Check thermostat settings and calibration
Confirm the thermostat is set to a reasonable temperature, and that a dial responds smoothly when rotated. If the unit is digital, ensure the display is active and there are no error codes. Record the current setpoint and room temperature for later comparison.
Tip: Avoid forcing a dial past its stops; calibrated settings should move within the range without sticking. - 4
Restore power and test heat call
Turn the power back on and set the thermostat to a high temperature. Wait 60–90 seconds and listen for the boiler ignition or circulation pump. If the boiler does not respond, consider rechecking wiring and connections before proceeding to the next steps.
Tip: Be ready to shut the system off again if it starts behaving erratically. - 5
Verify response to rising setpoints
Observe whether the boiler ignites and the heat actually circulates. Use a room thermometer to confirm temperature increases align with the setpoint. If you don’t see a response, there may be a fault in the thermostat, relay, or control board.
Tip: Document the exact time you observe a response to compare with future tests. - 6
Test shut-off by lowering the setpoint
Lower the thermostat setpoint and wait for about 60 seconds. The boiler should stop firing and the circulator may shut down. If the boiler continues running, recheck wiring and consider replacing the thermostat.
Tip: Avoid panicking if it stops briefly; some systems have a slight delay before stopping. - 7
Decide on next steps based on results
If the boiler responds reliably to setpoint changes and readings match, the thermostat is likely functioning. If issues persist, plan recalibration, replacement, or professional service. Keep a log of tests and outcomes for future reference.
Tip: If in doubt, schedule a pro assessment to avoid unsafe DIY repairs.
Questions & Answers
What are the most common signs a boiler thermostat is failing?
Look for inconsistent heating, thermostat won’t respond to setpoint changes, inaccurate temperature readings, or the boiler short-cycling. These indicate potential sensor or wiring faults.
Common signs include inconsistent heat and the boiler not responding to temperature changes, which suggests a sensor or wiring issue.
Can I test a thermostat without any tools?
Basic checks like verifying visual wiring and testing with the setpoint can help, but a multimeter or tester provides more certainty about electrical continuity and live signals.
You can do a quick visual check, but for electrical tests you’ll want a multimeter for accuracy.
Should I replace the thermostat or just recalibrate?
If calibration drifts after recalibration or the unit is old and faulty, replacement is often the safer, longer-term solution. Start with checking compatibility with your boiler.
If recalibration fixes nothing or the unit shows obvious wear, replacing the thermostat is usually best.
Is it safe to bypass the thermostat to test the boiler?
No. Bypassing removes essential safety controls and can cause overheating or fire hazards. Use the thermostat as the control, not a workaround.
Never bypass thermostat controls; it’s unsafe and can damage the boiler.
When should I call a professional?
If you’re uncomfortable with electrical work, or the boiler is gas-powered and shows persistent faults after checks, contact a licensed technician for a thorough diagnosis and safe repair.
If you’re unsure or see gas-related issues, call a licensed technician for safety.
Watch Video
Key Points
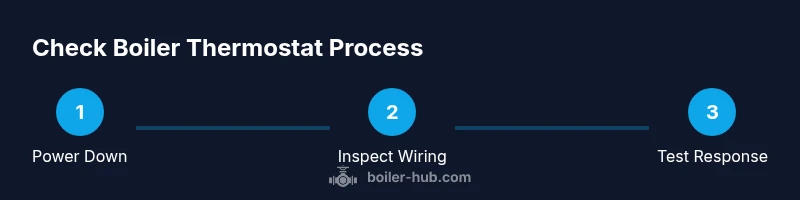
- Power down before inspecting wiring
- Confirm thermostat responds to setpoint changes
- Document results to guide replacement decisions
- Consult a professional if you’re uncertain about electrical testing