Drain Boiler: Safe Step-by-Step Guide
Learn how to drain a boiler safely, remove sediment, and restore proper pressure. This expert guide from Boiler Hub covers tools, steps, and maintenance tips to prevent future problems.

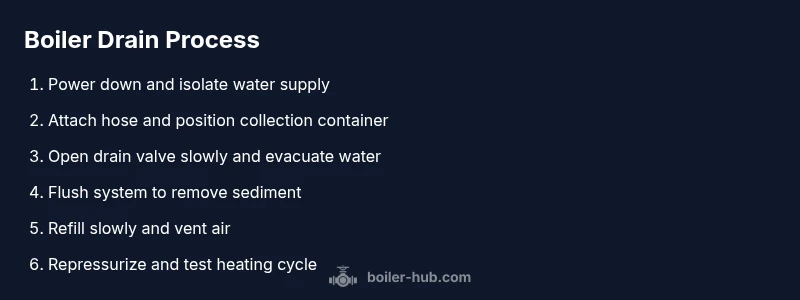
You will drain the boiler using a controlled sequence: power down, isolate water, connect a hose and container, slowly open the drain valve to remove water, flush out sediment, then refill, vent air, and re-pressurize. Gather a bucket, hose, towels, and basic hand tools to complete the process. This helps prevent sediment buildup, noisy operation, and inefficient heating.
Safety prerequisites and shutdown: preparing to drain the boiler
Drain boiler work should begin with safety as the top priority. Ensure the boiler is completely cooled before touching any components. Turn off electrical power at the breaker or switch, and if your system is gas-fired, set the thermostat to off and confirm the burner isn’t active. Close the cold-water isolation valve to prevent new water from entering the boiler while you work. This minimizes scald risk and sudden pressure changes. According to Boiler Hub, safety is non-negotiable when performing boiler maintenance. Wear PPE such as gloves and eye protection, and keep a companion nearby to assist with hose handling and spills. Always consult the boiler manual or a licensed technician if you’re unsure about any step.
Tools and safety gear you’ll need
Before you start draining a boiler, gather essential tools and safety gear. A drain valve key or adjustable wrench that fits your boiler’s drain valve is critical. A sturdy hose, a bucket or basin capable of holding several liters, and a large towel or rag help manage spills. You’ll also need protective gloves, splash goggles, and, if available, a multimeter to verify power status. Keep a secondary container for sediment samples and a flashlight to inspect the drain area. Having everything organized reduces the chance of accidental leaks and makes the job safer and faster.
Preparing the drain and setting up the collection
Position your work area to contain any potential spills. Place the bucket or basin on a dry, level surface and lay down towels to catch drips. Attach the hose securely to the boiler’s drain valve, ensuring the other end drains into the bucket or a floor drain. If your drain valve is stiff, apply a little penetrating lubricant and allow a moment before attempting to turn it. Verify that the hose lies downhill toward the collection container to prevent backflow. This setup keeps your space cleaner and reduces the risk of scalding from hot water.
Draining the boiler and removing sediment
Open the drain valve slowly to start the water flow. A gradual opening reduces the chance of a sudden rush that could splash hot water. Monitor the flow and the water’s clarity; you’re looking to wash out sediment and mineral deposits that accumulate over time. If your system has a service port or flush valve, consider briefly flushing with clean water to help carry sediment out. Keep one hand on the valve and one on the hose to prevent accidental detachment. Expect water to continue draining for several minutes depending on system size.
Flushing, refilling, and venting air
After the bulk of the water has drained, close the drain valve and prepare to refill. Open the cold-water supply gradually while watching the boiler pressure gauge. As water returns, listen for air escaping from radiators or the boiler’s automatic air vent and use the radiator bleed screws to purge air from the system if needed. Do not force water in too quickly; a slow, steady refill helps minimize air pockets. Once the system is filled to the recommended pressure, briefly run the boiler to move any remaining air toward vent points.
Repressurizing and testing the heating cycle
With the system refilled, repressurize to the boiler’s required operating pressure. This is typically shown in the manual as a range (for many residential boilers it’s around 12–15 psi when cold, higher when warm). Re-check for leaks at the drain valve and along hose connections. Restore electrical power, re-enable gas if applicable, and run a short heating cycle to verify normal operation and listen for unusual noises. If the pressure climbs higher than spec, shut down, vent air, and adjust the fill valve as needed.
Troubleshooting and maintenance considerations
If water continues to drain after you’ve closed the valve or if you notice persistent air gaps, there may be an underlying issue such as a faulty valve, blocked vent, or sediment buildup in the heat exchanger. Inspect drain components for wear and corrosion, and replace damaged parts. Regular maintenance—flushing on a schedule, testing safety devices, and cleaning strainers—reduces the need for frequent drain-and-fill cycles. Boiling off sediment during routine checks helps extend boiler life and maintain efficiency. As you complete the task, remember that exhaustive flushing is not always necessary; address issues only as they arise and consult a professional when complex repair is required.
Maintenance tips to prevent future sediment buildup
Preventive care saves time and money. Schedule annual boiler service to inspect valves, vents, and the circulating pump. Use softened water if your area has high mineral content to reduce mineral deposits. Keep the drain area clean and accessible so you can perform a quick drain if needed. Document the dates of maintenance so you have a clear history for future service calls. The Boiler Hub team emphasizes that ongoing maintenance is the best defense against repeated drainage and system inefficiencies.
Tools & Materials
- Drain valve key or adjustable wrench(Ensure it fits your boiler drain valve; carry a backup in case of strike resistance)
- Sturdy garden hose(Secure hose connection to prevent leaks; use a clamp if possible)
- Bucket or basin (large capacity)(Must hold several liters; position to drain into a floor drain or outdoors)
- Towels or absorbent mat(Place under the drain area to catch minor drips)
- Protective gloves(Wear heat-resistant gloves; protect hands from hot surfaces)
- Safety goggles(Protect eyes from splashes and steam)
- Flashlight or headlamp(Improves visibility in dim boiler rooms)
- Multimeter (optional)(Verify power status if you’re unsure about wiring)
Steps
Estimated time: 45-90 minutes
- 1
Power down and isolate
Turn off the boiler at the breaker or switch. If gas, switch off the thermostat and ensure the unit isn’t firing. Confirm no power is reaching the boiler before proceeding.
Tip: Double-check with a non-contact tester or by trying to power cycle the circuit. - 2
Close the water isolation valve
Locate and close the cold-water supply valve to prevent new water from entering while you drain. Do not force the valve if it’s stiff; pause and seek assistance.
Tip: If the valve won't close, stop and call a professional to avoid over-pressurizing the system. - 3
Attach hose and position container
Secure the hose to the boiler drain valve and route it toward the bucket or drain. Ensure the container is stable and on a dry surface.
Tip: Use a hose clamp for a tight seal to minimize leaks. - 4
Open drain valve slowly
Begin opening the valve gradually to control the water flow and reduce splashes from hot water. Monitor for leaks at joints and connections.
Tip: If the flow is sluggish, check the valve thread and valve handle alignment. - 5
Flush and remove sediment
If available, use a service port to flush with clean water and wash out accumulated sediment. Allow several minutes of flushing and collect a sample to assess clarity.
Tip: Keep an eye on the water color; persistent murkiness may indicate deeper issues. - 6
Refill and vent air
Close the drain valve and begin refilling the boiler slowly through the cold-water line. Open radiator bleed screws to vent air as needed.
Tip: Do not overfill; pause to recheck the gauge as pressure rises. - 7
Repressurize and test
Restore electricity and run a short heating cycle. Confirm the pressure is within the manufacturer’s recommended range and listen for abnormal sounds.
Tip: If pressure remains high, shut down, vent, and adjust the fill valve before trying again.
Questions & Answers
Is it safe to drain a boiler by myself?
Yes, as long as you follow safety steps, wear PPE, and work slowly. If you’re unsure, call a professional.
Yes, you can drain a boiler yourself if you follow safety steps; if you’re unsure, contact a professional.
Should I shut off power and water before draining?
Yes. Turn off electricity to the boiler and close the cold-water isolation valve before draining.
Yes, shut off power and close the water valve before you drain.
What if the water looks rusty or smells?
Rusty water or a foul odor indicates sediment or corrosion. Flush again, inspect the drain valve, and consider service if problems persist.
If water is rusty or smells, flush again and check for corrosion; see a pro if it continues.
How often should you drain a boiler?
Drain only when necessary or as recommended by the manufacturer; routine flushing can help with sediment control.
Drain as recommended by your boiler’s manual, or when you notice sediment.
Do I need to re-pressurize after draining?
Yes. Refill slowly and recheck boiler pressure according to the manufacturer’s spec; adjust if needed.
Yes, re-pressurize after draining and check the pressure gauge.
Can I drain radiators separately?
Draining radiators can help remove trapped air but is usually done after boiler drain; ensure system is safely drained first.
Draining radiators can help purge air after draining the boiler.
Watch Video
Key Points
- Power down and isolate water before draining.
- Attach hose securely and drain slowly to avoid splashes.
- Vent air thoroughly after refilling to prevent air locks.
- Recheck boiler pressure and test heating cycle after operation.
- Schedule regular maintenance to prevent sediment buildup.