Connect Thermostat to Boiler: A Step-by-Step Guide
Learn how to connect thermostat to boiler for precise heating, energy savings, and improved comfort. This Boiler Hub guide covers compatibility, wiring options, safety, and troubleshooting to help homeowners and facility managers complete a safe installation.

Connecting a compatible thermostat to your boiler gives precise temperature control, better energy use, and convenient schedules. This guide helps you verify compatibility, gather the right tools, and complete a safe, step-by-step installation. By following these steps, you’ll achieve reliable boiler performance and comfortable home heating. According to Boiler Hub, proper installation also reduces wasted heat and simplifies future maintenance.
Why connect thermostat to boiler matters
Connecting the thermostat to boiler gives precise temperature control, better energy use, and convenient schedules. This is especially important for homes with fluctuating occupancy or varying boiler performance. According to Boiler Hub, implementing a compatible thermostat with your boiler can reduce unnecessary heat cycling and help maintain comfortable temperatures more consistently. Before you begin, verify that your boiler supports low-voltage thermostat wiring and confirm the thermostat is compatible with your boiler's control system. Understanding these basics will save time and prevent wiring mistakes that could affect safety or efficiency.
Compatible systems and prerequisites
Not all boilers and thermostats are created equal. Most modern boilers support two main wiring approaches: wired low-voltage controls and wireless receivers that communicate via a relay. Combi boilers and system boilers are common targets for thermostat upgrades, but compatibility varies by brand and model. Check the boiler’s control board labeling and the thermostat’s installation guide to confirm voltage, terminal designations, and whether a power-stealing or a dedicated transformer is needed. In addition, gather the boiler manual, thermostat manual, and wiring diagrams. If you are unsure, contact the manufacturer or a licensed technician. Planning saves time and reduces the risk of damaging either device.
Types of thermostats and boiler interfaces
Thermostats come in wired, wireless, and smart variants. Wired thermostats typically connect to dedicated low-voltage terminals on the boiler or a relay module. Wireless systems use a bridge near the boiler and a separate wall-mounted thermostat. Smart thermostats add scheduling intelligence and remote control but require a compatible boiler interface and often a common power supply. Your choice affects wiring complexity, power requirements, and how you configure temperature curves. If your boiler has an existing control panel with a C-wire or a 24-volt gas valve interface, you have more options. Always verify that the thermostat supports heat-only or heat-and-hot-water operation, depending on your setup.
Electrical safety and permissions
Working with boiler wiring involves electricity and gas safety considerations. Always switch off the circuit feeding the boiler at the breaker and, when applicable, the gas supply valve. Use a voltage tester to confirm no live there before touching terminals. If you need to remove the boiler cover, be mindful of heat exchangers, pressure relief valves, and condensate lines. Ultimately, if your local codes require a licensed pro for wiring a boiler thermostat, hire one. The risk of electrical shock or gas-related hazards is real, and proper permits ensure compliance.
Planning wiring paths: wired vs wireless
Decide early whether you will wire a thermostat directly to the boiler using low-voltage wires or install a wireless relay. A wired solution is generally more reliable, with fewer potential interference issues. A wireless setup offers easier placement but depends on a stable signal between the boiler relay and the thermostat. If you choose wired, you will route low-voltage wires through the wall and connect to the boiler's control terminals as indicated in the wiring diagram. If wireless, ensure the relay is powered and placed within the recommended distance from the boiler to minimize dropouts.
Installation outcomes: testing and calibration
After wiring, reassemble any access panels, restore power, and run a test cycle. Watch the boiler LED indicators and listen for any unusual noises. Verify that the thermostat can command the boiler to start and stop, and confirm that the hot-water function follows the desired schedule if your system supports it. You may need to adjust temperature setpoints, differential (the temperature gap before the boiler restarts), and boiler lockouts. Document any changes and monitor for several cycles to ensure stable operation.
Tools & Materials
- Smart thermostat (compatible with boiler)(Check compatibility with your boiler model and control interface)
- Thermostat wireless receiver/relay (if required)(Needed for wireless setups to bridge boiler control)
- Screwdriver set(Phillips and flat-head, various sizes)
- Voltage tester(Verify there is no live voltage before touching terminals)
- Multimeter(Optional, for precise voltage checks and continuity tests)
- Wire stripper/cutter(Prepare clean, stripped conductors)
- Low-voltage thermostat wires(Match gauge to terminal screws)
- Electrical tape or wire nuts(Secure connections and insulate)
- Boiler wiring diagram/manual(Reference exact terminal designations)
- Screw anchors and a drill (if needed)(For mounting the receiver in place)
- Manuals for boiler and thermostat(Keep handy for model-specific wiring details)
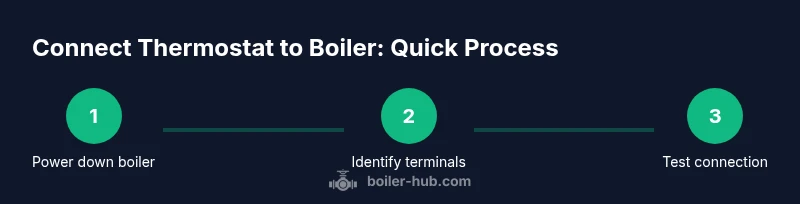
Steps
Estimated time: 45-90 minutes
- 1
Power down and safety first
Turn off the boiler power at the wall switch and the circuit breaker. If your system uses a gas valve, ensure it is closed per local codes. Wait 60 seconds to discharge any residual currents before you touch components.
Tip: Label any wires you disconnect and take a photo for reference. - 2
Check compatibility and gather diagrams
Obtain the boiler model number and thermostat model. Confirm the thermostat is designed for low-voltage boiler control and study both manuals for wiring diagrams and terminal designations.
Tip: Having manuals on hand reduces miswiring and avoids compatibility mistakes. - 3
Mount the thermostat receiver near the boiler
Choose a dry, accessible location close enough to the boiler for wiring, but out of heat sources and moisture. Mount the receiver or relay per the manufacturer’s instructions.
Tip: Keep wires neat and use strain relief to prevent pull-out. - 4
Connect the boiler control wires to the thermostat relay
Follow the wiring diagram to connect boiler control terminals (usually Rc/Rh, W, and C or S) to the thermostat relay. Use proper connectors and secure all terminals firmly.
Tip: Double-check labels and color codes before tightening screws. - 5
Program the thermostat with boiler settings
Enter the correct system type (heat-only or hot-water), set run intervals, and configure differential and setback temperatures as recommended by the boiler manual.
Tip: Start with conservative temperatures to test stability. - 6
Power up and run a test
Restore power and trigger a heat call to see if the boiler fires correctly. Confirm both heating and, if applicable, domestic hot water respond to the thermostat.
Tip: Watch for erratic cycling or no response—these require inspection. - 7
Calibrate and verify safety devices
Record observed temperatures, verify CO detectors, and ensure pressure relief and safety systems operate normally. Note any error codes and consult manuals if they appear.
Tip: If in doubt, stop and consult a professional.
Questions & Answers
Do I need a professional to install a thermostat with my boiler?
For many boiler setups, especially gas-fired systems, professional installation ensures gas safety and electrical compliance. A simple miswire can affect boiler operation or void warranties. If you have any doubts, consult a licensed technician.
For many boilers, professional installation is recommended to ensure safety and compliance. If you’re unsure, seek a licensed technician.
Will installing a thermostat affect my boiler warranty?
Installing a thermostat that is compatible with your boiler typically does not void warranties if done according to the boiler and thermostat manufacturer instructions. Always check the warranty terms and keep records of the installation.
Warranties often stay intact if you follow the manuals; keep installation records.
Is every thermostat compatible with all boiler types?
No. Compatibility depends on boiler control voltage, interface, and whether a relay or C-wire is available. Always verify the thermostat’s compatibility list against your boiler model before purchasing.
Not all thermostats work with all boilers. Check compatibility before buying.
What wiring will I need for a wired thermostat?
You will typically need low-voltage conductor wires (often 18- or 22-gauge) to connect the thermostat to the boiler’s control terminals or relay. Follow the wiring diagram precisely and insulate exposed conductors.
Wired thermostats use low-voltage wires to connect to the boiler or relay. Follow the diagram and insulate exposed wires.
Can I use a smart thermostat with a combi boiler?
Smart thermostats can work with many combi boilers, provided there’s a compatible interface (like a C-wire or relay). Check the boiler’s manual and the thermostat’s compatibility page for specifics.
Smart thermostats often work with combi boilers if there’s a compatible interface.
What should I do if the thermostat won’t connect after installation?
First, recheck wiring against the diagram and confirm power. Verify the thermostat’s settings and ensure the relay is powered. If issues persist, consult the manuals or contact a pro.
If it won’t connect, double-check wiring, power, and settings; if needed, get professional help.
Watch Video
Key Points
- Verify compatibility before wiring.
- Follow wiring diagrams exactly.
- Test thoroughly after installation.
- When in doubt, hire a professional.