How to Clean a Boiler Heat Exchanger: A Practical Guide
Learn how to safely clean a boiler heat exchanger, remove mineral scale, restore flow, and maintain efficiency with step-by-step instructions, safety tips, and maintenance guidance.

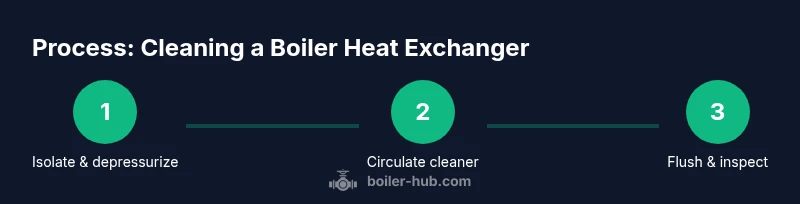
To clean a boiler heat exchanger, first shut off power and isolate the boiler, then depressurize and drain the loop. Apply an approved descaling solution, circulate it for the recommended time, flush with clean water, and inspect the exchanger before reassembling and testing the system. This process improves heat transfer, reduces fuel use, and extends equipment life when done safely.
Understanding the need for a clean boiler heat exchanger
According to Boiler Hub, the boiler heat exchanger is where heat from the burner is transferred to the water circulating through the system. When mineral scale, rust, or biological deposits form on the exchanger surfaces, heat transfer becomes less efficient, pressure can rise, and fuel consumption may increase. A clean exchanger restores flow paths and improves overall system performance, helping avoid hot spots and uneven heating in the home or facility. Regular attention to the exchanger also supports longer service life and fewer emergency repairs, aligning with practical maintenance practices favored by homeowners and facility managers alike.
Signs that your heat exchanger needs cleaning
Observe for slower heat response, colder zones in radiators or baseboard heaters, and rising energy bills that don’t align with usage. You may also notice increased boiler cycling, banging or gurgling noises in the pipes, or a visible buildup of scale on accessible components. In some cases, you’ll smell mineral odors or see white residue around vents after a burn cycle. Recognizing these indicators early helps prevent long-term damage and keeps the system running efficiently, a point highlighted in Boiler Hub Analysis, 2026.
Cleaning methods overview: chemical vs mechanical vs hybrid
There are three broad approaches to cleaning a boiler heat exchanger. Chemical descaling uses approved acids or chelating agents to dissolve mineral scale; mechanical cleaning involves brushing, scraping, or brushing through accessible passages; and hybrid approaches combine short chemical circulation with mechanical flushing. The choice depends on exchanger material, boiler design, and the type of deposits present. Always consult the boiler’s manual and use products compatible with copper, stainless steel, or cast iron surfaces to avoid corrosion.
Safety first: preparation and PPE
Before any cleaning, ensure the boiler is powered off and fully isolated from electrical supply, with gas supplies secured if applicable. Depressurize the system and drain the loop to a safe level, then flush the lines to prevent splash or splash-back. Wear chemical-resistant gloves, goggles, and a respirator as needed, and ensure proper ventilation in the work area. Keep a catch basin ready for any waste, and never mix cleaners unless the manufacturer approves the combination.
Preparing the system for cleaning: valves, drains, and flow paths
Map out the flow path of the boiler loop and identify service ports, automatic fill valves, and drain valves. Close isolation valves, disconnect unions as required, and attach temporary hoses to direct cleaner and rinse water to a safe collection point. Confirm that the system will not re-fill during cleaning and that all energy sources are isolated. This preparation minimizes leaks and ensures consistent exposure of the exchanger surfaces to the cleaning solution.
Step-by-step approach to chemical cleaning: what to do and why
Set up the descaling solution following the manufacturer’s directions, ensuring the solution is compatible with your exchanger material. Circulate the cleaner through the loop for the recommended time, typically 15 to 60 minutes depending on deposit severity. Monitor the temperature to stay within the cleaner’s safe operating range and avoid accelerated corrosion. After circulation, drain the solution and flush with clean water until the effluent meets acceptable pH and clarity levels.
Post-cleaning checks: verify, test, and reassemble
Rinse the system thoroughly, reconnect all valves and unions, and refill with treated water to the correct pressure. Repressurize and perform a controlled boiler test run, observing temperature rise, pressure stability, and venting behavior. Check for leaks, unusual noises, or abnormal odors. If any issues persist, consider a second short cleaning cycle or consult a professional for a more in-depth inspection.
Maintenance to prevent future buildup
Install a water treatment plan appropriate for your boiler type, adjusting makeup water chemistry to control mineral content. Schedule periodic flushes, especially in hard-water areas, and monitor for any changes in boiler performance. Keeping a maintenance log helps track cleaning intervals and informs decisions about when to call a technician. Boiler Hub emphasizes that proactive maintenance saves energy and reduces downtime.
DIY versus professional service: weighing the options
DIY cleaning works for many residential boilers with straightforward heat exchangers, provided you follow manufacturer guidelines and safety best practices. Complex systems, high-velocity flows, or signs of corrosion may require professional service. When in doubt, or if the exchanger is copper or an alloy with known sensitivity, hire a licensed technician to prevent accidental damage and preserve warranty coverage.
Tools & Materials
- Safety gear (gloves, goggles, respirator as needed)(Chemical-resistant PPE; ensure good ventilation)
- Descaling solution (citric acid, sulfamic acid, or manufacturer-approved cleaner)(Check compatibility with exchanger material)
- Long-reach brush or pipe cleaner(For manual scrubbing accessible passages)
- Drain pan or collection basin(Capture used cleaner and flush water)
- Hose(s) for circulating cleaner and flushing(Securely connect to service ports; direct to drain)
- Water testing strips or pH meter(Verify rinse water neutrality after flushing)
Steps
Estimated time: 60-120 minutes
- 1
Power down and isolate the boiler
Turn off electrical supply and lockout the boiler to prevent accidental restart. Isolate the boiler from the water supply and ensure no heat source is active. This step protects you and prevents uncontrolled chemical exposure.
Tip: Label all valves before closing to simplify reassembly. - 2
Depressurize and drain the loop
Open the service drain and release pressure gradually. Drain enough water to access the heat exchanger and push any air out of the system. This reduces splash risk and improves cleaning contact with exchanger surfaces.
Tip: Keep a second container ready to catch returned liquid. - 3
Prepare cleaning solution and PPE
Mix the descaling agent per manufacturer directions in a dedicated container. Put on all PPE and ensure the work area has adequate ventilation. Never mix cleaners unless explicitly approved.
Tip: Label the solution clearly and store away from children. - 4
Connect circulation and begin circulation
Attach hoses to entry and exit ports and start circulating the cleaner through the loop. Maintain recommended temperatures and monitor for any signs of leakage while the cleaner is in contact with the exchanger.
Tip: Ensure flow remains constant; kinks in hoses will reduce effectiveness. - 5
Circulate for the recommended dwell time
Run the cleaner for the time specified by the product instructions, typically 15–60 minutes. Do not exceed the recommended duration to avoid damaging protective coatings or metal surfaces.
Tip: If deposits are stubborn, perform a gentle second cycle rather than increasing time. - 6
Flush the system with clean water
Drain the cleaner and flush with clear water until the effluent is neutral and clear. Inspect for any remaining residue or discoloration that indicates persistent deposits.
Tip: Test rinse water pH; aim for near-neutral to minimize corrosion risk. - 7
Inspect, reassemble, and test
Reinstall caps, valves, and unions. Refill the loop to the correct pressure, purge air, and run the boiler to confirm normal operation and venting behavior. Look for leaks and listen for abnormal sounds.
Tip: Document valve positions for future reference. - 8
Post-cleaning checks and ongoing maintenance
After operation stabilizes, run system checks for efficiency and performance. Schedule regular maintenance and consider annual or biannual cleanings depending on water quality and usage.
Tip: Keep a maintenance log with dates and observations.
Questions & Answers
Can I clean the heat exchanger myself, or should I hire a professional?
DIY cleaning is feasible for many residential systems when you follow safety steps and manufacturer guidance. Complex systems or persistent deposits may require professional service to avoid damage, warranty issues, or incomplete cleaning.
DIY cleaning is possible for simple cases, but consult a pro for complex systems or stubborn buildup.
How often should a boiler heat exchanger be cleaned?
Frequency depends on water quality and usage. In hard-water areas, more frequent maintenance may be necessary; routine checks can help determine an appropriate schedule.
Frequency depends on water quality and how hard your water is; check yearly and adjust as needed.
What are the telltale signs that cleaning is needed?
Look for reduced heating efficiency, longer cycling, uneven heating, higher energy use, or unusual noises. Visible scale on accessible surfaces is another indicator.
If heating feels sluggish, you’re using more energy, or you hear odd noises, consider an inspection.
Are descalers safe for all boiler types and warranties?
Not all cleaners are compatible with every material. Always check the exchanger material and warranty terms before cleaning. Some warranties require professional service for any chemical treatment.
Check material compatibility and your warranty terms before using any cleaner.
What maintenance steps should follow cleaning?
Record results, recheck pressure and temperature, and schedule periodic flushes. Maintain water quality to minimize future deposits and extend exchanger life.
Document results and keep up with regular flushes and water quality checks.
Watch Video
Key Points
- Identify exchanger deposits early to maintain efficiency.
- Follow manufacturer instructions for cleaners and materials.
- Ensure proper isolation and safety gear throughout.
- Flush thoroughly and verify operation after cleaning.