Chicago Boiler Repair: A Practical, Safety-First Guide
Comprehensive Chicago boiler repair guide by Boiler Hub. Learn safety steps, diagnostic flow, and when to call a pro, plus maintenance tips to prevent future breakdowns.

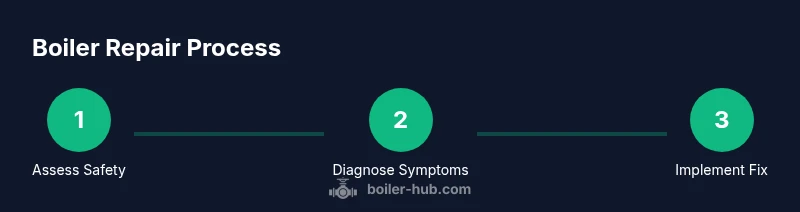
With Chicago boiler repair, you’ll learn how to safely diagnose common boiler problems, confirm power, gas supply, and venting, and decide when to call a licensed technician. This quick overview covers safety prerequisites, essential tools, and a disciplined approach to troubleshooting so you can protect your home and avoid costly mistakes.
Why Chicago boiler repair matters in colder months
Chicago winters demand reliable heating, and a malfunctioning boiler can quickly turn from a minor inconvenience into a safety concern. The Boiler Hub team emphasizes that proactive, well-documented Chicago boiler repair reduces emergency calls and minimizes energy waste. When you understand the core failure modes—ignition problems, pressure imbalances, venting obstructions, and control faults—you’re better prepared to triage without panic. This section grounds you in why timely repair matters, especially in a city where winter temperatures can stress aging systems. By recognizing symptoms early and keeping a safety-first mindset, homeowners and facility managers can prevent costly downtime and protect residents from freezing conditions. Boiler Hub Analysis, 2026 highlights the value of routine checks and clear maintenance records for faster service calls.
Safety protocols before touching any boiler
Safety is the foundation of any Chicago boiler repair effort. Before you touch the boiler, switch off power at the breaker and shut the gas supply if you smell gas or hear a hiss near fittings. Ventilate the area and ensure no one else can access the boiler during inspection. Use a non-contact voltage tester to verify that circuits feeding the boiler are indeed de-energized. Keep a fire extinguisher rated for electrical or gas fires within easy reach. If you notice corrosion around electrical terminals or a persistent gas smell, stop immediately and call a licensed technician. By establishing a firm safety baseline, you protect yourself, your household, and your property while you diagnose.
Diagnosing common boiler symptoms without guessing
Start with symptom clusters: no heat, no hot water, odd noises, leaks, and unusual pressure. For no heat, verify the thermostat, zone valves, and circulator pump operation, then check the boiler’s pressure gauge. Low pressure under 1 bar typically indicates a leak or air in the system, while high pressure over 2 bar may trigger relief valve concerns. For no hot water, inspect the aquastat/thermostat settings and the hot-water priority. If you hear banging or kettling sounds, it often signals mineral buildup or improper flow. Leaks around joints or the pressure relief valve require immediate attention. Keep a notebook of observed symptoms and timestamps to share with a technician; precise symptom recording speeds up diagnosis and reduces downtime. Boiler Hub’s guidance emphasizes structured observation over guesswork.
Tools and testing you’ll need for basic checks
Before you begin, gather a basic toolkit: a digital multimeter, a non-contact voltage tester, screwdrivers (Phillips and flat-head), an adjustable wrench, a flashlight, and clean rags. A gas leak detector spray helps identify leaks around joints, while a manometer can be used to check gas line pressure in more complex setups. For boilers with variable-speed circulators, a troubleshooting meter can confirm motor function. Keep spare fuses and electrical tape on hand. Having the right tools reduces unnecessary disassembly and prevents accidental damage during a home repair attempt. The goal is to run safe checks and confirm obvious faults before calling a pro.
Step-by-step triage approach you can follow (non-destructive first)
Begin with non-destructive checks: confirm power, gas supply, and basic controls. If the boiler powers on but delivers inconsistent heat, inspect the thermostat wiring and sensor placement. Check for trapped air in the radiant system and bleed air from the boiler if needed. Examine the pressure gauge; if pressure is off spec, note the direction and magnitude of the deviation. For ignition problems, observe spark and flame behavior while ensuring proper gas flow. Remember, never inhibit a safety device or bypass control logic. Document findings and mark any components that appear loose or corroded for professional review.
No-heat symptoms and quick assessment steps
No heat is often a systems-level problem: a faulty aquastat, a failed circulator, air locks, or a tripped circuit. Quick checks include ensuring the thermostat calls for heat, verifying the circulator’s operation by feeling for vibration or using a current meter, and confirming that zone valves are opening. If you hear the boiler firing intermittently or cycling on and off, this could indicate dirty burners, low water, or a faulty flame sensor. Do not attempt aggressive cleaning if you’re unsure of burner design; use manufacturer guidance or contact a pro for burner service. A calm, methodical approach keeps you from chasing phantom faults.
What to do about visible leaks or corrosion
Visible leaks around pipe joints or the pressure relief valve are red flags. Isolate the area, collect drips with a towel, and note the location and moisture speed. Do not tighten fittings beyond hand-tight levels, as overtightening can damage threads. For suspected corrosion on the heat exchanger, avoid running the boiler and call a licensed technician. Small drips may be addressed by replacement gaskets if you have confirmed part compatibility, but leaky heat exchangers typically require professional service due to safety and emission concerns. Your notes will help a technician quickly assess scope and urgency.
When to stop troubleshooting and call a professional
If you detect a sulfurous gas odor, hear gas hissing, or observe persistent condensation and carbon monoxide alarms, evacuate immediately and call emergency services. In any scenario involving combustion or fuel supply, err on the side of caution. For most homeowners, complex ignition systems, sealed-combustion configurations, or gas line work should be handled by licensed technicians with required permits and safety certifications. The aim is to know your limits, document symptoms, and secure the home while awaiting professional service. Boiler Hub emphasizes timely escalation when safety is a concern.
Tools & Materials
- Digital multimeter(To test electrical circuits and sensors )
- Non-contact voltage tester(Quickly verify energized circuits at terminals)
- Screwdriver set (Phillips and flat-head)(General fasteners and control coverings)
- Adjustable wrench(Gas line and pump fittings)
- Flashlight(Well-lit work area and access panels)
- Work gloves(Thermal and hand protection)
- Rags and a bucket(Contain minor leaks and clean spills)
- Gas leak detector spray(Identify leaks around joints (optional))
- Manometer or pressure gauge tester(For more advanced gas/pressure checks (optional))
Steps
Estimated time: 60-120 minutes
- 1
Power down and isolate the boiler
Locate the circuit breaker and switch off power to the boiler. If you smell gas or hear a hiss, shut off the gas supply and evacuate if exposure feels unsafe. This step prevents electrical shock or gas ignition during inspection.
Tip: Label the switches and gas shutoff valve for easier re-energizing after inspection. - 2
Verify safety conditions and ventilation
Ensure the area is well-ventilated. Open nearby windows if you’re testing venting or combustion. Confirm no one else is near the boiler while you proceed with checks.
Tip: Keep a carbon monoxide detector in the same room and test it before and after any operation. - 3
Check control settings and thermostat
Inspect the thermostat wiring and ensure it is calling for heat. Confirm the aquastat is set to an appropriate temperature for the season and that there are no loose wires at terminals.
Tip: If you recently changed thermostats, revert to previous settings to see if heat resumes. - 4
Inspect pressure and drainage
Read the boiler’s pressure gauge. If pressure is outside normal operating range, note the value and avoid adjusting pressure without proper guidance. Bleed air if you notice cold spots or trapped air in radiators.
Tip: Do not exceed the manufacturer’s recommended pressure; a high-pressure condition can trigger safety relief valves. - 5
Examine ignition and flame behavior
For gas boilers, observe whether ignition occurs and if the flame stays stable. A flickering or absent flame can indicate gas supply issues, dirty burners, or sensor problems. Do not attempt to clean burners aggressively without manufacturer guidance.
Tip: If you smell gas, leave the area immediately and contact the utility or emergency services. - 6
Bleed radiators and check for air locks
If radiators feel cold at the top, bleed to remove trapped air. This can improve circulation and heating efficiency. Always have a rag ready to catch water that escapes.
Tip: Bleeding one radiator at a time helps identify blockages or system imbalances. - 7
Inspect and test safety devices
Check the safety relief valve and high-limit switches for signs of wear or corrosion. If a valve leaks, replace it with a compatible unit or have a pro review. Avoid tampering with pressure-relief devices.
Tip: Document valve condition and timestamp checks for service records. - 8
Document findings and plan next steps
Record observations, including symptoms, times, and any actions taken. If issues persist or safety concerns arise, schedule a professional assessment and avoid running the boiler until inspected.
Tip: Share your notes with the technician to accelerate diagnosis.
Questions & Answers
What is Chicago boiler repair and when should I seek help?
Chicago boiler repair involves diagnosing and fixing heating systems used in Chicago homes and facilities. Seek help if you detect gas smells, carbon monoxide alarms, leaks, or persistent no-heat conditions after basic checks.
Chicago boiler repair helps you fix heating systems. If you smell gas or CO alarms go off, call a professional immediately.
Can I perform boiler repairs myself?
Basic safety checks and simple maintenance can be done by homeowners, but complex tasks—gas components, pressure systems, and safety devices—should be handled by licensed technicians.
Some safe maintenance you can do, but complex parts require a licensed technician.
How do I know if I need a replacement or a repair?
If the boiler is old, repeatedly breaking, or requires costly repairs, replacement may be more cost-effective. A professional can assess efficiency, safety, and expected remaining lifespan.
If it’s old and unreliable, replacement could be better than ongoing fixes.
What safety steps are essential during repair?
Always shut off power and gas, ventilate the area, and test for gas before touching equipment. If you smell gas or CO, evacuate and call emergency services.
Power off, ventilate, test for gas, and call for help if you smell gas or CO.
How long does a typical Chicago boiler service take?
A standard service visit typically takes 60-120 minutes, depending on age, complexity, and whether parts need replacement.
Most service visits run about an hour or two.
Do I need permits for boiler repair in Chicago?
Permitting varies by municipality and project scope. A licensed contractor will know the local requirements and obtain permits if needed.
Permits depend on local rules; a pro can handle this.
Watch Video
Key Points
- Identify safety first before touching the boiler
- Document symptoms to speed up professional diagnosis
- Differentiate no-heat vs. no-hot-water scenarios
- Know when to call a licensed technician
- Maintain a simple repair log for future reference