Boiler Repair Guide: A Homeowner's Step-by-Step Approach
Learn practical, step-by-step boiler repair guidance for homeowners. This educational guide covers common problems, safety tips, and when to call a professional.

Boiler repair is best approached with a clear plan: diagnose the root cause, verify safety, and choose between DIY checks or professional service. This guide walks you through safe steps, common issues, and what to expect from a technician. You’ll learn how to prepare, assess symptoms, and avoid risky mistakes.
What boiler repair involves
Boiler repair is a systematic process that restores safe operation and reliable heat and hot water. While the specifics vary by boiler type (gas-fired, oil, or electric), the core steps are the same: ensure safety, identify the fault, determine whether repair is feasible, replace worn parts, and test for proper operation. According to Boiler Hub, an effective repair starts with turning off power and gas supply, then performing a structured diagnostic that avoids unnecessary disassembly. This approach helps homeowners avoid risky improvisation and reduces the chance of creating new problems. In practice, you’ll examine symptoms, gather basic information about your system (age, model, typical fuel type), and prioritize tasks that are safe to perform before contacting a professional. The aim of repair work is not simply to fix a symptom but to address underlying causes—leaks, pressure issues, sensor faults, or wear in pumps and valves—and to ensure safe, efficient operation for the heating season ahead.
Common boiler problems and symptoms
Boilers can fail for many reasons, and recognizing the signs early saves time and cost. Typical problems include no heat or hot water, which often signals a power supply issue, a thermostat fault, or a blocked heat exchanger. Strange banging, whistling, or gurgling noises usually point to air in the system, a faulty pump, or a pressure imbalance. Leaks at fittings, valves, or the boiler itself are a red flag for corrosion, worn seals, or failed gaskets. Low system pressure (often indicated on the gauge) can cause sporadic heating or cold radiators. Frequent cycling on and off can indicate overheating, a dirty heat exchanger, or an ineffective expansion tank. If you notice a yellow flame instead of blue on a gas boiler, that can indicate incomplete combustion and warrants urgent evaluation. These symptoms are clues; a professional visit often confirms the root cause and safety implications before any parts are replaced.
Boiler Hub’s guidance emphasizes documenting symptom patterns (times of day, heat vs hot water, code displays) to aid rapid diagnosis.
Safety first: vital precautions
Safety is non-negotiable in boiler work. Before touching any boiler components, switch off the boiler at the wall switch and, for gas or oil units, shut off the gas supply if you can safely reach the valve. Do not work on gas lines or the burner if you smell gas; evacuate and contact emergency services. If your boiler uses electricity, cut power at the breaker to avoid shocks and accidental ignition of flammable materials. Keep children and pets away from the work area. Wear appropriate PPE: gloves, eye protection, and non-slip footwear. If your boiler is in a confined space (attic, crawl space, or utility closet), ensure adequate ventilation and illumination. Never bypass safety devices, such as low-water cutoffs or pressure relief valves. Finally, remember that many boilers are under warranty; tampering with components without proper documentation can void warranty and complicate future service. When in doubt, contact a professional.
Boiler Hub reiterates: safety and proper licensing are essential whenever gas and combustion are involved.
Tools, parts, and safety equipment
To carry out basic safe checks, you’ll rely on common tools and some spare parts. A flashlight, a set of screwdrivers (Phillips and flat-head), an adjustable wrench, and a pipe wrench are essential for accessing panels and fittings. A digital multimeter helps verify electrical signals, while a non-contact voltage tester provides quick safety confirmation. Teflon tape and pipe joint compound are used to seal threaded connections; a leakage detector fluid helps locate small leaks. If your system includes an expansion tank, a manometer might help gauge pressure. Keep a clean rag, a small tray for parts, and a notebook to log observations and codes. For any gas-specific tasks, never attempt repairs beyond safe checks; consult a licensed technician and rely on manufacturer service manuals for part compatibility. People often overlook the importance of a clean work area; clutter can lead to misplacing small seals or screws, causing a reassembly error. Boiler Hub’s approach emphasizes using proper protective gear and keeping the workspace tidy to avoid mistakes.
DIY checks you can safely perform
Performing non-invasive checks can help you prepare for a professional visit and sometimes resolve minor issues. Start by turning off the boiler and allowing it to cool before handling heat-exposed components. Bleed hot-water radiators to release trapped air, verifying that the radiator valve is open and listening for a gurgle as air escapes. Check the pressure gauge; if it reads within the recommended range (often around 1–2 bar when cold), you’re in a normal zone. If pressure is low, you may need to top up the system, but only after confirming the correct method in your boiler manual. Inspect visible pipes for signs of leakage, corrosion, or frost, especially near valves and unions. Examine the thermostat and timer settings, ensuring they match your heating schedule. Resetting the boiler or switching it off and on can clear minor lockouts, but avoid repeated resets if you still see fault codes. Document any error codes displayed, including date and time, to share with a technician. In practice, these checks should be limited to non-invasive actions to prevent accidental damage.
Diagnostic flow: narrowing down the cause
Adopt a structured diagnostic flow to identify root causes without unnecessary parts swapping. Start with safety verification (power off, gas off, ventilation). If the boiler shows an error code, consult the manual; codes often map to specific faults like flame sensing, pressure issues, or sensor faults. Next, determine if the problem is heating-related or hot-water-related. If the indicator shows no heat but the boiler runs, check the thermostat, zone valves, and circulator pump. If hot water is absent, explore diverter valves, aquastats, and domestic hot-water controls. For noises, isolate whether noises come from the burner, the pump, or the expansion tank. If you observe leaks, focus on seals, gaskets, or pressure relief valves. At this stage, avoid guessing; gather data and compare symptoms to manufacturer troubleshooting guides. A careful record of observations will accelerate a pro’s diagnosis and reduce unnecessary downtime. Boiler Hub notes that a methodical approach reduces misdiagnosis and enhances safety.
When to call a professional and what to expect
Most boiler repairs involve gas safety and complex combustion diagnostics that require licensed technicians. If you verify a gas smell, if you see gas pooling, or if the unit fails electrical safety checks, call a professional immediately. For less urgent issues—odd noises or intermittent no-heat situations—you can schedule a service visit. Expect a technician to verify safety, inspect the venting and combustion system, test electrical connections, and check pressure, temperature, and flame status. They’ll typically provide a written estimate, identify worn parts, replace components as needed, and run post-repair tests to confirm performance and safety. They may also advise on maintenance steps, such as annual tune-ups or filter changes. While some tasks are within a capable homeowner’s reach, professional service provides peace of mind, and helps ensure compliance with local codes and warranty requirements. Boiler Hub recommends prioritizing licensed technicians for gas-fired boilers and keeping warranty terms in mind when planning repairs.
What happens during a boiler repair visit
During a typical repair visit, the technician begins with access verification, safety checks, and a review of fault codes. They will perform leak tests, pressure tests, and a combustion analysis to ensure efficient burning and proper venting. Worn gaskets, seals, pump bearings, or valves are identified and replaced with compatible parts. After replacement, the system is re-pressurized and tested for leaks and safe ignition. The technician documents the replaced parts, test results, and any recommendations for maintenance. If the fault is caused by an upstream issue (for example, a faulty thermostat or a corroded expansion tank), they may suggest ancillary repairs or adjustments. Finally, they’ll discuss running costs, potential efficiency improvements, and a maintenance plan to reduce future breakdowns. This hands-on diagnostic approach minimizes guesswork and helps ensure reliable heat and hot water once the job is complete. Boiler Hub’s case studies highlight the value of comprehensive testing and clear communication during repairs.
Maintenance tips to prevent future breakdowns
Prevention is cheaper than emergency repairs. Schedule an annual boiler service with a licensed technician to verify burner operation, venting, and safety devices. Regularly bleed radiators and check the pressure gauge; maintain a steady zone pressure within the manufacturer’s recommended range. Replace air and sediment filters as specified in your manual, and inspect the expansion tank for signs of wear or waterlogging. Keep the area around the boiler clear of clutter, dust, and combustibles. Consider installing a carbon monoxide detector near the boiler for safety. If your system is older, discuss potential upgrades such as a more efficient heat exchanger or modern smart thermostats that improve efficiency and comfort. Finally, maintain a simple log of service visits, fault codes, and any replacements to track performance over time. Boiler Hub analyses show that consistent maintenance reduces risk of unexpected outages and helps extend boiler life.
Choosing the right service provider
Selecting a reputable boiler repair service is as important as the diagnosis itself. Look for licensed technicians with gas safety credentials and manufacturer-trained certifications. Read local reviews and request a written estimate that itemizes labor, parts, and any diagnostic fees. Verify that any recommended parts are compatible with your boiler model and covered by a warranty. Ask about response times, emergency service options, and whether the provider offers maintenance plans. A good contractor will explain the root cause in plain language, show you test results, and provide clear next steps. If your boiler is under warranty, confirm coverage and preferred service channels to preserve warranty terms. Finally, ensure the company follows safety protocols, keeps the work area tidy, and leaves you with a detailed post-service checklist. By choosing a trusted provider, homeowners can reduce downtime and safeguard comfort during colder months.
Tools & Materials
- Safety gloves (heat-resistant)(Protect hands when handling hot surfaces and fittings)
- Flashlight or headlamp(For visibility in tight boiler spaces)
- Screwdrivers (Phillips and flat-head)(Access panels and fittings)
- Adjustable wrench(Loose or tighten fittings safely)
- Pipe wrench(Work on pipe connections and radiators)
- Teflon tape(Seal threaded connections to prevent leaks)
- Pipe joint compound(Optional sealant for certain fittings)
- Multimeter(Verify electrical signals safely)
- Leak detector fluid(Locate small leaks around joints)
- Pressure gauge/maintenance kit(Check and top up pressure as needed)
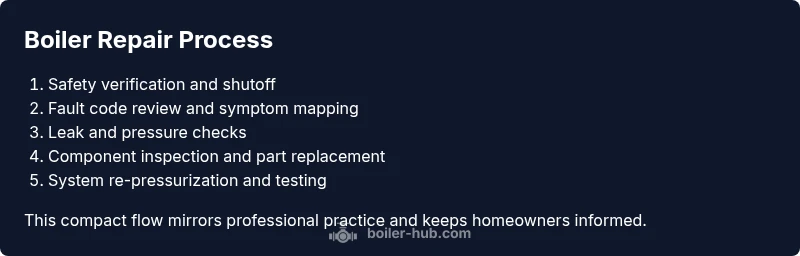
Steps
Estimated time: 2-6 hours
- 1
Power down and isolate the boiler
Shut off the boiler at the wall switch and, if accessible, close the gas valve. If you can safely reach the electrical panel, switch off the boiler’s circuit to remove any risk of shock. Confirm with a non-contact tester that there is no live current near exposed components.
Tip: Label the OFF switch and keep others from re-energizing the boiler during inspection. - 2
Check fault codes on the display
Look for error codes or flashing lights on the boiler display. Note the exact codes and any accompanying symbols in a notebook or on your phone. Consult your boiler manual or manufacturer website to map codes to likely faults.
Tip: Photograph the display for quick reference when speaking with a technician. - 3
Bleed radiators to remove air
Use a radiator key to open the bleed valve at the top of each radiator, starting with the highest floor. Listen for a hiss of air, and close the valve when water begins to emerge steadily. Recheck system pressure after bleeding.
Tip: Have a cloth ready to catch water and avoid burns from hot radiators. - 4
Check boiler pressure
Read the pressure gauge; most residential boilers run safely around a standard cold pressure. If pressure is low, consult your manual for the correct procedure to top up, rather than guessing. If the pressure is consistently high, do not attempt adjustments without guidance.
Tip: Never overfill; small increments are safer and easier to revert. - 5
Inspect visible leaks and corrosion
Scan around the boiler, connections, and nearby pipes for damp spots, dripping, or corrosion. A leakage trace may require replacing a gasket or tightening a union. Place a tray or towel under suspected joints to catch drips.
Tip: Document any leaks with dates and photos to share with a professional. - 6
Test thermostat and zone controls
Set the thermostat to call for heat and observe whether the boiler fires and heats radiators evenly. Check zone valves or pumps if multiple zones exist. If some zones stay cold, the issue may be valve or controller-related rather than the boiler core.
Tip: Replace or clean thermostat batteries if needed and verify wiring connections. - 7
Safe burner check from a distance
Do not disassemble the burner chamber. From a safe position, visually confirm a steady blue flame when the boiler is running. A yellow or flickering flame indicates combustion issues that require a pro.
Tip: If flame looks off, stop and call a professional—do not attempt risky adjustments. - 8
Document symptoms and plan next steps
Record times, codes, noises, and any observations. Create a simple checklist to discuss with a technician. Having precise data speeds up diagnosis and reduces unnecessary downtime.
Tip: Bring your notes to the service visit to streamline the conversation. - 9
Decide on next steps
If the issue persists after safe checks or involves gas/electrical concerns, schedule a professional visit. For minor, clearly resolved issues, keep monitoring and consult the manual for cautions.
Tip: When in doubt, err on the side of safety and professional assessment.
Questions & Answers
Can I repair my boiler myself?
Basic safety checks and non-invasive troubleshooting can be done by homeowners who follow safety guidelines. Most boiler repairs, especially those involving gas or combustion, should be performed by a licensed technician.
You can do basic safety checks, but for repairs involving gas or combustion, hire a licensed professional.
What are common signs your boiler needs repair?
No heat or hot water, unusual noises, leaks, low pressure, and frequent cycling are common indicators that a repair may be needed. If you see a flame color other than blue on a gas boiler, seek immediate help.
No heat, leaks, odd noises, or low pressure are typical repair signals.
How long does a boiler repair usually take?
Repair duration varies with the fault and parts availability. Simple diagnostics may take a few hours, while more involved fixes could span a day or longer.
It depends on the fault; many repairs take a few hours, some longer.
Will boiler repairs be expensive?
Costs vary based on the fault, parts needed, and service call charges. Get a written quote before work begins and consider maintenance plans to avoid surprise costs.
Costs depend on the issue and parts; get a written quote first.
What should I do if I smell gas near the boiler?
If you smell gas, leave the area immediately and call emergency services or your gas supplier. Do not operate switches or use phones near the leak.
If you smell gas, evacuate and call emergency services right away.
Is it safe to continue using a boiler that’s acting up?
Do not risk safety. If you notice persistent issues, anomalies, or gas combustion signs, stop using it and consult a professional before continuing.
If it acts up, stop using it and call a pro to assess safety.
Watch Video
Key Points
- Take safety first and isolate power/gas before any checks
- Identify root causes through symptom patterns, not guesses
- DIY checks can help, but gas/burner work needs a licensed pro
- Keep a maintenance log to extend boiler life
- Prepare questions in advance to speed up professional visits