Boiler and Furnace Repair: A Practical How-To Guide
Learn to diagnose and safely address common boiler and furnace issues with step-by-step instructions, essential tools, safety tips, and when to call a professional. A comprehensive, proactive approach to maintenance helps homeowners and facility managers keep systems reliable and efficient.

Learn how to diagnose and safely troubleshoot common boiler and furnace issues, perform essential maintenance, and know when to call a professional. This step-by-step guide covers basic checks, safety precautions, and practical tips to keep your heating system reliable and efficient, reducing downtime and costly repairs. Follow the steps below to get started with confidence.
Understanding the value of reliable boiler and furnace repair
Reliable boiler and furnace repair is not just about keeping a system warm; it’s about safety, efficiency, and long-term cost savings. When a heating appliance operates poorly, it can waste fuel, cause uneven comfort, and, in worst cases, create hazardous conditions such as carbon monoxide exposure. Homeowners and facility managers should treat boiler and furnace repair as a proactive practice, not a crisis response. By understanding common failure modes, maintenance schedules, and signal signs, you can reduce emergency calls and extend equipment life. According to Boiler Hub, a structured approach to diagnostics and maintenance helps translate complex mechanical concepts into actionable steps you can perform with confidence. As you learn, you’ll gain the ability to distinguish nuisance noises from real problems, recognize early indicators of wear, and document repairs for future service records. This foundation sets the stage for safer troubleshooting and smarter energy use, aligning with best practices in boiler system care and energy efficiency.
In many homes, boilers and furnaces are the backbone of year-round comfort. Regular attention helps ensure warm winters and cool summers, even as equipment ages. The goal is not to chase every minor symptom, but to identify root causes that have a lasting impact on performance. A systematic repair mindset includes validating fuel supply, electrical connections, venting, and control systems, then proceeding with targeted fixes or professional referrals when required. With a thoughtful approach, you’ll reduce downtime, improve reliability, and increase overall system resilience.
Safety first: essential precautions and codes
Safety is the top priority in any boiler or furnace repair effort. Exposed gas lines, hot surfaces, and electrical components pose real risks if mishandled. Before any hands-on work, ensure you can shut off power to the unit, close the gas supply (where applicable), and ventilate the space if you suspect exhaust or combustion byproducts. Install and check working carbon monoxide detectors in living areas and near the equipment. Follow local codes and the manufacturer’s instructions for servicing components such as burners, heat exchangers, and ignition systems. If you smell gas, hear hissing, or notice condensation on a vent, evacuate and contact emergency services. Personal protective equipment—gloves, safety glasses, and non-slip footwear—helps prevent injuries during inspection and adjustments. For many homeowners, certain steps require professional training or specialized tools. When in doubt, prioritize safety and seek qualified service. Boiler Hub emphasizes a safety-first philosophy: plan, pause, and consult when needed to avoid dangerous situations and costly mistakes.
Part of staying compliant is understanding basic code requirements and manufacturer recommendations. Many jurisdictions require licensed technicians for certain repairs, especially those involving gas lines, venting, or combustion safety devices. Maintaining records of inspections and services helps demonstrate due diligence and can support warranty claims or insurance considerations. By embedding safety as a core habit—lockout/tagout procedures for electrical isolation, proper gas shutoff practices, and safe handling of tools—you build a culture of responsible maintenance that protects occupants and equipment alike.
Common problems and quick diagnostic checks
Boiler and furnace issues often fall into a handful of recognizable categories. Common symptoms include no heat, uneven warming, short cycling, unusual noises, or unexpected energy bills. A systematic diagnostic checklist helps you differentiate between simple fixes and more complex failures. Start with power and controls: ensure the thermostat is functioning, batteries are fresh, and the circuit breaker has not tripped. Next, inspect the ignition system or pilot light—flames should burn steady and blue; yellow or orange flames can signal incomplete combustion or dirty burners. Check the condensate and venting pathways for obstructions, as blocked vents can trigger safety shutoffs. Listen for banging, popping, or clanking noises that may signal water hammer, air in the lines, or a failing circulator pump. Finally, assess fuel supply and pressure: a furnace needs adequate gas pressure or electricity to ignite reliably, while a boiler relies on proper water level and pressure. If signs point toward a safety risk, do not push through; contact a professional. Throughout, document symptoms, time of occurrence, and any prior repairs to help diagnose patterns. By mapping symptoms to likely causes, you’ll know when a DIY check is feasible and when to call for expert service. This knowledge also supports more productive conversations with technicians when you do seek help.
Safety-first diagnostic checks for a homeowner
A practical approach is to validate basic safety parameters before touching any components. Start by locating the service switch and shutoff valves, then confirm the power is indeed cut to avoid accidental energization. Use a non-contact voltage tester to verify that circuits feeding the device are safe. Inspect the area around the boiler or furnace for signs of moisture, corrosion, or gas leaks—tiny damp spots near heat exchangers can indicate leaks that require professional attention. Check the carbon monoxide detector readings and test alarms to ensure they function properly. If applicable, test the thermostat for communication with the control board and verify that demand signals are being sent correctly. Finally, ensure the venting system is clear of debris, snow, or bird nests. Regular safety checks like these form the backbone of a responsible maintenance routine and help you assess whether a problem is within DIY reach or requires a licensed technician.
Essential tools and materials for DIY checks
Before you begin, assemble a toolbox of essential items to safely inspect and, where appropriate, adjust your boiler or furnace. A clean workspace and proper tools reduce the risk of injury and improve diagnostic accuracy. Core items include a digital multimeter for electrical testing, a non-contact voltage tester for safe voltage verification, adjustable wrenches or a metric set, screwdrivers, and a flashlight with a strong beam for hard-to-see areas. A manometer or pressure gauge can help assess gas pressure or system pressure on boilers, while a combustible gas detector or soap bubble solution helps identify leaks. Have a gas shutoff wrench if you’ll encounter gas lines, and keep spare fuses or circuit breakers on hand. Safety gear such as gloves, safety glasses, and a face mask can protect you from dust and chemical residues. Finally, maintain a service manual or the manufacturer’s online resources for model-specific instructions. With the right tools, you can perform basic inspections, read basic diagnostics, and determine when a problem exceeds DIY capabilities.
Stepwise approach to troubleshooting and routine maintenance
A disciplined, stepwise approach minimizes guesswork and increases the likelihood of a successful outcome. Begin with a clear plan: power, gas, and control systems are your primary focus. Establish a safe, well-lit workspace and isolate the unit from power and gas when performing inspections. Document each finding and save any error codes from the control board. Progress through a logical sequence: verify thermostat signals, test ignition systems, inspect burners and flame quality, then check venting for blockages. If you identify a failed component, consult the manufacturer’s guidelines for replacement parts, torque specifications, and safety precautions. After performing any repair, re-test the system under supervised conditions to confirm safe operation. Maintain a log of all inspections and repairs to inform future service. For many homeowners, routine maintenance such as annual tune-ups, filter changes, and visual inspections of electrical connections can prevent most major failures. This proactive stance aligns with best practices in boiler and furnace care and reduces the risk of unexpected outages.
Understanding key components and how they work together
A modern boiler or furnace is a system of interdependent parts that must work in harmony. The heat exchanger transfers heat from combustion to water or air; burners ignite the fuel; ignition systems light the burner reliably; the inducer fan ensures safe venting; the pressure switch monitors air flow; and the control board coordinates functions like ignition, gas valves, and safety interlocks. Thermostats translate room temperature needs into calls for heat, while circulator pumps or fans move heated air or water through the home. When one component malfunctions, others may compensate temporarily, masking the underlying problem. Understanding these roles helps you diagnose symptoms more accurately and communicate with professionals. In your notes, map symptoms to likely components, then prioritize checks based on which subsystem is most affected—combustion safety, heat transfer, or airflow. By demystifying the mechanics, you’ll gain confidence to perform safe inspections and ask informed questions when scheduling service.
When to replace vs repair and budgeting for service
Boilers and furnaces have finite lifespans, influenced by usage, maintenance, and quality of installation. Routine repairs can extend life, but some issues exceed cost-effectiveness thresholds. If a unit is approaching the end of its expected life or requires frequent major repairs, replacement may be more economical in the long run. Budgeting for replacement includes estimating installation costs, potential upgrades for energy efficiency, and any required ancillary work such as vent updates or upgrades to meet current codes. When budgeting, consider utility savings from higher efficiency models, availability of rebates, and the reliability you need for peak seasons. Regular maintenance contracts with a licensed technician can help spread costs and ensure timely servicing. For homeowners, prioritizing preventive care—filter changes, annual tune-ups, and prompt attention to warning signs—can prevent abrupt failures and keep overall operating costs in check. Implementing a structured maintenance plan with a trusted technician is the most reliable path to sustained comfort.
Keeping a proactive maintenance mindset with Boiler Hub guidance
The Boiler Hub team emphasizes proactive maintenance, professional service when required, and clear communication with technicians. By adopting a systematic, safety-first approach, homeowners can reduce downtime and keep heating systems operating efficiently. Regular checks of flame quality, venting integrity, control systems, and temperature regulation promote dependable performance across seasons. As you gain experience, you’ll develop a sharper sense for when to perform DIY checks and when to call in a pro for complex tasks such as gas line assessments or sealed-combustion unit servicing. This balanced approach—combining basic DIY maintenance with professional support when needed—helps ensure lasting comfort and system reliability.
Tools & Materials
- Safety gloves(ANSI-rated, cut-resistant, heat-resistant if handling hot surfaces)
- Safety goggles(Impact-resistant; protects eyes from debris and splashes)
- Non-slip work boots(Good grip; protects feet in a workshop area)
- Digital multimeter(For reading voltages, continuity, and resistance)
- Non-contact voltage tester(Quickly confirms live circuits without contact)
- Gas leak detector or soapy solution(Detects gas leaks safely)
- Wrenches set (adjustable and fixed)(Common sizes for gas and water connections)
- Screwdrivers (Phillips and flathead)(For panels, covers, and small fasteners)
- Torque wrench(Helpful for precise fastener torque on connections)
- Flashlight/headlamp(Bright, focused light for dark spaces)
- Rags and cleaning supplies(Cleanup and spill control)
- Owner’s manual or model-specific guide(Model-specific instructions and safety warnings)
Steps
Estimated time: 60-120 minutes
- 1
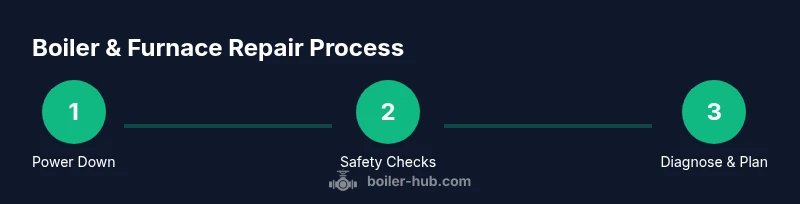
Power down and secure utilities
Locate the main electrical disconnect and switch off the circuit feeding the boiler or furnace. If your system uses gas, close the gas supply valve and confirm no gas is flowing to the appliance. This initial isolation reduces the risk of electric shock, gas leaks, or accidental ignition while you inspect. Always verify de-energization with a tester before touching wiring.
Tip: Lockout/tagout the disconnect if others may re-energize the circuit. - 2
Verify safety devices and venting
Check carbon monoxide detectors in adjacent spaces and ensure they’re functional. Inspect vent pipes for blockages, condensation, or signs of corrosion. A blocked vent can trigger safety shutoffs or cause hazardous buildup; clear obstructions only if you have proper tools and know the vent layout.
Tip: Never bypass a vent or CO detector—these are critical safety components. - 3
Inspect thermostat and control signals
Test the thermostat by lowering and raising the setpoint to trigger heat. Observe whether the furnace responds by igniting or cycling. Review any error codes on the control board and note them for reference. If signals aren’t reaching the unit, there may be a wiring or control issue.
Tip: Replace batteries in wireless thermostats and re-sync the device if it’s not communicating. - 4
Assess ignition and flame quality
For gas furnaces, inspect the ignition system: electronic ignitions should create a clean, blue flame; standing pilots should be stable and steady. Dirty burners or yellow flames indicate incomplete combustion and require adjustment or cleaning by a qualified technician. Don’t attempt full burner cleaning beyond basic safety checks.
Tip: Only clean burners if you’re confident in your approach and the unit is de-energized. - 5
Check heat transfer and water pressures (boilers)
Boilers rely on maintaining proper water pressure and a stable water level. Inspect the pressure gauge and ensure it sits within the manufacturer’s recommended range. Look for leaks, rust, or scale buildup around valves and the heat exchanger. If pressure is too low or high, this can prevent efficient heat transfer.
Tip: Consult the manual on the proper pressure range for your model. - 6
Document findings and plan next steps
Record all symptoms, readings, and any temporary fixes. If you identify a failed component or suspect safety risks, plan for professional service, part replacement, or a full system evaluation. Schedule a follow-up check to confirm that the issue is resolved after any repair or replacement.
Tip: Keep a running maintenance log for future reference.
Questions & Answers
What is the first step if my boiler won’t start?
Begin with safety checks: ensure power is off, gas supply is shut if applicable, and venting is clear. Check the thermostat signal and error codes on the control board before advancing to more involved diagnostics.
If your boiler won’t start, start with safety checks and thermostat signals, then review any error codes before calling a pro.
Can I fix a gas furnace myself?
Some basic maintenance tasks can be done safely, such as thermostat checks and filter replacement. Gas furnaces involve combustion safety and gas lines, which require licensed professionals for most repairs.
You can handle simple maintenance, but most gas-furnace repairs should be left to licensed technicians.
Why does my furnace make banging noises?
Banging or popping sounds can indicate water hammer, expansion of metal parts, or delayed ignition. If you hear loud noises, shut down power and gas and consult a professional promptly to avoid damage.
That banging could be water hammer or a ignition issue—shut down and get a pro to check.
What maintenance should I perform yearly?
Schedule an annual tune-up with a licensed technician, replace or clean filters, inspect controls, flame quality, and safety devices, and verify venting and combustion efficiency.
Annual tune-ups help keep your system efficient and safe.
How do I check for carbon monoxide risk?
Install working CO detectors in key living areas and test them monthly. Ensure proper venting and combustion air supply; have a professional evaluate any abnormal readings or symptoms like headaches or dizziness.
CO detectors should be tested regularly and any abnormal readings mean immediate professional evaluation.
When should I replace rather than repair?
If repairs are frequent, costly, or the system is old, replacement with a higher-efficiency unit may be more economical in the long term. Consider energy savings, installation costs, and reliability needs.
Sometimes replacement is more economical than continual repairs, especially for older systems.
Watch Video
Key Points
- Follow a safety-first approach before any inspection
- Use a structured diagnostic checklist to identify root causes
- Know when to DIY and when to call a pro for gas or combustion issues
- Maintain a maintenance log to support future service
- Schedule regular tune-ups to maximize efficiency and lifespan