Boiler Leak Stop: A Practical Guide for Homeowners
Learn how to stop a boiler leak safely with a practical, step-by-step approach. This Boiler Hub guide covers safety, tools, DIY vs professional options, and follow-up actions to prevent future leaks in 2026.

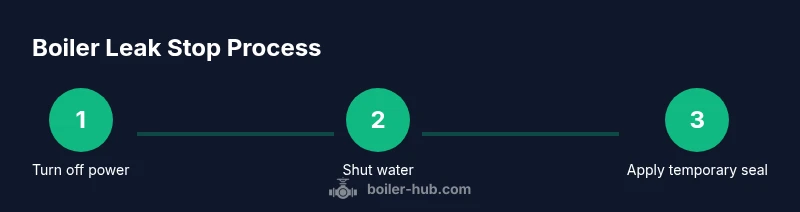
Goal: stop a boiler leak safely using a structured, step-by-step approach. You will identify the leak location, shut off electrical power and water, contain the area, and apply a temporary seal if safe. Then decide whether to perform a DIY fix or call a licensed professional. This boiler leak stop guide covers safety, tools, and next steps.
What is a boiler leak stop and why it matters
A boiler leak stop is a deliberate, safety-first approach to halting a leak and preventing damage while arranging for a permanent repair. In practice, it means acting quickly, identifying where the leak is coming from, and ensuring that people and pets are out of danger. A drip from a boiler can lead to water damage, mold growth, and corrosion, especially when heat is present and the system operates under pressure. According to Boiler Hub, a well-executed boiler leak stop reduces risk and protects the boiler from further harm. The first priority is safety: cut power to the boiler at the breaker, and if it’s safe to do so, shut off the water supply to minimize the leak. Then, calmly assess the area, locate the leak, and prepare for a temporary containment or patch while you plan a permanent repair with a licensed technician.
Common causes of boiler leaks and how to spot them
Boiler leaks don’t appear from nowhere; they grow from wear, corrosion, and stress on joints and components. Common culprits include aging gaskets and seals, loose fittings on pipes or valves, failing heat exchangers, and pressure-relief valve issues. Spotting a leak early saves money and downtime: look for damp patches around the boiler, rust or white mineral crust along joints, dripping from pipes, wet insulation, and unusual sounds such as hissing or gurgling. A sudden drop in pressure or an unexplained increase in boiler cycles can also indicate a developing leak. Boiler Hub notes that maintenance and water quality influence leak risk; keeping corrosion inhibitors in the system and addressing minor leaks promptly can extend the life of a boiler.
Immediate safety steps you should take
Your safety comes first. If you detect a leak, start with basic precautions: move people and pets away from the area; do not touch hot surfaces. If you smell gas, hear a hissing sound near gas lines, or suspect a gas leak, evacuate immediately and call emergency services. Turn off the boiler’s power at the circuit breaker; for gas boilers, close the gas valve only if you can do so safely. If you can access the water shut-off valve for the boiler, close it to stop further leakage. Do not attempt to operate the boiler to 'test' the leak. Ventilate the space if safe, and collect any visible water with towels while you decide on next steps. After the area is safe, document the leak location and time to share with a technician.
Temporary containment and patching options
Temporary solutions are about buying time, not a permanent fix. Use a leak containment pan or a bucket to collect drips and lay towels to keep the floor dry. For small, threaded leaks on fittings, you can sometimes slow the leak with PTFE tape wrapped correctly and a wrench tightened to a snug fit. Epoxy putty or a similar metal-repair patch can cover small surface cracks when you cannot immediately shut down the system, but it is not a lasting repair and should be followed by a professional assessment. Do not rely on rubber patches or duct tape for boiler piping; these are unsafe long-term. After applying a temporary solution, monitor the area for changes in size or speed of the leak and plan a professional service as soon as possible.
DIY vs professional repair: evaluating your options
DIY fixes are sometimes acceptable for minor, clearly accessible leaks on non-pressurized components or where you have proper training and PPE. However, boiler systems operate under high pressure and can involve gas, electricity, and hot surfaces; mistakes risk severe injury or carbon monoxide exposure. A temporary seal can slow a leak, but a permanent fix usually requires replacing seals, gaskets, or sections of pipe, and may involve welds or component replacement. If your boiler is under warranty, DIY patches may void coverage; always check the warranty terms first. For complex leaks, leaks on heat exchangers, or leaks near the gas supply, call a licensed boiler technician promptly. Accurate diagnosis ensures you don’t mask a serious problem and can prevent costly future failures.
Tools, materials, and safety considerations
Before starting, assemble your tools and protective gear. Always wear PPE: gloves, eye protection, and, if possible, a respirator in dusty or tough conditions. Gather essential items: safety gear, a leak containment bucket or tray, a flashlight, an adjustable wrench, PTFE tape, epoxy putty, rags, and a capture pan. For electrical work, have a non-contact voltage tester handy to verify power is off before touching any components. Keep a written note of leak characteristics and coordinates for your technician.
Authoritative sources and follow-up actions
Boiler Hub analysis shows that prompt action reduces the likelihood of escalation when managing a boiler leak. For safety and verification, consult official guidance from organizations such as OSHA and DOE. Always schedule a professional assessment to ensure a permanent repair is performed correctly and safely. Following up with regular boiler maintenance and water quality checks helps prevent future leaks and extend boiler life.
How Boiler Hub guides your approach
The Boiler Hub team emphasizes safety, practical steps, and thorough follow-up. Our approach combines immediate safety actions with a clear path to permanent repair, warranty considerations, and ongoing maintenance. By following a structured leak stop plan, homeowners can reduce risk and protect occupants and property while ensuring the boiler remains reliable.
Tools & Materials
- Safety gear (heat-resistant gloves, safety goggles, coveralls)(Full coverage; consider a face shield for splashes)
- Leak containment bucket or pan(Large enough to catch drips and prevent floor damage)
- Bright flashlight or headlamp(Dark boiler rooms require good visibility)
- Adjustable wrench(Fits multiple pipe fittings; avoid overtightening)
- PTFE tape (plumber’s tape)(Use on threaded fittings to slow leaks)
- Epoxy putty or metal repair patch(Temporary seal for small surface cracks)
- Rags and towels(Absorb spills and protect floors)
- Non-contact voltage tester(Verify power is off before touching electrical components)
- Replacement gaskets/seals (on-hand if available)(Only useful if you identify a seal leak)
- Permanent marker(Mark areas for technician reference)
Steps
Estimated time: 60-120 minutes
- 1
Shut off power and gas (if safe)
Locate the boiler’s electrical disconnect or circuit breaker and switch it off. If you have a gas boiler and can reach a shutoff valve safely, close it. Do not attempt if you detect a gas odor or suspect a gas line issue.
Tip: If you smell gas, evacuate immediately and call emergency services. - 2
Close the water supply
Find the boiler isolation valve or main water shut-off feeding the boiler and close it to stop further leakage. If you cannot locate a valve, proceed with caution and prepare for professional service.
Tip: A closed water valve reduces pressure and makes temporary containment easier. - 3
Locate and assess the leak
Carefully inspect the area around joints, fittings, and the heat exchanger to identify the source. Use a flashlight to spot active drips and dampness and note the affected components for the technician.
Tip: Document the leak with photos for reference during repair. - 4
Contain the area and protect surroundings
Place a bucket or pan under the leak and lay towels to prevent water from spreading. Keep children and pets away from the area and avoid stepping on wet surfaces.
Tip: Move vulnerable items away to prevent further damage. - 5
Apply a temporary seal if safe
If the leak is small and you have confidence in applying a temporary patch, use epoxy putty or PTFE tape on threads as a stopgap. This is not a permanent solution and should be followed by a professional repair.
Tip: Do not rely on temporary patches for high-pressure or high-heat leaks. - 6
Check system status and gauge readings
Observe the boiler pressure gauge for abnormal readings and monitor for new dripping. If pressure rises or the leak worsens, stop and seek professional service immediately.
Tip: Record gauge readings and any control codes displayed. - 7
Decide DIY vs professional repair
Evaluate whether the leak is manageable with temporary measures or requires a licensed technician for a permanent fix. Consider warranty terms and safety risks before proceeding.
Tip: When in doubt, call a professional—safety first. - 8
Document and schedule permanent repair
Note the leak’s location, the actions taken, and the date. Schedule a follow-up repair with a qualified boiler technician to replace seals, fittings, or faulty components.
Tip: Keep maintenance records for future reference and warranties.
Questions & Answers
What is boiler leak stop?
Boiler leak stop is a safety-first approach to pausing a leak and protecting the boiler while arranging a permanent repair. It prioritizes immediate safety, containment, and informed decisions about professional service.
Boiler leak stop is about stopping the leak safely and arranging a permanent fix with professional help when needed.
Can I perform a leak stop myself?
Some minor leaks on accessible joints may be addressed temporarily by a trained homeowner, but boilers involve high pressure and potential hazards. If unsure, contact a licensed technician.
DIY can be risky with boilers; when in doubt, call a professional.
What should I do immediately if I notice a leak?
Shut off power, shut off the water if safe, contain the area, and assess whether to patch temporarily while planning professional service.
Turn off power and water if safe, contain the area, and call a technician for a permanent fix.
How long can a temporary patch last?
Temporary patches are a stopgap and not a substitute for a permanent repair. They require prompt assessment by a professional.
Temporary patches are only a short-term measure until a repair can be done.
When should I call a professional?
Call a professional for high-pressure leaks, gas line involvement, or if you are unable to safely stop the leak or identify its source.
Call a professional for high-risk leaks or if you're unsure how to proceed.
Can a boiler leak cause carbon monoxide exposure?
Yes, leaks near gas-burning components can lead to CO exposure. It is critical to ventilate and call emergency services if you suspect a gas leak.
Leaks near gas lines can cause dangerous carbon monoxide; evacuate if you suspect CO.
Watch Video
Key Points
- Shut off power and water first.
- Contain leaks and protect occupants.
- Use temporary seals only when safe, and plan a professional repair.
- Document the leak for technicians and warranties.