Crown Boiler Repair: A Complete How-To Guide
Learn how to diagnose and safely repair Crown boilers with expert guidance from Boiler Hub. This educational guide covers common issues, essential tools, and a practical, step-by-step approach to keep your system heating smoothly.

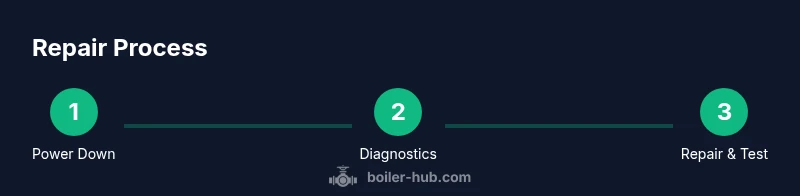
According to Boiler Hub, Crown boiler repair starts with a safety shutdown and a quick diagnostic for ignition or circulation issues. In this guide you will learn how to diagnose and safely repair common Crown boiler problems, from power loss to ignition failures. This overview covers safety steps, required tools, typical failure points, and when to call a licensed professional.
Crown Boiler Repair: What Crown boilers are and what typically fails
Crown boilers are compact, gas-fired heating units designed for residential spaces. They offer efficient heat with sealed combustion and integrated controls, but like any appliance they require regular attention. The most common Crown boiler repair needs relate to ignition, flame sensors, circulating pumps, pressure controls, and leaks at joints or valves. A solid understanding of the model layout — including the burner assembly, heat exchanger, aquastat, and pressure vessel — helps you prioritize the right checks. A structured approach that emphasizes safety and testing rather than guesswork often saves time and money. By knowing what to expect, you can identify symptoms early and plan a safe, cost-effective repair path. Boiler Hub's guidance is to test methodically and document symptoms for future service.
Safety and preparedness for Crown boiler work
Safety is non-negotiable when you're dealing with gas-powered heating equipment. Start by turning off power at the circuit breaker and shutting the gas valve if accessible. Ensure the area is well ventilated and that CO detectors are functional. Do not operate a boiler if you smell gas or hear unusual hissing sounds. Use eye protection and gloves, and keep a bucket and shop towels handy for condensate spills. If you smell gas, evacuate immediately and call your gas provider or emergency services. These precautions protect you from ignition hazards, CO exposure, and electrical shock.
Diagnostic hotspots: ignition, flame sensor, and pressure
Ignition problems are among the most common reasons homeowners call for Crown boiler repair. Start with the igniter: check for cracks, loose wires, and proper spark or glow. A dirty flame sensor can signal falsely that the flame is present and shut the burner off; clean it gently with a soft cloth if residue is present. The pressure switch and aquastat control burner cycling and water temperature; if they are out of adjustment, the boiler may short-cycle or fail to light. Inspect venting paths for obstructions, since poor venting can trigger safety shutoffs. Note any error codes displayed on the control board and cross-check them with the manual for targeted troubleshooting.
Tools, parts, and keeping a Crown repair organized
Before you begin, assemble a basic toolkit: digital multimeter, non-contact voltage tester, screwdrivers (Phillips and flat), adjustable wrenches, and a clean rag or shop vac for condensate. Have a Crown-compatible igniter or flame sensor on hand if you identify wear, plus a replacement pressure relief valve and a spare thermostat or aquastat for common models. A small tray helps keep fasteners organized, and a camera helps document wiring layouts before disassembly. Safety gear like gloves and eye protection is essential, and CO detectors should remain active in the boiler room. Always verify part compatibility against your model in the manual before purchasing replacements.
Troubleshooting quick wins homeowners can try safely
For basic improvement and faster diagnosis, start with simple checks you can perform without tools. Verify the thermostat is calling for heat and that zone valves are open. Reset the boiler if the controls permit it, and listen for a steady flame when it attempts to light. Check the pressure gauge; many Crown systems run around 12–15 psi when cold, rising as the system warms. Bleed radiators to remove air pockets if you notice reduced heat in some rooms. Finally, inspect piping for leaks and address minor drips with a maintenance-friendly approach only if the manual allows it.
Tools & Materials
- Digital multimeter(Test voltage and continuity in control circuits)
- Non-contact voltage tester(Detect live circuits without touching wires)
- Screwdriver set (Phillips & flat)(Access burner and control panel screws)
- Adjustable wrench and fixed wrenches(Gas valve fittings and joints)
- Nut drivers(Small fasteners under the boiler enclosure)
- Shop vacuum or rags(Clean condensate and debris safely)
- Safety gloves and eye protection(Personal protection during work)
- CO detector and smoke detector(Critical safety devices in the boiler area)
- Replacement parts kit (igniter, flame sensor, pressure switch)(Only if diagnostics indicate worn components)
- Gasket sealant and thread sealant(For resealing joints if needed)
Steps
Estimated time: 60-90 minutes
- 1
Power down and isolate the gas supply
Turn off power at the breaker and, if accessible, close the gas valve. Wait 5–10 minutes to allow residual gas to clear. This prevents accidental ignition during inspection.
Tip: Use a non-contact tester to verify no live voltage before touching wiring. - 2
Inspect accessibility and safety devices
Ensure the area is ventilated and CO detectors are functioning. Note any error codes on the boiler’s display and inspect safety shutoffs and limit switches.
Tip: Take photos of control wiring and label wires for reassembly. - 3
Check ignition system and flame sensor
Inspect the igniter for cracks and corrosion. Clean the flame sensor if it has a dull film or residue. Test flame presence when the burner attempts to light.
Tip: If the electrode is visibly damaged, replace it before re-lighting. - 4
Test gas supply and burner flame
Confirm the gas valve is open and observe the burner flame. It should be blue and steady; a yellow or flickering flame indicates incomplete combustion.
Tip: Do not adjust gas pressure beyond documented specifications. - 5
Check water pressure and heat sequence
Verify system pressure in the recommended range; add water via the feed valve if needed and purge air as the system stabilizes.
Tip: Open bleed points to vent air only after confirming it's safe to operate. - 6
Run a short test and confirm safety checks
Restart the boiler and monitor a full cycle for safe operation. Listen for unusual noises, check for leaks, and verify CO detectors remain active.
Tip: If problems persist, stop and call a pro to avoid safety risks.
Questions & Answers
What is Crown boiler repair?
Crown boiler repair involves diagnosing and fixing issues in Crown brand boilers, including ignition, controls, pumps, and leaks. It should be performed safely with proper tools; some tasks require a licensed professional.
Crown boiler repair means diagnosing and fixing issues in Crown boilers. Some tasks require a professional.
Can I repair a Crown boiler myself?
Basic maintenance can be safe for a motivated homeowner, but significant gas and electrical work should be performed by a licensed technician.
DIY is okay for basic checks, but gas and electrical work needs a pro.
How do I reset a Crown boiler?
Many models have a reset button or switch; follow the manual. If resets occur repeatedly, stop and call a professional.
Resetting is often a button, but repeated resets indicate a larger problem.
What maintenance helps prevent Crown boiler problems?
Annual professional service plus regular checks like bleeding radiators, testing CO detectors, and inspecting the expansion tank pressure reduce failures.
Regular annual service and simple checks prevent many issues.
What should I do if I smell gas near the Crown boiler?
Leave the area immediately, call the gas company, and do not operate switches or lights until professionals arrive.
If you smell gas, evacuate and call the gas company.
How long does a Crown boiler repair typically take?
Repair duration varies with complexity and parts availability; diagnostics often take 1–2 hours, with longer times for component replacement.
Time depends on the issue; plan for a few hours.
Watch Video
Key Points
- Always power down before inspection and service
- Diagnose ignition, flame sensor, and safety switches first
- CO safety is essential in all Crown boiler work
- Document symptoms and codes to inform professionals
- Respect the limits of DIY; call a pro for gas/electrical work