Burnham Boiler Repair: Step-by-Step Troubleshooting Guide
Learn how to troubleshoot and safely repair a Burnham boiler with practical steps, maintenance tips, and when to call a pro. This Boiler Hub guide covers ignition, pressure, CO safety, and common fixes for Burnham boilers.

This guide helps homeowners perform safe, initial Burnham boiler repairs and troubleshooting. You'll learn the most common issues, from ignition and heat delivery to pressure and thermostat faults, plus a structured diagnostic approach. Use this to decide when you can fix a problem yourself and when to call a licensed technician for safe, compliant repairs.
Why Burnham Boiler Repair Matters
Maintaining a Burnham boiler in good repair is essential for safety, comfort, and efficiency. A malfunctioning unit can pose risks from gas leaks to carbon monoxide exposure, and inefficiencies waste energy. According to Boiler Hub, prompt repairs help reduce energy waste and extend the life of your boiler. Homeowners who ignore early warning signs often pay higher repair costs later and may face more significant downtime. This guide helps homeowners understand why repairs are important, what to watch for, and how to approach fixes safely. By prioritizing professional service for complex tasks and following a structured troubleshooting process, you protect your family and preserve reliability in cold months. Throughout this guide, Boiler Hub references and best practices shape practical steps you can take today to keep a Burnham boiler operating safely and efficiently.
Common Burnham Boiler Issues and Root Causes
Burnham boilers share several recurring problems. Heat delivery problems can stem from a dirty burner, clogged igniter, or low gas pressure. Ignition failures often trace to faulty electrodes or a worn flame sensor. Low or high boiler pressure is commonly caused by a faulty expansion tank or water leaks. Strange noises, banging or whistling, usually indicate air in the system, mineral buildup, or venting issues. Leaks around joints or the pressure relief valve suggest worn seals or damaged gaskets. Understanding these patterns helps you decide whether a DIY check is safe or you should call a professional. Boiler Hub’s experience shows that addressing issues early dramatically reduces the risk of expensive emergencies.
Diagnostic Approach: Where to Start
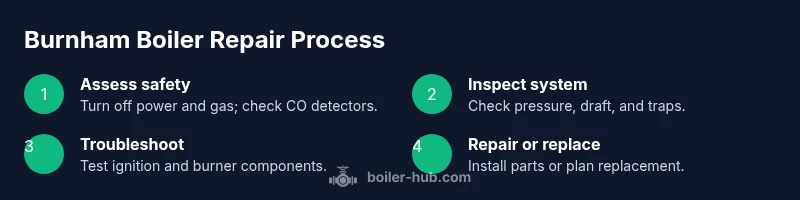
A structured diagnostic workflow reduces guesswork and improves safety. Start with basic safety checks: ensure the power switch is on, breakers are intact, and the boiler is receiving power. Verify the gas supply valve is fully open and listen for gas odors; if you smell gas, leave the area and call the utility immediately. Check the thermostat settings and the room temperature; a mis-set thermostat can masquerade as a boiler problem. Inspect the boiler pressure gauge; typical domestic systems run at about 12-15 psi when cold and higher when hot. If the pressure is off, consult the manufacturer’s manual about the correct target range. Finally, examine venting and flue for blockages; poor venting can cause backdraft and overheating. Boiler Hub Team guidance emphasizes documenting each observation to track patterns over time.
Repair vs Replacement: The Decision Framework
Not every fault on a Burnham boiler warrants a full replacement. Small components, like igniters, sensors, or gaskets, are often economical to repair and can extend service life. If the repair cost approaches or exceeds the cost of a replacement, or if the boiler has frequent failures due to aging components, replacement may be the wiser option. Consider efficiency gains from modern models, potential fuel savings, and available warranties. Always factor in the cost of labor and the risk of recurring issues when deciding between repair and replacement. The Boiler Hub Team notes that upgrading to a newer model can offer better safety standards and longer-term reliability, especially for aging systems.
Step-by-Step: Safe Basic Diagnostic and Troubleshooting
Estimated total time: 60-90 minutes.
- Check power and reset
- Ensure the boiler is plugged in or wired, the circuit breaker is on, and perform a full reset if the model allows. This clears minor electronic glitches. Tip: unplug and replug or reset at the switch, then listen for a restart sequence.
- Verify gas supply and ignition
- Confirm the gas valve is open, the line is free of leaks, and the ignition system is clean. If you smell gas, leave the area. Tip: do a soapy water test on joints for leaks.
- Check pressure and expansion tank
- Read the pressure gauge; cold pressure typically around 12-15 psi for many models. If low, top up using the filling loop per manual. Tip: avoid over-pressurizing; small increments matter.
- Inspect thermostat and controls
- Validate that thermostat setpoint matches room conditions and that any outdoor reset or smart controls are functioning. Tip: test boiler-on delay settings to avoid short cycling.
- Inspect venting and flue
- Look for obstructions in the flue, frost blockers, or backdrafts that affect combustion. Tip: never run a boiler with a blocked vent.
- Test safety devices and flame sensor
- Verify flame presence, check for sensor dirt, and ensure limit switches aren’t tripping. If ignition fails after steps above, do not attempt risky repairs; call a pro. Tip: keep CO detectors near living spaces and test monthly.
Prevention and Maintenance for Burnham Boilers
Regular maintenance is the best defense against unexpected failure. Schedule annual professional service: cleaning, gas pressure verification, heat exchanger inspection, and safety control testing. Between visits, perform light maintenance: check the vent terminals for blockages, replace batteries in CO detectors, and keep the area around the boiler clear of clutter. Use a service log to track part replacements and service dates, so you notice patterns that may indicate a looming failure. This proactive approach helps sustain efficiency, safety, and reliability, especially during peak heating months.
What to Do in an Emergency: CO Alarms and Safety
Carbon monoxide is a silent, deadly risk with gas-fired boilers. If a CO alarm sounds, or you notice symptoms like headache, dizziness, or confusion, exit the building immediately and call emergency services. Do not re-enter until the area is deemed safe by professionals. Ensure your Burnham boiler’s CO detector is installed according to local codes and tested monthly. For added protection, keep a window or door open during start-up in very cold weather and never bypass safety devices. The Boiler Hub Team emphasizes prioritizing professional assessment for any suspected safety issue.
Authoritative Sources
- U.S. Department of Energy: Boiler safety and maintenance guidelines, https://www.energy.gov
- National Institute of Standards and Technology: Building energy performance and appliance safety, https://www.nist.gov
- Occupational Safety and Health Administration: Workplace boiler safety, https://www.osha.gov
Tools & Materials
- Digital multimeter(For testing voltage and temperature sensors)
- Voltage tester(Check power supply and switches)
- Adjustable wrench(For gas lines and service valves)
- Screwdrivers (Phillips & flat-head)(Panel screws and access panels)
- Soapy water solution(Check gas line leaks (bubbles indicate leak))
- CO detector(Place near living spaces; test monthly)
- Flashlight(Inspect tight spaces and switch panels)
- Boiler manual or model guide(Reference model-specific procedures)
Steps
Estimated time: 60-90 minutes
- 1
Check power and reset
Verify the boiler is powered, the circuit breaker is on, and perform a full reset if the model supports it. This clears minor electronic glitches that can mimic bigger problems. If the reset fails to restart the boiler, proceed to power isolation and consult the manual.
Tip: If the boiler has a reset button, use a pointed object to press it firmly for a full cycle. - 2
Verify gas supply and ignition
Confirm the gas valve is fully open and there are no smells of gas. Inspect the ignition system for dirt or corrosion and clean as needed. A clogged igniter or dirty flame sensor can prevent ignition even when gas is present.
Tip: Perform a soapy water leak test on exposed joints; bubbles indicate a leak that requires immediate attention. - 3
Check pressure and expansion tank
Read the boiler’s pressure gauge when the system is cold and cold-start the unit to observe the pressure rise. If the pressure is consistently low, use the filling loop per the manual to restore the target range. Over-pressurizing can stress components and trigger safety limits.
Tip: Make small pressure adjustments and recheck after the boiler heats up to avoid overshoot. - 4
Inspect thermostat and controls
Test thermostat operation by setting a higher and lower temperature to confirm the boiler responds. Check any outdoor reset, smart thermostats, or control modules for wiring or software faults. Replace batteries if needed and ensure wiring is secure.
Tip: Disable any energy-saving modes temporarily to verify if a control issue masks a mechanical fault. - 5
Inspect venting and flue
Look for blockages, frost, or corrosion in the venting path. Poor venting can cause backdraft and improper combustion, which are hazardous. Clear obstructions and ensure the vent runs uninterrupted to the outdoors.
Tip: Never operate the boiler with a blocked or damaged venting system. - 6
Test safety devices and flame sensor
Confirm flame is present during operation and inspect the flame sensor for dirt or buildup. Ensure high-limit switches and other safety devices are in their normal state. If the flame sensor is dirty, clean it gently with a soft brush.
Tip: If ignition still fails after these steps, do not attempt risky repairs; contact a licensed technician.
Questions & Answers
What are the signs a Burnham boiler needs repair?
Frequent cycling, no heat or insufficient heat, odd noises, and rising energy bills indicate a repair may be needed. A drop in pressure, gas odor, or a CO alarm should trigger immediate professional evaluation.
Watch for unusual cycling, loss of heat, noises, and pressure changes; safety alarms mean you should contact a pro right away.
Is it safe to attempt Burnham boiler repair myself?
Basic troubleshooting like checking power, thermostat, and air vents is reasonable if you are comfortable. For gas, flame safety, or structural issues, hire a licensed technician to prevent hazards.
You can handle simple checks, but leave gas and safety-critical tasks to a licensed professional.
Can a non-working Burnham boiler be repaired, or should I replace it?
Many issues can be repaired, especially if parts are available and the unit is relatively new. If failures are frequent or the cost nears replacement, consider upgrading for efficiency and reliability.
Repairs are common, but if the boiler is aging or failing often, replacement may be the smarter choice.
How often should a Burnham boiler be serviced?
Annual professional service is recommended to verify safety controls, test combustion, and clean components. More frequent checks may be needed in hard water or older systems.
Have a yearly professional service, with extra checks if your system is older or in a harsh water area.
What should I do if I smell gas around the boiler?
If you smell gas, evacuate the area immediately and contact the gas utility or emergency services. Do not operate switches or lighting until cleared by professionals.
Leave the area right away and call the gas company or emergency services.
How long does Burnham boiler repair typically take?
Repair duration varies by issue and parts availability. Minor component fixes may take a few hours, while major replacements or safety concerns can require a full day or more.
Time depends on the problem and parts; expect a few hours for simple fixes and longer for major work.
Watch Video
Key Points
- Start with a safety-first diagnostic routine.
- Differentiate repair from replacement based on age and frequency of failures.
- Prioritize professional assessment for gas or combustion issues.
- Maintain CO detectors and a service log for reliability.
- Use the manual and manufacturer guidance for model-specific steps.