New Boiler Installation: Step-by-Step Guide for Homeowners and Pros
A practical, step-by-step guide to planning, selecting, and installing a new boiler, including sizing, permits, safety considerations, and maintenance tips from Boiler Hub.

You're about to learn how to plan and execute a new boiler installation. This guide covers sizing, selecting the right boiler type, installation prerequisites, safety considerations, permits, and a step-by-step process. By following these steps, you can minimize risk, ensure code compliance, and optimize system efficiency. Note: always hire a licensed professional for gas work.
Why Boiler Hub's guidance matters
According to Boiler Hub, a properly planned new boiler installation can improve efficiency, extend equipment life, and reduce safety risks. The Boiler Hub team emphasizes that the quality of planning, sizing, and venting directly influences performance and reliability. When done correctly, a new boiler delivers consistent warmth, lower energy waste, and fewer emergency calls. This is why homeowners and facility managers should treat installation as a core project with professional oversight and clear documentation.
Boiler Hub’s analysis shows that many problems after replacement stem from undersized equipment, poor venting, or inadequate combustion air. By prioritizing proper sizing, fuel type, and venting arrangements, you can avoid costly corrections later and preserve warranty protections.
By approaching the project with a structured plan, you’ll meet code requirements, minimize downtime, and maximize comfort. The Boiler Hub team recommends scheduling a thorough pre-install evaluation and selecting a compatible boiler with a proven track record for your home or building.
Planning essentials: sizing, fuels, and boiler types
Choosing a boiler starts with understanding your heating goals, space, and fuel availability. Common options include combination boilers (which provide hot water on demand), system boilers (which work with unvented cylinders), and heat-only boilers (traditional radiators). Fuel options typically include natural gas, oil, or electricity, with each offering different efficiency profiles and installation considerations. Modern boilers come with efficiency ratings that reflect annual performance, enabling better long-term operating costs. A proper planning phase also weighs venting requirements, condensate drainage needs, and compatibility with existing controls.
Size and performance matter more than brand alone. Oversized boilers heat spaces quickly but waste energy and shorten equipment life; undersized units struggle during cold snaps. When available, Commissioning and safety checks from a certified professional help verify correct sizing and safe combustion. This planning phase also considers future needs, such as additional radiators or upgraded controls, to avoid early replacement.
During planning, consider the dwelling’s heat loss, occupancy patterns, insulation levels, and hot-water demand. This helps determine whether a combi, system, or heat-only boiler best fits your home. Efficiency plays a central role: higher efficiency models reduce ongoing fuel use and often align with regional energy programs. A careful choice now yields dividends for comfort and cost over the boiler’s life.
Boiler Hub notes that engaging a qualified installer early in the process improves sizing accuracy and helps you navigate local permitting and safety requirements. A solid plan reduces surprises during installation and speeds up the commissioning phase.
Permits, codes, and safety prerequisites
Before any work begins, verify local requirements for gas installations and alterations to combustion appliances. Most jurisdictions require an accredited technician to perform gas line work, vent connections, and combustion testing. You may need a permit and an inspection after installation to confirm compliance with building, fire, and energy codes. Begin by contacting your local building department or gas utility for guidance on required documents and timelines.
Safety prerequisites include ensuring adequate combustion air, proper ventilation, and carbon monoxide detection near the boiler. High-efficiency boilers often vent through specialized stacks and condensate drains that must be properly routed to prevent backflow or water damage. Check that electrical power supply and shutoff provisions meet the boiler’s service requirements, and verify that manufacturer clearances around the unit are observed to reduce heat exposure to adjacent materials.
Documentation is essential. Keep copies of the installation manual, permit cards, warranty information, and any test results from pressure and leak checks. This helps with future service calls and warranty claims. The emphasis on permits and safety reflects best practices recommended by Boiler Hub to protect residents and property.
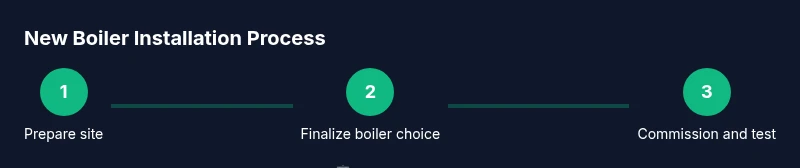
The installation overview: what to expect
A typical new boiler installation unfolds in several phases: site preparation, removal of the old unit (if replacing), installation of the new boiler, connection of plumbing and gas lines, electrical and control wiring, venting or exhaust setup, and final commissioning. A professional team coordinates these tasks to minimize downtime and ensure code compliance. On the day of installation, expect a structured workflow with checks along the way.
During site prep, technicians confirm the location’s suitability for a new boiler’s dimensions, weight, and service clearances. They prepare the venting arrangement, condensate drainage, and proper gas and electrical connections. If you are replacing an existing unit, care is taken to safely disconnect and remove old components while protecting surrounding finishes.
The boiler is then mounted, and supply and return lines are connected. Pipework is checked for leaks, and pressure checks are performed to confirm proper operation. Controls, thermostats, and sensor wiring are integrated to ensure reliable system feedback. Finally, a commissioning sequence tests ignition, flame stability, and heat delivery to radiators or domestic hot water systems.
Boiler Hub emphasizes the importance of a comprehensive test plan during commissioning, including leak tests, pressure checks, and safety shutoffs. Well-documented commissioning ensures reliable performance and helps substantiate warranty coverage. A well-executed installation also supports energy-saving opportunities through optimized system controls.
Maintenance, safety, and lifecycle costs
After installation, establish a maintenance schedule focused on safety, efficiency, and longevity. Annual service by a licensed technician typically includes inspection of gas connections, ignition systems, heat exchanger condition, venting integrity, and calibration of controls. Regular preventive maintenance reduces the likelihood of unexpected breakdowns and preserves warranty eligibility.
In addition to professional service, homeowners should perform simple, non-invasive tasks like checking for odd noises, ensuring vents are unobstructed, and verifying that CO detectors remain functional. Maintaining consistent heat settings and scheduling seasonal checkups helps keep efficiency high and comfort steady throughout the year.
Lifecycle costs hinge on proper sizing, regular maintenance, and timely repairs. A correctly installed system with proactive service preserves energy efficiency and reduces the need for early replacement. The Boiler Hub team recommends documenting service history and reviewing efficiency ratings to track long-term savings and performance.
Common pitfalls and how to avoid them
A few common mistakes can undermine a new boiler installation. First, incorrect sizing—either oversized or undersized—can lead to wasted energy and uneven heating. Correct sizing requires a deliberate assessment of heat load, insulation, and occupancy patterns. Second, inadequate venting or combustion air can create safety hazards and poor combustion efficiency. Third, skipping permits or inspections creates compliance risks and potential warranty challenges. Fourth, poor-quality connections or improper sealing may cause leaks and air ingress, reducing efficiency and comfort. Finally, inadequate condensate drainage or improper piping can lead to moisture damage or corrosion over time.
To avoid these issues, work with a qualified installer who follows the manufacturer’s specifications and local codes. Prior to installation, confirm that the chosen boiler model supports your home’s layout, water pressure, and radiator setup. After installation, ensure a thorough commissioning process, including pressure testing, leak checks, and functional testing of controls and safety devices. This approach minimizes post-install surprises and helps you realize the boiler’s efficiency benefits from day one.
The Boiler Hub team stresses that a successful installation hinges on licensed professionals handling gas work, venting, and electrical connections. This ensures safety, reliability, and adherence to warranty requirements, making the investment worthwhile for years to come.
Tools & Materials
- Gas-rated pipe sealant tape(Use per manufacturer guidelines for gas connections.)
- Adjustable wrenches(Sizes 6–24 mm; ensure grips are clean for tight fittings.)
- Pipe cutter(For copper or steel lines; ensure clean, straight cuts.)
- Torque wrench(Helpful for precision on tight gas fittings.)
- Vent kit appropriate for boiler model(Match to vent type (PVC/metal) per unit.)
- Condensate drain kit(Includes drain line and, if needed, pump.)
- CO detector(Place near boiler per code, test regularly.)
- Electrical tester(Check circuits and GFCI as required.)
- Sealant tape and thread sealant(Gas and water connections as per code.)
- Manufacturer installation manual(Keep on site for reference during commissioning.)
Steps
Estimated time: 8-16 hours
- 1
Prepare the site and verify permits
Survey the installation area for space, access, and ventilation. Confirm fuel type, boiler type, and required permits with local authorities. Gather documents and ensure the space can accommodate the new boiler’s dimensions and service clearances.
Tip: Have a written plan and a copy of the manufacturer’s installation manual ready. - 2
Select boiler size and confirm with load calculations
Perform a heat-load assessment and match the boiler’s output to the building’s needs. Review existing radiators, piping, and control systems to ensure compatibility.
Tip: Oversize the schedule to avoid cold rooms but avoid oversizing to prevent energy waste. - 3
Shut off utilities and remove the old unit
Turn off gas, water, and electricity to the boiler area. Safely disconnect the old boiler and remove it along with any obsolete venting or piping. Protect surrounding finishes during removal.
Tip: Label displaced components and keep fasteners organized. - 4
Mount and connect the new boiler
Position the new unit, secure mounting, and connect plumbing and gas lines following the manufacturer’s diagram. Connect electrical power and control circuits as required.
Tip: Double-check all connections for security and alignment before test. - 5
Vent, condensate, and drainage setup
Install the venting system according to code and ensure condensate drainage is correctly routed. Verify slope and drainage path to prevent backflow or pooling.
Tip: Test condensate line for proper flow during commissioning. - 6
Configure controls and fuel supply
Install thermostats, zoning controls, and any required sensors. Verify fuel supply pressure and gas valve operation to ensure safe ignition.
Tip: Program a basic, energy-efficient schedule before testing. - 7
Commissioning and safety testing
Perform ignition tests, pressure checks, leak tests, and safety shutdown verification. Confirm proper burner flame and carbon monoxide detector operation.
Tip: Document test results and keep a record for warranty and future service. - 8
Handover and occupant education
Explain how to operate the new boiler, demonstrate controls, and outline maintenance steps. Schedule the first service visit.
Tip: Provide contact info for emergency service and service intervals.
Questions & Answers
Do I need a permit for a new boiler installation?
Most areas require a permit for gas or heating system work, with an inspection after installation. A licensed installer typically manages the permit process and ensures code compliance.
Most places require a permit and inspection for a boiler install; a licensed installer usually handles this.
What boiler type is best for a small home?
For compact spaces, a combi boiler is common, as it provides hot water on demand and heating with fewer separate tanks. Sizing is crucial for performance.
In small homes, a combi boiler is often ideal, but get a proper size and layout check.
Can I install a boiler myself?
Gas work and combustion appliance installation should be performed by a licensed technician. DIY installation can be dangerous and may void warranties.
No—gas work requires a licensed professional for safety and warranty reasons.
How long does installation take?
Typical installations range from a few hours to a full day, depending on existing plume, venting, and system complexity. Larger homes or retrofits may take longer.
Most installs take a day or less, but complexity can extend the timeline.
What maintenance is needed after installation?
Schedule annual servicing, check for leaks, test safety devices, and ensure carbon monoxide detectors are functioning. Regular maintenance preserves efficiency and warranties.
Annual service and safety checks keep your boiler reliable and efficient.
Watch Video
Key Points
- Plan with a licensed pro to ensure safety and compliance
- Size the boiler to your home’s load, not room comfort alone
- Get permits and inspections to protect warranty and code compliance
- Thorough commissioning prevents leaks and ensures efficiency
- Maintain an ongoing service plan for optimal life and performance