Oil Boiler Filter Change: A Simple Step-by-Step Guide for Homeowners
Learn how to safely change an oil boiler filter with our detailed, homeowner-friendly guide. Tools, steps, safety tips, and troubleshooting from Boiler Hub to keep your system efficient.

Goal: Change the oil boiler filter to protect the burner and sustain efficiency. You’ll need the correct filter size, a pan to catch spills, and basic hand tools. Power down the boiler, verify it's cool, and follow the filter housing’s instructions. In most homes this takes about 20-40 minutes, with longer times if access is tight or the filter is clogged.
What an oil boiler filter does and why it matters
In an oil-fired boiler, a filter catches sediment, rust, and particulates before fuel reaches the burner. Keeping the filter clean helps maintain proper fuel flow, stable combustion, and clean exhaust. When the filter is clogged, the burner works harder, consuming more fuel and increasing the risk of soot buildup that can damage the heat exchanger. Regular filter changes can extend burner life and improve overall efficiency, especially in homes with older systems where sediment may be more prevalent. According to Boiler Hub, routine filter maintenance is a simple but effective safeguard against common inefficiencies and breakdowns. A well-maintained filter reduces strain on the pump and ensures consistent heat output, which is especially important during shoulder seasons when demand fluctuates. By scheduling a filter change during your annual maintenance window, you can prevent costly repairs and enjoy steadier boiler operation.
Safety and preparation
Before touching any part of the boiler, shut off power to the unit and allow the system to cool. Oil boilers can reach high operating temperatures, and a live circuit poses shock risks. Wear gloves and eye protection, and place a disposable sheet or shop towel under the work area to catch any drips. Have a container or pan ready to collect used oil from the filter housing, and keep a rag or degreasing wipe handy for quick cleanups. Read the owner's manual or the filter’s label to confirm the correct size and type of filter for your model. If you feel uncertain at any stage, stop and contact a licensed technician. Boiler Hub emphasizes safety first and recommends confirming fuel type, filter type, and removal direction before loosening fittings.
Types of oil boiler filters and how to identify yours
Oil boiler filters come in a couple of common formats: spin-on (a cylindrical canister that screws off) and cartridge (a replaceable element inside a housing). Spin-on filters are usually changed by unscrewing the old unit and threading a new one in place. Cartridge filters require opening the housing, pulling out the old element, and seating a new cartridge. The best choice depends on your boiler model and the manufacturer’s guidance. To identify yours, check the filter label or consult the manual. If the model uses a cartridge, you’ll typically see a removable insert; for spin-ons, the entire canister Unscrews from the base. Align the new filter with the same orientation as the old one.
What you will need: tools, filters, and workspace
Having the right supplies on hand makes the change quick and clean. You’ll need the correct filter size (model or dimensions from the manual or the old filter), a pan to catch spills, disposable towels, gloves, a flashlight, and a screwdriver if needed to access the housing. Keep a clean rag nearby for any wipes and a marker to note the date of the change. Working in a well-lit, dry area reduces slips and oil exposure. If you don’t know the exact size, purchase a filter that matches the model number in your boiler manual or consult a professional.
Common mistakes and how to avoid them
Common mistakes include over-tightening the filter housing, which can strip threads and cause leaks, or installing a filter in the wrong orientation. Always lubricate the O-ring with a thin film of oil from the system, avoid using force to seat a filter, and ensure all seals are intact before reassembly. Another frequent error is neglecting to check the filter seat and the surrounding area for debris. A quick wipe with a clean rag helps ensure a proper seal and reduces the chance of a leak after the change.
When to call a professional and maintenance cadence
If you notice oil leaks, unusual smells, or the boiler shows error codes after a change, shut the system down and call a licensed technician. Regular maintenance cadence is typically aligned with manufacturer guidance, but a practical rule is to inspect and replace the filter at least once per year, or sooner if you have high sediment or frequent cycling. Scheduling an annual filter check as part of your boiler maintenance plan can prevent unexpected shutdowns and extend burner life.
Authority sources and when to call a pro
Boiler Hub recommends combining filter changes with a broader annual inspection to verify seals, connections, and fuel lines. For complex systems or uncertain models, a professional assessment ensures proper filter selection and safe removal, protecting both you and your equipment.
Understanding filter types and how to identify yours (continued)
Different boiler brands may implement slightly different filter housings, so always match the replacement to the exact model. If you’re unsure, consult the manufacturer’s labeling on the existing filter, or contact a dealer for the correct part number. When in doubt, replacing with the same type—spin-on or cartridge—avoids compatibility issues and reduces the risk of improper seating or leaks.
Tools & Materials
- Oil boiler filter (exact model/size)(Check old filter or manual for size; verify spin-on vs cartridge.)
- Replacement cartridge or spin-on filter(Ensure compatibility with your boiler model.)
- Oil drain pan or sturdy container(Must be able to hold used oil without overflow.)
- Disposable shop towels or rags(For spills and cleaning surfaces.)
- Gloves (nitrile/latex) and eye protection(Protect skin and eyes from hot oil and debris.)
- Flashlight or headlamp(Extra lighting helps in tight spaces.)
- Screwdriver (flat or Phillips)(Only if your housing requires tools to loosen.)
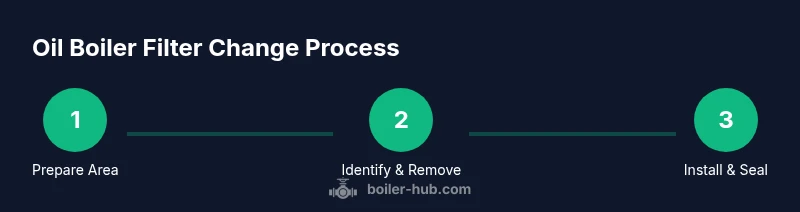
Steps
Estimated time: 25-60 minutes
- 1
Power down and prepare the area
Turn off the boiler and its power switch, then wait for the unit to cool. Set up a containment area with a pan and towels to catch any drips. Keep your replacement filter within reach so you’re ready to swap as soon as the old one is out.
Tip: Double-check the manual for the exact filter location before you start. - 2
Identify the filter type and remove the old unit
Inspect whether your system uses a spin-on canister or a cartridge inside a housing. If it’s spin-on, unscrew counterclockwise; if cartridge, open the housing and slide out the element. Place the old filter in the drain pan.
Tip: Note the filter orientation so the new one installs correctly. - 3
Inspect the housing and seat for debris
Wipe away grime from the housing threads and the filter seat. Look for cracks, damaged O-rings, or corrosion. Replace damaged seals if needed to prevent leaks after installation.
Tip: A clean seat ensures a proper seal and minimizes leaks. - 4
Install the new filter
Lubricate the new O-ring with a light film of system oil, then install the filter by hand until snug. Do not overtighten; hand-tighten then give a gentle quarter-turn if needed.
Tip: Avoid cross-threading by starting the filter straight and steady. - 5
Restore power and check for leaks
Reassemble the housing, restore power to the boiler, and run the system briefly. Inspect all connections for leaks and wipe away any drips. If you notice a leak, shut down and reseat the filter or consult a professional.
Tip: If a leak persists after reseating, contact a pro promptly. - 6
Record the maintenance and monitor
Date and note the filter model, size, and condition. Monitor boiler performance over the next few cycles for consistent heat and stable pressure.
Tip: Keep a simple log to track when the next change is due.
Questions & Answers
How often should I change an oil boiler filter?
Most systems benefit from a filter change every 6-12 months, but you should follow the boiler manufacturer’s recommendations and consider usage, fuel quality, and sediment in your fuel. If in doubt, schedule an annual check.
Change the filter at least once a year and more often if you have high sediment or heavy fuel use.
Can I change the filter while the boiler is running?
No. Always shut off power and allow the boiler to cool before handling the filter or housing. Working with live components can cause burns, shocks, or leaks.
Never change the filter with the boiler running; turn it off and wait until it’s cool.
What signs indicate a clogged oil boiler filter?
Reduced heat output, longer cycling, unusual odors, increased fuel consumption, or visible debris around the filter area are common signs a filter needs replacement.
If you notice weak heat or higher fuel use, inspect the filter for clogs.
Do I need to replace the filter housing or O-ring?
Inspect the O-ring and seals; replace if worn or cracked. A damaged seal can cause leaks even with a new filter.
Check seals and replace damaged parts to prevent leaks.
Is filter change a DIY job or should I hire a pro?
For many homeowners, a basic filter change is DIY-friendly if you follow the manual and take safety precautions. If you’re unsure about the fuel type, seals, or if leaks occur, hire a pro.
Many people can do it themselves, but don’t hesitate to call a pro if you’re unsure about any step.
What safety precautions are essential during a filter change?
Shut off power, let the boiler cool, wear gloves and eye protection, and work on a dry surface. Be mindful of hot surfaces and spilled oil.
Safety first: power off, cool boiler, wear protection, and keep the area dry.
Watch Video
Key Points
- Change the filter to protect the burner and improve efficiency.
- Identify filter type (spin-on vs cartridge) before buying replacements.
- Always prioritize safety: power off, cool boiler, protect eyes and skin.
- Inspect the housing and seals to prevent leaks after installation.
- Document the change for future maintenance and planning.