nti boiler repair: Step-by-Step Guide for Homeowners and Managers
A practical, safety-focused guide to nti boiler repair for homeowners and facility managers. Learn diagnostic steps, tools, and when to call a pro, with tips from Boiler Hub.

nti boiler repair is a practical, safety-first approach to diagnosing and addressing common boiler faults. This quick answer connects you to a detailed, step-by-step guide for safe troubleshooting and knowing when to call a professional. After completing, you will know how to assess energy efficiency, isolate power, check for leaks, and decide whether to proceed or stop and call a technician. According to Boiler Hub, proper prep reduces risk and speeds repair.
Understanding nti boiler repair
nti boiler repair describes the process of diagnosing and correcting faults in NTI-brand boilers or in boilers referred to by the shorthand nti. The goal is to restore safe operation, maintain efficiency, and prolong equipment life. In this guide, Boiler Hub uncovers practical steps homeowners and facility managers can perform, plus clear signposts for when professional service is necessary. This content uses a realistic, safety-first approach, emphasizing that you must never bypass gas or electrical safety protocols. Always consult your equipment manual and local codes. The information here is educational and designed to help you decide whether you can proceed with basic troubleshooting or need to call a licensed technician. According to Boiler Hub Analysis, a careful assessment early in the process saves time and reduces the risk of further damage. The topic also highlights common fault indicators, such as failed ignition, low system pressure, persistent leaks, and abnormal burner flame, and explains how to approach these issues responsibly. Remember: safety and proper isolation of power and gas are non-negotiable.
Safety prerequisites before you begin
Before you touch any boiler components, prepare a safe workspace and gather required PPE. This includes gloves, eye protection, and appropriate clothing. Make sure the area is well-ventilated and free of flammable materials. If you smell gas, or hear hissing from a gas line, leave the area immediately and contact your gas supplier or emergency services. Your local codes and NTI’s manual should guide ignition and shutdown procedures. Boiler Hub emphasizes safety as the foundation of any repair activity, and strongly advises against bypassing safety devices or attempting repairs beyond your training. Have a fire extinguisher nearby and ensure children and pets are kept away while you work.
Diagnostic approach: where to start
A methodical diagnosis reduces wasted time and potential hazards. Start by noting any error codes on the boiler control panel and consulting the user manual for their meaning. Verify power is isolated, then check that the thermostat is calling for heat and the zone valves operate correctly. Inspect the venting for blockages and confirm the condensate drain is clear. If available, use a combustion analyzer to check for proper burner operation and combustion efficiency. Boiler Hub recommends documenting each finding as you go, so you can share a clear report with a technician if professional help is required. Keep a checklist handy and proceed only if you feel confident in your scope of work.
Common fault scenarios and how to identify them
Several faults show up repeatedly in nti boiler repair scenarios. Ignition failures may present as a clicking sound without a flame; low or irregular flame can indicate fuel delivery or air intake issues. Leaks around joints or the expansion tank manifest as damp areas or persistent moisture on the floor. A boiler that won’t turn on at all may indicate a power or control fault, while error codes can point to sensor or board problems. Do not ignore persistent cycling, unusual odors, or overheating warnings. In all cases, reference the manual and Boiler Hub guidance, and escalate to a licensed professional for gas or electrical concerns. Remember that safety comes first, and electronics in a boiler system require careful handling.
Preparing your tools and workspace
Organize a dedicated workspace with a stable surface for parts and tools. Lay out a clean mat to catch drips and avoid slipping. You’ll need a basic toolset, a multimeter, a manometer or pressure gauge, screwdrivers, and safety PPE. Keep a digital camera or smartphone handy to photograph wiring configurations before disconnecting anything. If you plan to test combustion, have a CO detector or combustion gas analyzer available. Maintain a clear log of every action taken, including timestamps and readings. A tidy, well-lit area reduces mistakes and improves overall safety during nti boiler repair.
Maintenance tips to prevent future problems
Prevention is the best form of maintenance. Schedule annual professional service to ensure burner alignment, heat exchanger integrity, and venting clearance. Regularly replace air filters if your system uses them, inspect pipework for corrosion, and keep the area around the boiler unobstructed. Note any changes in performance, such as longer heating cycles or uneven warmth in rooms, and address them promptly. Boiler Hub suggests keeping a spare set of basic parts and a simple diagnostic checklist to reduce downtime should a minor fault recur. Implement a simple routine of checking pressure, listening for unusual noises, and confirming safe flame quality after each heating season.
When to hire a professional vs. do-it-yourself
DIY nti boiler repair is appropriate for basic, clearly defined tasks—like simple cleaning, tightening accessible fittings, or checking air intake —when you have the right tools and training. For anything involving gas lines, burner adjustments, electrical controls, or sealed combustion systems, professional service is essential. If you encounter unfamiliar fault codes, persistent leaks, or signs of unsafe operation, stop immediately and contact a licensed technician. Boiler Hub Team emphasizes conservative decision-making: safety and compliance come first, and improper repairs can create serious hazards or void warranties. If in doubt, seek expert help sooner rather than later.
Next steps and how to verify repairs
After completing any DIY checks, re-test the system end-to-end: reset the boiler, observe ignition, monitor flame stability, and verify temperatures meet expected ranges per the manual. Check for leaks again and ensure venting operates without obstruction. If diagnostic tests were inconclusive or error codes reappear, schedule a professional assessment. Finally, reassure occupants by confirming proper CO levels and safe operation, and document the service history for future reference.
Tools & Materials
- Digital multimeter(test electrical connections and voltages on the control board)
- Manometer or pressure gauge(evaluate boiler system pressure and check for pressure loss)
- Screwdrivers (Phillips and flat-head)(open service panels and adjust components)
- Wrench set (adjustable)(work on valves or fittings without stripping nuts)
- Combustion gas analyzer or CO detector(verify safe combustion and CO levels)
- Safety PPE (gloves, safety goggles)(protect against burns and debris)
- Leak detection solution/soap(identify leaks at joints and valves with bubbles)
- Owner's manual(model-specific procedures and specs)
- Bucket, towels, rags(catch drips and keep work area clean)
Steps
Estimated time: 60-90 minutes
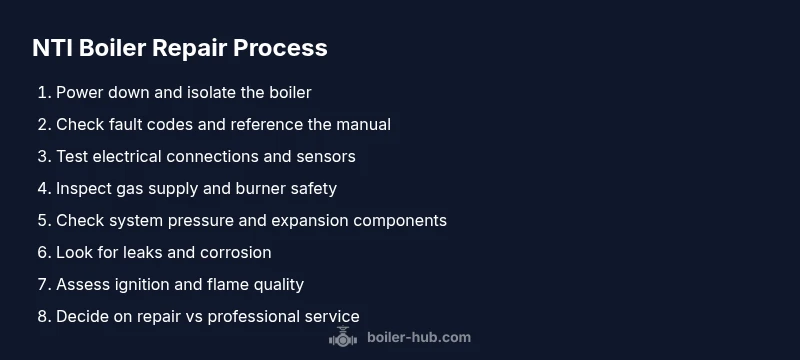
- 1
Power down and isolate the system
Turn off the boiler at the main breaker and shut off the gas supply if safe to do so. Verify that all power to the boiler is disconnected before touching any controls. This reduces shock risk and prevents accidental ignition during inspection.
Tip: Double-check main breaker and gas valves; never rely on switch toggles alone. - 2
Consult the manual and read fault codes
Note any fault codes on the boiler display and refer to the owner's manual for their meaning. Fault codes guide you toward the likely subsystem (ignition, pressure, sensor, or PCB) without random guessing.
Tip: Take a photo of the display before clearing codes for future reference. - 3
Test electrical connections
With a multimeter, verify that control board wiring and sensors have proper voltage within the manual’s ranges. Loose or corroded connections are a common source of intermittent failures.
Tip: If you find loose terminals, reseat and tighten them to the manufacturer’s torque spec. - 4
Inspect gas supply and burner safety
Check visible gas lines for kinks, leaks, or blockages. Do not attempt to loosen gas fittings or perform any gas line work unless you’re a licensed professional. If you smell gas, evacuate and call emergency services.
Tip: Use a soapy-water test on accessible connections only and never use open flame around gas fittings. - 5
Check system pressure and expansion components
Inspect the pressure gauge and verify the expansion vessel or tank is not waterlogged or damaged. Refer to the manual for the recommended pressure range and procedures for re-pressurization if applicable.
Tip: Record pressure readings at cold and hot states to detect drift. - 6
Look for leaks and corrosion
Examine all joints, valves, and the heat exchanger for signs of moisture or corrosion. Use soapy solution on joints to reveal small leaks that aren’t obvious visually.
Tip: Address leaks promptly; even small leaks can lead to efficiency loss or safety hazards. - 7
Assess ignition and flame stability
If you have permission and the risk is manageable, observe the burner flame for consistent color and height. Use a combustion analyzer if available to check CO and O2 levels against manufacturer specs.
Tip: A yellow or flickering flame can indicate incomplete combustion or air misadjustment. - 8
Decide on repair vs. professional service
If fault persists after the above checks or involves gas/electrical components, stop and call a licensed technician. Document all findings to share with the pro for faster diagnosis.
Tip: Never bypass safety devices or attempt complex repairs beyond your training.
Questions & Answers
What is nti boiler repair?
nti boiler repair refers to diagnosing and addressing issues in NTI-brand boilers or related units, focusing on safe troubleshooting and restoring proper operation. It often involves safety checks, inspection of ignition and gas delivery, and determining whether DIY steps are appropriate.
nti boiler repair means diagnosing issues in NTI-brand boilers and safely troubleshooting, with guidance on whether to DIY or call a pro.
Can I perform nti boiler repair myself?
DIY repair can be appropriate for simple, non-gas-related maintenance tasks if you have the right tools and training. Gas and electrical work, however, should be handled by a licensed professional to avoid serious hazards.
DIY is only advised for simple tasks; for gas or electrical work, hire a licensed pro.
How long does nti boiler repair take?
Repair duration varies with the fault and your experience. A basic diagnostic and minor fixes may take 1–2 hours, while complex gas or electrical issues can require professional service and scheduling.
Time depends on the fault; simple checks may take under 2 hours, more complex repairs need a pro.
What tools do I need for nti boiler repair?
Essential tools include a digital multimeter, a manometer or pressure gauge, screwdrivers, wrenches, PPE, and leak-detection solutions. The exact set depends on the fault and model.
You’ll need basic electrical and plumbing tools plus safety gear; consult your manual for specifics.
When should I call a professional?
Call a professional if you detect gas smells, persistent leaks, abnormal flame, gas/electrical symptoms, or fault codes that don’t clear after safe checks. Professionals can safely test and repair sealed combustion and control systems.
Call a pro for gas leaks, persistent faults, or anything involving the burner or control board.
How can I prevent future nti boiler problems?
Schedule annual servicing, replace filters if present, monitor pressure and flame quality, and address signs of wear early. Keeping the boiler area clean and vented helps prevent buildup and failure.
Regular maintenance and early attention to warning signs help prevent future problems.
Watch Video
Key Points
- Isolate power and gas before inspecting any boiler components
- Use fault codes and manuals to guide diagnostics
- Document findings to aid professional repair when needed
- Prioritize safety and call a pro for gas/electrical work