How to Clean Water Boiler: A Practical Step-by-Step Guide
Learn how to clean water boiler safely, prevent mineral buildup, and maintain efficient operation with Boiler Hub’s practical, step-by-step guidance for homeowners and facility managers.

Learn how to clean water boiler safely and effectively. This quick guide outlines what to inspect, the best cleaning methods, and a simple maintenance routine to reduce mineral buildup and maintain efficiency. Whether you’re a homeowner or facility manager, following these steps will help you keep your boiler running reliably.
What a clean water boiler achieves
If you’re asking how to clean water boiler, the goal is twofold: maximize efficiency and extend the system’s lifespan. Mineral buildup and corrosion reduce heat transfer, increase fuel use, and can shorten equipment life. Regular cleaning removes scale, sludge, and oxidized deposits that insulate heat exchange surfaces and hinder circulation. By investing time in a proper clean, homeowners and facilities can lower operating costs, reduce the risk of sudden failures, and improve overall comfort. According to Boiler Hub analysis, routine maintenance and cleaning correlate with more reliable boiler operation and fewer unscheduled service calls. The value isn’t just about a brighter gauge; it’s about consistent heat delivery and safer operation for occupants.
Safety and planning before you start
Before touching any boiler components, establish a plan and confirm that it is safe to proceed. Power should be shut off, the system allowed to cool, and the area prepared with containment for any drainage. Reading the manufacturer’s maintenance guide is essential because some models use sealed or pressurized circuits that require professional service. Wear PPE such as gloves and eye protection, and keep children and pets away from the work zone. If you smell gas, hear hissing steam, or notice a gas leak, evacuate and call the gas provider immediately. Planning also means setting aside enough time, typically a cleaning session that might take 60 to 90 minutes depending on accessibility and water quality.
Tools, materials, and setup
Having the right tools before you start makes the process safer and faster. Assemble a supply kit that includes safety goggles, nitrile gloves, a bucket, soft brushes, a garden hose or flexible tubing, wrenches or pliers, screwdrivers, a descaling agent or white vinegar, and clean rags. Ensure you have a means to safely collect and dispose of wastewater according to local codes. Check the boiler’s drainage valve and ensure the surrounding area is clear of obstructions. Label shutoff valves to prevent accidental reactivation and test your safety devices after the cleaning is complete.
Understanding mineral buildup and system behavior
Boilers operate by transferring heat from a burner to water, then distributing that hot water or steam to radiators or in-floor loops. In hard water areas, dissolved minerals like calcium and magnesium precipitate out and form scale on heat exchange surfaces. This reduces heat transfer efficiency and increases energy consumption. Over time, deposits can create hotspots, encourage corrosion, and impair pump performance. Regular cleaning helps maintain proper circulation and consistent temperatures, while timely descaling preserves heat exchange efficiency and reduces wear on pumps and valves.
Cleaning methods: chemical descaling vs mechanical cleaning
There are two broad approaches to cleaning a water boiler: chemical descaling and mechanical cleaning. Chemical descaling uses approved descaling agents or diluted acid solutions to dissolve mineral deposits, followed by thorough rinsing. Mechanical cleaning uses brushes and manual scrubbing to remove buildup on accessible surfaces. For sealed systems or boilers with complex internals, mechanical cleaning alone may be insufficient and should be done in coordination with a service professional. Regardless of method, always follow the manufacturer’s guidelines and local safety rules. Boiler Hub recommends choosing a method that aligns with your boiler design, water quality, and maintenance history.
Step-by-step workflow overview (high-level)
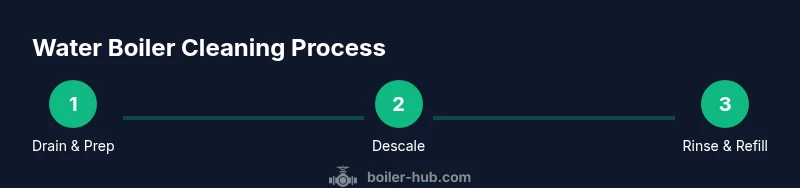
This section provides a high-level conceptual flow you’ll implement in the formal STEP-BY-STEP section. Begin by powering down the unit and isolating electrical and water supplies. Drain the boiler according to the manufacturer’s instructions, then apply a descaling solution or rinse with clean water to loosen deposits. Rinse thoroughly to remove all residues, refill with fresh water, and purge air from the system. Finally, re-pressurize (if applicable), restore power, and run the system to verify normal operation. Always document the cleaning event for future reference.
Maintenance schedule and record-keeping
A simple record-keeping habit greatly improves long-term reliability. Create a maintenance log noting the date, your cleaning method, any readings (pressure, temperature), and the observed condition of heat exchangers and valves. For most homes, a light cleaning every 12 to 24 months suffices; industrial or hard-water installations may need annual attention. Align cleaning frequency with water hardness, boiler age, and usage patterns. Consider installing a water softener or descaler treatment if mineral deposition recurs quickly. Regularly inspecting gaskets, seals, and drain valves helps catch leaks early and prevent costly water damage.
Troubleshooting outcomes after cleaning
After finishing the cleaning process, run the boiler through a full cycle and observe performance. If there is uneven heating, loud banging, reduced hot water pressure, or error codes on a smart control panel, note them and investigate their cause. Some issues may indicate trapped air or a damaged sensor, while others may suggest lingering deposits or a failed pump. If symptoms persist after cleaning, re-check the drainage path for clogs, verify valve positions, and consult the manufacturer guide or a qualified technician.
Common mistakes to avoid
Avoid rushing the drain or skipping rinsing steps, as leftover cleaning solution can corrode internal components or cause staining. Do not mix cleaning agents unless the manufacturer approves it, and never use acidic solutions on non-compatible materials. Overheating the system or forcing valves can lead to leaks or ruptures; always vent slowly and follow the heat-up sequence recommended by the boiler maker. Finally, never ignore safety warnings or disable protective devices; a well-maintained boiler is safer and more reliable in the long run.
When to call a professional
If you’re uncertain about the boiler’s age, condition, or the availability of service manuals, seek professional help. Complex systems, sealed designs, or signs of corrosion, gas-related odors, or unusual sounds require a licensed technician. A professional can perform a thorough descaling, pressure checks, and a complete safety inspection, ensuring compliance with local codes and warranty requirements. Boiler Hub users should view professional service as part of a comprehensive maintenance program when risk factors arise.
Tools & Materials
- Safety goggles(Impact-resistant; protect eyes from splashes)
- Nitrile gloves(Chemical-resistant; wear during all cleaning steps)
- Bucket(Rinse water and wastewater containment)
- Soft brush or non-metal scrubber(Avoid scratching heat exchanger surfaces)
- Screwdrivers (flat and Phillips)(Access panels and service screws)
- Adjustable wrench or pliers(Drain valve and fittings)
- Garden hose or flexible tubing(Direct discharge to a safe area)
- Descaling agent or white vinegar(Follow manufacturer guidance; do not mix with other cleaners)
- Rags or towels(Dry surfaces and wipe up spills)
- Torch or flash light (optional)(Inspect hard-to-see corners)
Steps
Estimated time: 60-90 minutes
- 1
Power off and cool down
Shut off the boiler’s electrical supply and allow the unit to cool completely. This reduces the risk of scalding or electrical shock. If you must test valve positions, do so with the system depressurized and with PPE on.
Tip: Wait at least 30 minutes after shutdown; hot surfaces can cause severe burns. - 2
Isolate water and power
Close the cold-water inlet valve and isolate the electrical feed. This ensures the boiler won’t re-pressurize while you work. Lock-out any control panels if available.
Tip: Double-check that power is off at the breaker before you touch wires. - 3
Drain the boiler
Attach the garden hose to the drain valve and position the other end to a safe drainage area. Open the valve slowly to avoid a sudden surge. Allow the water to drain completely before proceeding.
Tip: Contain the drain water to prevent slip hazards and environmental impact. - 4
Apply descaling solution or rinse
Pour or inject the descaling solution into the boiler according to the product instructions, or use a diluted vinegar solution if approved. Let it sit for the recommended dwell time to loosen scale.
Tip: Do not exceed recommended dwell time; overexposure can damage seals. - 5
Scrub accessible surfaces
Gently scrub the interior where accessible with a soft brush to dislodge deposits. Avoid aggressive scrubbing that could damage heat-exchanger fins or internal coatings.
Tip: Focus on lower sections where deposits accumulate first. - 6
Rinse thoroughly
Flush the system with clean water through the drain until all cleaning residues are gone. Reconnect water supply and vent any trapped air as you refill.
Tip: Run several rinse cycles if you’re unsure whether residue remains. - 7
Refill and purge air
Close the drain valve, refill the boiler to its normal operating level, and purge air from the system. Use the manual fill valve if present and verify there are no air pockets.
Tip: Vent until water flows smoothly with no air spurts. - 8
Test and restore power
Turn power back on and run a full heating cycle to confirm normal operation. Check for leaks around valves and fittings and ensure controls respond correctly.
Tip: Note any abnormal noises or inconsistent temperatures and address promptly.
Questions & Answers
How often should I clean my water boiler?
Cleaning frequency depends on water hardness, boiler age, and usage. In hard-water areas, annual maintenance is common; in softer water regions, every 1–2 years may suffice. Always align with the manufacturer's recommendations.
Frequency depends on water hardness and boiler age; typically once a year in hard-water areas, otherwise every one to two years.
Can I use vinegar to descale my boiler?
Vinegar can be used as a descaling agent if approved by the boiler manufacturer or descaling product guidelines. Avoid strong acids not recommended for your model and ensure thorough rinsing to prevent residue.
Vinegar may be used if approved by your boiler’s guidelines; rinse thoroughly afterward.
Is it safe to drain a boiler myself?
Draining a boiler is safe when you follow the manufacturer’s instructions and take proper safety precautions. If you notice leaks, pressure on valves, or unsure about valve positions, stop and seek professional help.
Draining is safe if you follow the manual and wear PPE; stop if you see leaks.
What signs indicate I should call a pro?
Call a professional if you detect gas odors, significant corrosion, persistent leaks, or uncontrollable pressure. Complex systems or sealed units often require licensed service.
Call a professional for gas smells, strong corrosion, or leaks; complex systems need expert service.
Does descaling void warranties?
Descaling itself doesn't necessarily void a warranty, but deviating from manufacturer instructions or using improper chemicals can. Always consult the manual and document your maintenance actions.
Follow the manufacturer guidelines to avoid warranty issues.
What preparation helps prevent mess during cleaning?
Shield surrounding areas with towels, arrange a drip tray, and have containment ready for wastewater. A well-prepared workspace minimizes spills and reduces cleanup time.
Prepare the area with towels and a drip tray to catch spills.
Watch Video
Key Points
- Regular cleaning improves efficiency and reliability
- Follow manufacturer instructions to avoid damaging components
- Keep a maintenance log for future reference
- If in doubt, consult a professional for complex systems