How to Clean Boiler Heat Vents: A Step-by-Step Guide
Learn a safe, step-by-step method to clean boiler heat vents, improve efficiency, and prevent common issues. This guide covers safety, tools, techniques, and a maintenance cadence for homeowners.

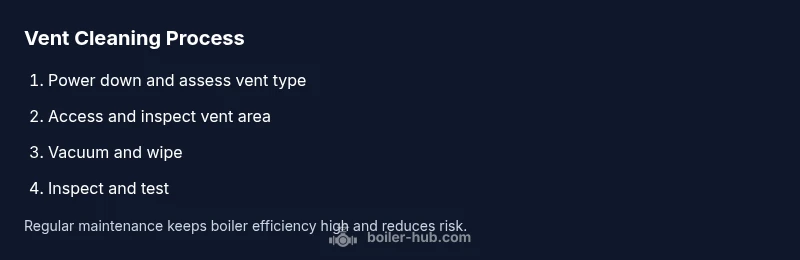
To clean boiler heat vents safely and effectively, start by powering down the boiler and disconnecting power, then inspect vent covers for dust, lint, or corrosion. Remove accessible vent parts, vacuum the cavity, and wipe surfaces with a damp cloth. Reassemble, test the system, and monitor for signs of soot or unusual smells. If you smell gas, stop immediately and call a professional. Keep kids and pets away during the process.
Why Clean Boiler Heat Vents Matter
Clean boiler heat vents are essential for safe, efficient operation. A buildup of dust, lint, and corrosion can restrict airflow, cause overheating of nearby components, and reduce heat transfer efficiency, which translates to higher energy use and uneven heating. According to Boiler Hub, regular vent maintenance helps prevent dust-induced blockages and extends the life of your boiler system. If vents are blocked, the boiler may work harder, consume more fuel, and produce more soot over time. By taking a few minutes to inspect and remove debris, you can maintain better combustion conditions, protect seals, and keep indoor air cleaner. This section explains what vents do, why debris collects, and how neglect translates into real-world symptoms like reduced heat output and increased cycling. Understanding vent design—whether your system uses metal plenums, rigid ducting, or integrated heat exchangers—helps you target the right cleaning approach and avoid damaging fragile parts. Prioritize safety: never force a stuck vent cover or pry at connections; skip aggressive methods that could loosen joints or injure wiring. A calm, methodical approach yields reliable results and minimizes downtime.
Safety First: Turn Off Power and Assess Vent Type
Before you touch any vent, shut off power to the boiler and allow the area to cool. Gas-fired boilers require extra caution: if you smell gas or hear hissing near fittings, evacuate and contact your energy provider. Start by identifying the vent type and location: some vents have accessible caps or grilles, while others are tucked behind panels or inside cathedral ceilings. Documenting vent location helps you avoid accidental damage on reassembly. When removing covers, use a flashlight to look inside for loose dust, nesting debris, or signs of moisture. Do not use water on electrical components, and never bypass safety switches. If your vent runs through a sealed area, consider consulting a professional to avoid disturbing flue integrity. This step protects you from shocks and reduces the chance of a hazardous air leak after cleaning. Safety comes first; a careful, measured approach reduces risk and makes the subsequent cleaning easier and more effective.
Accessing Vents: Gaining Safe, Clear Access and Visual Inspection
Beginning with safety, clear the area around the boiler, then remove any grill or cover using the appropriate screwdriver. If the vent is high or out of reach, set up a sturdy ladder or step stool and have a helper hold supplies. Inspect each vent opening for dust, household fibers, or bird nests. Check for obvious signs of corrosion around fasteners, seals, or duct connections. A quick visual scan helps you decide whether you can clean safely with household tools or if you need specialized equipment. Keep a small tray to hold screws and small parts so nothing falls into the boiler cabinet. If you notice moisture or soot, stop and reassess; persistent moisture can indicate a deeper issue that requires professional evaluation. After this inspection, you’ll be ready to choose a gentle cleaning method tailored to the vent type and material.
Cleaning Techniques: Vacuum, Wipes, and Gentle Bristles
Begin with a vacuum using a brush attachment to remove loose dust from the vent opening and surrounding area. A low-suction setting prevents dislodging delicate seals while still collecting debris. For stubborn buildup, use a nylon brush or old toothbrush to loosen grime without scratching metal surfaces. Wipe interior surfaces with a damp microfiber cloth lightly moistened with a mild, non-abrasive cleaner if necessary, then dry with another cloth to prevent moisture trapping. Pay particular attention to corners and flues where dust tends to accumulate. Avoid over-wetting seals or dampening electrical components, as moisture can corrode connections. If your vents are connected to fabric ductwork, use a light brush to prevent fiber shedding. When you’re finished, re-check all joints for looseness and ensure that any access panels return to their original snug fit. This method minimizes disruption while restoring airflow and improving performance.
Inspecting for Wear, Seals, and Connection Integrity
After cleaning, inspect seals, gaskets, and fasteners around the vent assemblies. Look for brittle or cracked rubber seals, corroded metal, or loose clamps that could leak air or furnace exhaust. Tighten screws carefully to avoid stripping threads, and replace damaged seals with manufacturer-recommended parts. If you notice black soot around vent connections, that can indicate incomplete combustion or a leak; consult a professional. Check duct connections for gaps or misalignment and reattach with appropriate tape or clamps. Do not try to seal active leaks with cheap sealants; improper sealing can cause dangerous leaks or pressure changes. A thorough inspection now can prevent costly repairs later and keep your boiler performing at peak efficiency.
Post-Clean Procedures and Maintenance Cadence
Reinstall vent covers and any access panels, then restore power to the boiler. Listen for unusual noises, hums, or whistling that could signal a loose connection. Observe vent discharge for any visible smoke or odor that wasn’t present before cleaning. Schedule vent-cleaning maintenance on a regular cadence—typically every 6–12 months for most homes, more often in dusty environments. Document the date and the results of your inspection so you can track changes over time. If you’re unsure about any step, or if the ventwork is embedded in the building’s structure, contact a licensed technician. Following a planned maintenance rhythm helps sustain efficiency, extend equipment life, and maintain safe indoor air quality.
Tools & Materials
- Vacuum with brush attachment(Low-suction setting to avoid dislodging parts)
- Soft microfiber cloths(For damp wiping and polishing surfaces)
- Nylon brush or old toothbrush(For stubborn grime without scratching)
- Flashlight(Bright, focused light for inside vents)
- Screwdrivers (Phillips/flat-head)(To remove vent covers if needed)
- Protective gloves(Heat-resistant or disposable depending on access)
- Ladder or stable step stool(Only if vents are out of reach)
- Mild detergent or cleaner (optional)(Use sparingly on non-electrical parts)
Steps
Estimated time: 60-90 minutes
- 1
Power down and prep
Turn off the boiler at the main switch and disconnect power to the unit. Allow the area to cool for at least 10-15 minutes. Put on protective gloves and gather tools so you can work efficiently.
Tip: Double-check the boiler is cool before starting. - 2
Access vent covers
Remove vent covers or grilles using the appropriate screwdriver. If vents are high, set up a stable ladder and have a helper pass tools.
Tip: Use a flashlight to inspect inside for dust or moisture. - 3
Vacuum loose dust
Use the vacuum with a brush attachment to remove loose dust from the vent opening and surrounding area. Focus on corners and hard-to-reach nooks.
Tip: Keep the suction gentle to avoid disturbing seals. - 4
Brush stubborn grime
Gently scrub buildup with a nylon brush or toothbrush. Avoid applying excessive pressure that could scratch metal or loosen joints.
Tip: Work in small sections for thorough coverage. - 5
Wipe and dry
Wipe interior surfaces with a damp microfiber cloth, then dry completely to prevent moisture retention near electrical parts.
Tip: Never saturate seals or dampen electrical components. - 6
Inspect seals and connections
Check gaskets, clamps, and fasteners for wear. Tighten gently and replace any brittle seals with manufacturer parts.
Tip: Look for soot around joints as a possible issue sign. - 7
Reassemble and test
Reinstall covers securely, restore power, and observe vent operation. Listen for leaks, unusual noises, or air flow irregularities.
Tip: Ensure all panels sit snugly to maintain seal integrity. - 8
Document and schedule
Record cleaning date, findings, and any parts replaced. Plan the next vent-cleaning cycle based on dust levels and usage.
Tip: Set a reminder for 6–12 months ahead.
Questions & Answers
Do I need to turn off the boiler before cleaning vents?
Yes. Always shut off power and allow components to cool before starting any vent cleaning to reduce shock risk and avoid damaging electrical parts.
Yes, always power down and let the boiler cool before cleaning.
Can I clean vents with water?
Moisture can reach electrical components or dampen seals. Use a damp cloth only on non-electrical surfaces and avoid soaking the area.
Water can cause damage near electrical parts, so use caution with damp cloths.
How often should I clean boiler heat vents?
A typical cadence is every 6–12 months, depending on dust levels, usage, and environment. More frequent cleaning may be needed in dusty spaces.
Most homes do vent cleaning every 6 to 12 months.
What signs mean I should call a pro?
If you notice soot around joints, persistent moisture or corrosion, unusual noises, or a gas smell, stop cleaning and contact a licensed technician.
Call a pro if you see soot, moisture, or hear odd noises.
Are vent cleaning tools necessary for all boilers?
Basic tools like a vacuum and nylon brush are sufficient for many vents. More complex systems behind panels may require professional equipment.
A vacuum and brush are usually enough; some setups require expert help.
Watch Video
Key Points
- Power down before touching vents
- Use gentle tools and dry methods to prevent damage
- Inspect seals and joints during every cleaning
- Maintain a regular vent-cleaning cadence for efficiency