Repair Boiler Leak: Step-by-Step Guide
Learn how to safely identify, contain, and repair a boiler leak with a practical step-by-step guide. Includes safety tips, required tools, and when to call a pro.

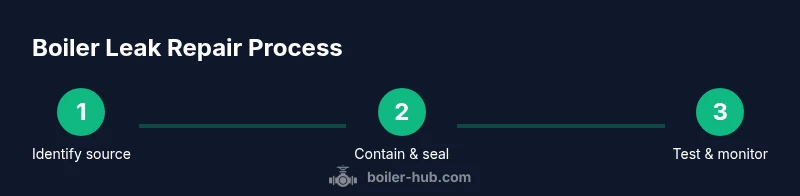
You will learn how to safely identify, contain, and repair a boiler leak, with a safety-first approach. This guide covers shut-off procedures, temporary containment, and steps for a permanent fix. By following these steps, homeowners and facility managers can reduce downtime and prevent damage.
Why boiler leaks matter
According to Boiler Hub, a boiler leak is more than a minor drip. It signals potential gasket failure or corrosion that can escalate if ignored. Leaks waste energy and create safety risks, from scalding to carbon monoxide exposure in gas systems. Understanding common leak sources—pressure relief valve discharge, pump seals, loose fittings, and heat exchanger joints—helps you prioritize action and protect the home or building from downtime and expensive repairs. Boiler Hub analysis shows that timely assessment and documentation improve outcomes for both homeowners and facility managers.
Safety first: isolate power, gas, and water
Before touching any boiler components, shut off electrical power to the unit and isolate the gas or fuel supply if you can do so safely. Close the water feed valve to stop additional pressure and water flow. Open nearby taps to relieve pressure, but do not operate the boiler valve while the system is pressurized. Ventilate the area and monitor for any gas odor. Use a gas detector if available and wear appropriate PPE: chemical-resistant gloves, eye protection, and a long-sleeve shirt. If you smell strong gas or suspect a major leak, leave the area immediately and call emergency services. This is not a step to rush—it reduces risk of burns, electrical shock, and floods.
Tools and materials you’ll need
Having the right tools ready reduces delays and makes the repair safer. Essential items include adjustable wrenches, pipe wrenches, screwdrivers, a torque wrench, and a flashlight for dark corners. You’ll need replacement gaskets or seals compatible with your boiler model, PTFE tape for threads, and a boiler-approved sealant or gasket compound if applicable. Keep towels, a bucket, and absorbent rags on hand for spills. Have a drain pan and a way to safely collect and dispose of water. Confirm that any sealant used is rated for hot water/steam and compatible with metal surfaces in your system. Safety gear should be worn at all times during the repair.
Locating the leak origin and assessing damage
Carefully inspect all potential leak points: valve connections, unions, gaskets, and the heat exchanger. Look for fresh drips, wet spots, or mineral deposits that indicate a slow leak. Pressure gauges can reveal a drop in pressure over time. If you can, isolate the affected section by closing the relevant valves, then document the leak location with photos for reference and future maintenance notes. If the leak is from the heat exchanger or a corroded pipe, the fix may require professional service or replacement of a larger boiler component.
Temporary containment: stopping active leaks
For small, slow leaks at accessible joints, you can apply a temporary sealant rated for boiler use, following the product instructions exactly. Use towels and a drain pan to catch any dripping water and avoid slick surfaces. Place absorbent mats around the area to prevent damage to floors and cabinets. Do not clamp or tighten beyond specified torque, and never seal off a leak that is actively venting steam. If the leak is from the relief valve or piping under high pressure, immediate professional intervention is recommended.
Permanent repair options: seals, gaskets, and replacements
Permanent repair will depend on the leak source and boiler design. Options include replacing worn gaskets or seals at pipe joints, tightening fittings to the manufacturer's torque specification, or replacing a failed pump seal. In some cases, the heat exchanger or pressure relief valve may be the culprit and require professional service or component replacement. Always consult the boiler’s service manual or a qualified technician before proceeding with major parts replacements. After replacing components, reassemble, verify all connections are dry, and ensure there are no fuel or electrical hazards.
Refill, test, and monitor for leaks
With the system refilled, slowly bring it up to operating pressure as per the boiler's manual. Bleed any air from radiators or circuits and check all joints for renewed leaks. Observe the pressure gauge for a stable reading over 24-72 hours and inspect after a heating cycle. If you notice any new drips or pressure changes, repeat the inspection process and consider professional inspection if the problem recurs. Document readings and steps taken for future maintenance records.
When to call a licensed professional and maintenance plan
If the leak originates from a heat exchanger, a cracked pipe, or persistent valve issues, professional service is strongly advised. A licensed technician can safely depressurize, diagnose, and perform permanent repairs with the correct replacement parts and torque specifications. Regular preventive maintenance—annual inspections, pressure relief valve testing, and leak checks—can prevent future leaks and extend boiler life. The Boiler Hub team recommends scheduling an annual service and maintaining a simple maintenance log to track any issues and corrective actions.
Authoritative sources
- U.S. Department of Energy: Boiler maintenance and safety tips: https://www.energy.gov
- OSHA Boiler Safety Standards: https://www.osha.gov
- EPA Home Heating Safety Guidance: https://www.epa.gov
Tools & Materials
- Safety gear (gloves, goggles, protective clothing)(Heat-resistant gloves recommended)
- Adjustable wrench(To fit various nuts and fittings)
- Pipe wrench(For large fittings and joints)
- Screwdrivers (Phillips and flathead)(For removing panels and covers)
- Torque wrench(To manufacturer torque specs)
- PTFE tape (Teflon tape)(For threaded pipe joints)
- Boiler-safe gasket sealant or replacement gaskets(Only sealants/gaskets rated for boiler use)
- Replacement gaskets or seals for common joints(Match model family and pipe size)
- Drain pan, towels, and absorbent rags(Contain spills and protect floors)
- Leak-detection dye (optional)(To locate faint leaks in complex joints)
- Flashlight or headlamp(Shine light into tight spaces)
- Ventilation or fan (optional)(Ensure good air flow in enclosed spaces)
Steps
Estimated time: Estimated total time: 2-3 hours
- 1
Power down and isolate
Turn off power to the boiler at the switch or breaker. If safe, shut off gas or fuel supply and close the water feed valve to stop new water from entering the boiler.
Tip: Never open the boiler or adjust valves while it's pressurized. - 2
Depressurize and drain
Open the boiler drain and cold-water line to reduce pressure; collect water in a bucket. Close the drain when water flow stops.
Tip: Be prepared for a rush of hot water; wear protective gloves. - 3
Identify leak source
Inspect joints, unions, and seals; look for fresh drips and use photos for reference. Check the pressure gauge for abnormal drops.
Tip: Label potential sources for later comparison. - 4
Prepare surfaces
Clean the area with a rag or brush; ensure surfaces are dry and free of corrosion before applying sealant or gasket.
Tip: Dry surfaces allow sealants to cure properly. - 5
Apply sealant or replace gasket
Apply boiler-rated sealant or replace worn gasket as indicated; follow product instructions precisely.
Tip: Do not mix sealants; verify compatibility with metal surfaces. - 6
Tighten or replace fittings
Re-tighten loose unions to the manufacturer's torque spec or replace faulty seals as needed.
Tip: Use a torque wrench and avoid overtightening. - 7
Repressurize and restore
Close the drain and gradually refill the system; restore power/gas and allow the boiler to reach normal operating pressure.
Tip: Watch the gauge closely during first fill. - 8
Test and monitor
Run a heating cycle and inspect joints for leaks; monitor for 24-72 hours and document readings.
Tip: If leaks recur, escalate to professional service.
Questions & Answers
What is the first step I should take when I discover a boiler leak?
Shut off power and water, and, if safe, isolate the gas supply. Then assess the leak source and plan the repair.
Shut off power and water first, then assess the leak and plan the repair.
Can I repair a boiler leak myself?
Small leaks at accessible joints can sometimes be addressed with proper seals or tightening, but larger leaks or dangerous locations should be handled by a licensed technician.
Small leaks may be doable if you're experienced; larger leaks need a pro.
Is a leaking boiler dangerous?
Yes. Leaks can cause burns, slippery floors, and carbon monoxide risks in gas boilers. Treat any leak as urgent.
Leaking boilers are dangerous; treat it as urgent.
When should I call a professional?
If the leak is from the heat exchanger, if you cannot depressurize safely, or if leaks recur after a basic fix, contact a licensed boiler technician.
If in doubt or if leaks return, call a professional.
What maintenance helps prevent leaks?
Annual professional inspections, pressure relief valve testing, and regular leak checks help prevent future leaks.
Regular maintenance stops leaks before they start.
What should I do after a repair is complete?
Repressurize slowly, test for leaks, monitor readings, and keep a maintenance log for future reference.
Slow re-pressurization and careful monitoring are key.
Watch Video
Key Points
- Shut off power and water before inspecting any leak
- Identify the leak source safely and methodically
- Use correct torque specs and approved sealants for permanent fixes
- Test and monitor post-repair before returning to service
- Schedule regular maintenance to prevent future leaks