Leaking Pipe from Boiler: A Comprehensive Troubleshooting Guide
Urgent troubleshooting guide for a leaking pipe from your boiler. Learn safety steps, common causes, diagnostic flow, step-by-step fixes, and prevention tips to protect your home and avoid costly damage.

The most likely cause is a loose joint or failing valve on a boiler pipe. Immediate action: shut off power and the water supply, place towels to catch drips, and inspect obvious fittings. If the leak persists or involves the boiler itself, stop and contact a licensed professional.
Immediate safety steps
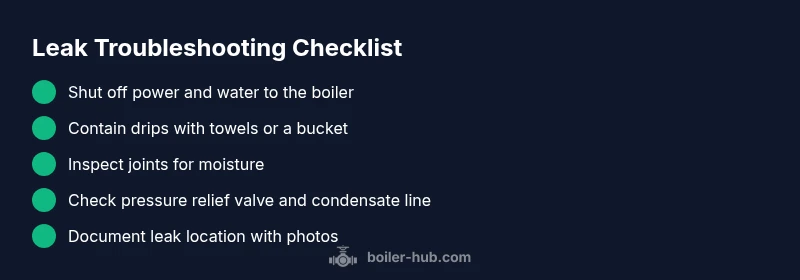
If you discover a leaking pipe from the boiler, your first priority is safety. Do not ignore the problem or assume it will stop on its own. According to Boiler Hub, the safest initial response is to shut off the boiler and close the main water supply to prevent further flooding. If you have a gas boiler and you smell gas or hear hissing near fittings, evacuate immediately and contact emergency services. Once you’ve ensured safety, use absorbent towels or a bucket to contain the drip and keep children and pets away from the area. If you’re unsure about turning off gas or power, wait for a professional. After securing the area, document the leak with photos so a technician can assess the extent of damage. Remember, a small leak can become a major issue quickly, especially if it involves the boiler’s pressure system or electrical components.
Common causes of a leaking boiler pipe
Leaking pipes around a boiler typically arise from a few common sources. The most frequent culprit is a loose joint or failed compression fitting where piping connects to the boiler or valves. Corrosion over time can weaken metal or rubber seals, leading to slow drips that intensify with pressure. Freezing temperatures can crack pipes or joints, especially in unheated or poorly insulated basements or crawl spaces. A damaged pressure relief valve or condensate line can also leak water directly from the system. Finally, a poorly performed repair in the past may have left a weak seam or leak path. Each cause has different implications for repair, cost, and safety, so a careful inspection is essential.
Where leaks originate in the piping system
Boiler piping consists of hot-water or steam pipes, cold water feed lines, a condensate drain, and safety valves. Leaks most commonly emerge at joints, valve connections, or along a corroded section of pipe. The condensate return line and the pressure relief valve are frequent trouble spots because they handle pressure and temperature changes. In some cases, leaks originate from the boiler’s inner components and travel along exterior pipes, creating a damp spot away from the actual failure point. Distinguishing between a true pipe leak and a hose or condensate drip is important for choosing the right repair approach. A careful inspection for moisture patterns, staining, and the direction of drips can help identify the source.
Diagnostic checklist: what to inspect
Before calling a pro, perform a structured check to narrow down the source. Look for visible moisture on joints and fittings; check for corrosion or rust on pipes and valves; inspect the condensate drain for clogs or leaks; examine the pressure relief valve and the pipe connected to it for moisture around the seal. If the area is damp only when the boiler is firing, the leak may be related to thermal expansion or valve operation. Don’t forget to check for loose mounting brackets or supports that might stress joints over time. If you see water pooling near the boiler, note the color, texture, and any oily sheen that could indicate different fluid types. Documenting conditions helps a technician diagnose quickly.
Diagnostic flow: symptom → diagnosis → solutions
Symptoms guide the diagnosis. If you see steady dripping from a joint, the likely cause is an imperfect seal or loose connection; tightening or resealing can fix this in many cases. If water appears from a valve or pipe that is corroded, the diagnosis shifts toward component wear, requiring replacement. For pipes that crack from freezing or aging, the repair may involve replacing a section of pipe. If the leak continues after basic tightening, escalate to replacing gaskets, valves, or a segment of hot-water pipe. In all cases, never work on live gas lines or electrical components unless you are trained and authorized. When in doubt, consult a professional. Boiler Hub emphasizes safe handling and regular maintenance to prevent recurring leaks.
Step-by-step fixes for common causes
- Tighten accessible fittings: With the boiler powered down and cooled, gently tighten all accessible joints using the correct wrench, ensuring you don’t over-tighten and strip threads.
- Replace worn gaskets or seals: If a valve or connection shows cracks or dry rot, replace the gasket or seal with a compatible part.
- Replace a faulty valve: A leaking pressure relief valve or a faulty shut-off valve may require replacement by a professional.
- Replace damaged pipe sections: If the pipe itself is corroded or cracked, cutting out the bad section and installing a new piece with proper fittings is often necessary.
- Refill and test: After repairs, re-pressurize the system slowly and check for additional leaks using a soapy water test along joints and valve connections.
- Monitor: Run the boiler briefly to verify that the leak is sealed and that no new moisture appears.
Tip: If you’re unsure about the exact source, perform the fixes on a single suspected joint first and test before proceeding to other areas. Safety and proper part compatibility are critical.
Safety considerations and when to call a professional
Boiler work can be dangerous, especially if you have a gas-fired unit or high-pressure system. If you notice a gas odor, hissing sounds, or if the leak is near electrical components, stop and call emergency services or a licensed technician immediately. Do not attempt to seal or bypass safety devices. For leaks within the boiler cabinet or behind walls, or if you lack the proper tools or knowledge, hire a professional. Regular maintenance by a qualified pro can prevent leaks and ensure safe operation. A professional will verify pressure, test for hidden leaks, and inspect venting and flue integrity to prevent dangerous buildups.
Preventing future leaks: maintenance tips
Prevention is easier than repair. Schedule annual boiler service with a licensed technician and perform periodic checks of pipes, joints, and valves. Maintain proper system pressure within the recommended range and replace aging components before failures occur. Insulate exposed piping in unheated areas to reduce thermal stress, and keep the area around the boiler clean and dry to spot leaks early. If you notice even small drips, address them promptly rather than waiting for a larger issue. Proper drainage, clear condensate lines, and prompt removal of standing water protect floors and reduce mold risk.
Aftercare: testing, documentation, and next steps
After completing repairs, run a controlled test to ensure no further leaks appear under normal operating conditions. Monitor for at least a few hours, checking joints and valves periodically. Take photos and notes of the repaired areas and the test results for future reference. If any new moisture appears or the leak reoccurs, stop and contact a professional promptly. Keep a preventive maintenance log and schedule future checks to minimize the risk of recurring leaks.
Steps
Estimated time: 60-120 minutes
- 1
Power down and isolate
Turn off the boiler and disconnect it from power. If accessible, shut the main water valve to stop the flow. Allow the system to cool before touching any components. This reduces the risk of scalding and electric shock.
Tip: Always verify power at the outlet with a tester before touching any wiring. - 2
Contain and protect
Place towels or a bucket under the leak to catch dripping water. Keep animals and children away from the area. If the leak is near electrical components, avoid contact with water and call a professional.
Tip: Use a white cloth to better see the moisture and confirm color changes. - 3
Identify the source
Carefully inspect joints, connections, and valves to locate the exact leak origin. Look for moisture, corrosion, or staining along pipes and fittings. If you can’t pinpoint the source, document areas with photos for the technician.
Tip: Mark the suspected area with painter’s tape for quick reference later. - 4
Tighten or reseal
Gently tighten loose fittings with the appropriate wrench. Replace any worn seals or gaskets. Do not overtighten, which can damage threads or crush seals. Re-check after a short test run.
Tip: Use plumber’s tape on threaded connections if recommended by the manufacturer. - 5
Replace faulty components
If a valve, gasket, or pipe section is damaged, replace it with compatible parts. This may require partial disassembly; ensure you follow safe procedures and manufacturer guidelines. Some repairs are best left to professionals.
Tip: Only replace parts that are clearly compatible with your boiler model. - 6
Test and verify
Refill the system slowly, restore power, and observe for any leaks. Use a soap-water solution to check joints—if bubbles appear, there’s a leak. Monitor for several hours and document results for future maintenance.
Tip: Keep a log of test results and any changes in pressure readings.
Diagnosis: Visible water drips from a boiler pipe or pooling near the boiler
Possible Causes
- highLoose pipe fitting or joint
- mediumWorn gasket or valve seal
- lowCracked pipe from freezing or aging
Fixes
- easyTighten accessible joints after verifying power/water off
- mediumReplace corroded gasket or valve seal
- hardReplace damaged section of pipe or valve assembly
Questions & Answers
Can a leaking pipe from a boiler be repaired without replacing the pipe?
Yes, if the leak is at a joint or from a worn gasket, a seal or part replacement may stop the leak. If the pipe itself is cracked or corroded, replacement is usually required.
Yes, sometimes a fix at the joint or seal stops the leak, but a cracked or corroded pipe often needs replacement.
Is it safe to operate the boiler if there is a visible leak?
No. A leak can indicate a failing component or unsafe conditions. Shut off the boiler and contact a professional to assess and repair.
No. Shut it off and call a professional to inspect and repair.
What should I do to contain water from a leak while waiting for help?
Place towels or a bucket under the leak to minimize damage and dampness. Keep children away and avoid touching electrical components if the area is damp.
Use towels or a bucket to catch drips and stay safe from any electrical risk.
What are signs the leak could become a bigger problem?
Persistent damp spots, increasing water volume, rust on pipes, or a sudden pressure drop can indicate a growing issue requiring professional evaluation.
Watch for growing dampness, rust, or pressure changes and get a pro if they appear.
Does repairing a leaking pipe cost a lot?
Costs vary based on parts, labor, and complexity. A professional assessment will provide a range after inspecting the exact cause and required parts.
Costs vary; a professional can give you a range after assessing the exact cause.
When should I call emergency services?
If you smell gas, hear hissing near the boiler, or suspect a gas leak, evacuate and call emergency services immediately.
If you smell gas or hear a hissing noise, evacuate and call emergency services.
Watch Video
Key Points
- Shut off power and water immediately when you detect a leak.
- Identify whether the source is a joint, valve, or pipe.
- Tighten or replace components only if you feel confident and safe.
- Call a licensed professional for gas boilers or complex repairs.
- Maintain regular boiler maintenance to prevent leaks.