If Boiler is Leaking: Urgent Troubleshooting Guide
Urgent, practical steps to diagnose and fix a leaking boiler. This Boiler Hub guide covers safety, common causes, quick checks, a step-by-step fix, and when to call a professional.

Immediate action: shut off power to the boiler and close the main water supply. A boiler leak is usually caused by a faulty pressure-relief valve, a cracked pipe, or a worn gasket. Begin with safe, simple checks (external connections, valves, and visible seals) and call a professional if the leak continues or appears to come from inside the boiler.
Symptoms and Immediate Safety
According to Boiler Hub, a boiler leak demands urgent action. If you notice water pooling around the boiler, a damp area on walls, or dripping from supply lines, treat it as an emergency. First, power down the boiler at the thermostat or breaker, and shut the main water supply to limit further leakage. Do not ignore hissing sounds from the relief valve or a strong sulfur or burning odor — these can indicate dangerous conditions (especially with gas boilers). Wear protective gloves if you must touch any wet metal and keep children and pets away from the area. After ensuring personal safety, document the leak (photo or note) and prepare for a professional inspection. Boiler leaks can escalate quickly, damaging floors, walls, and electrical components if left unchecked. The goal in this section is to stabilize the situation and prevent casual, risky fixes. Keep a bucket and towels handy to manage minor drips while you assess the source for the next steps.
Common Causes and What They Look Like
Boiler Hub analysis shows that most residential boiler leaks originate at external connections or protective devices rather than the heat exchanger itself. Typical culprits include a faulty pressure-relief valve (PRV) with a worn seal, loose or corroded pipe connections, condensate drain issues, or a deteriorated gasket at valve joints. A leak from the PRV often presents as a steady, low-volume drip from the discharge line, sometimes accompanied by a faint mineral residue. Loose pipe fittings can produce a more obvious drip from joints, while cracked pipes may leak along the length of the line. If the leak appears only when the boiler cycles on, it’s often a connection or gasket problem rather than the internal components. The more severe internal failures (like a compromised heat exchanger) are rarer but require immediate professional assessment. Understanding the common sources helps you communicate clearly with a technician and prioritize the most dangerous or costly fixes. Keep records of when the leak happens and how it changes with boiler activity, as this information speeds up diagnosis.
What to Check First: Fast Fixes You Can Try Safely
Start with the simplest checks before calling for help. Visually inspect the obvious external connections: PRV discharge line for cracks or blockages, hose clamps on condensate lines, and pipe joints at the boiler cabinet. Ensure that the automatic shutoff valves (if present) are fully open and not partially closed. If you see a minor drip from a loose valve nut, gently tighten with the correct wrench, taking care not to over-tighten and damage threads. For a discolored residue or mineral buildup around gasket seals, clean the area carefully and reseal if you have the right sealant rated for boiler use. Do not attempt to reseal or disassemble interior boiler components unless you are trained, as this can be dangerous. If the drip persists after these checks, or if the leak is coming from internal components or the heat exchanger, stop and call a licensed HVAC technician immediately. Remember: never work on live electrical parts near water.
Diagnostic Flow: From Symptom to Diagnosis to Solution
The diagnostic approach is to map the observed symptom to a probable cause and select a safe, incremental fix. Start by confirming the visible source of the leak and checking pressure and temperature readings. If the leak is from the discharge line, the PRV, or the condensate pipe, you can often fix or temporarily seal the issue. If the leak originates inside the boiler or from the heat exchanger, the recommended action is professional replacement or assessment. Document changes, monitor pressure, and avoid running a unit that continues to leak. This flow keeps you focused on safe, actionable steps and prevents risky attempts to “patch” an interior failure. For homeowners, this means prioritizing external seals and discharge lines first, then engaging pros for internal repairs.
Step-By-Step: Most Common External Leak Fix (What You Can Do Now)
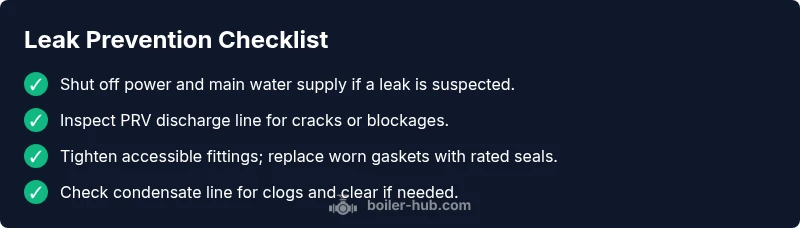
- Power down and shut off water supply. 2) Inspect PRV and discharge line for drips or cracks. 3) Tighten accessible fittings with appropriate tools—do not force beyond snug. 4) Check condensate line for clogs; clear with a small brush if safe. 5) Inspect visible gaskets around valves; replace if you have rated seals and the correct tool. 6) Clean and dry the area; monitor for re-leaks over 24–48 hours. 7) If leakage persists or you suspect internal components, call a licensed professional immediately.
Safety Tips, Warnings, and Common Mistakes to Avoid
- Do not operate a boiler that’s visibly leaking; shut it down and call for service.
- Never mix electrical work with water exposure; disconnect power safely before any inspection.
- Avoid DIY fixes on heat exchangers or sealed systems; these require professional training.
- Use only manufacturer-approved seals and gaskets rated for your boiler model.
- Document the leak with photos and note the time of day and any changes when troubleshooting.
Prevention: How to Reduce Future Leaks and Extend Boiler Life
Regular maintenance is the best defense against leaks. Schedule annual inspections by a qualified technician, test the PRV annually, replace worn gaskets at valve joints, and clean condensate traps to prevent clogs. Keep the boiler area dry, ensure proper ventilation, and monitor the pressure gauge (typical residential boilers run around 12–15 psi when cold). If you notice rust, corrosion, or mineral buildup, address it promptly as these signs often precede leaks. By combining routine checks with smart valve management, you reduce the likelihood of a sudden leak and extend the life of your boiler system. The Boiler Hub team recommends establishing a preventive maintenance calendar and keeping a log of service visits for reference during future troubleshootings.
Steps
Estimated time: 30-60 minutes
- 1
Ensure safety first: power, water, and gas shutoff
Turn off the boiler at the thermostat or breaker and close the main water supply. This minimizes further leakage and protects against electrical hazards. If you smell gas, evacuate and call emergency services.
Tip: Label the shutoffs to remind yourself where to reset later. - 2
Identify the leak source
Look for drips at the PRV discharge line, condensate drain, and visible pipe joints. Note whether the moisture is constant or intermittent with boiler cycles.
Tip: Take photos for your service call to show exact leak points. - 3
Check external valves and fittings
Inspect hose clamps and union nuts; tighten gently if you detect a small drip. Avoid over-tightening, which can crack fittings.
Tip: Use a proper wrench and avoid metal-to-metal contact with delicate threads. - 4
Inspect the condensate drainage
Ensure the condensate pipe is clear and unobstructed. A clogged line can cause backups and accidental leaks around the unit.
Tip: Flush or replace the condensate line if you notice blockages. - 5
Check system pressure
Verify the pressure gauge reading. If pressure is too high, bleeding or reducing pressure may be required, but only if you know how to do it safely.
Tip: Do not depressurize aggressively; follow manufacturer guidelines. - 6
Decide on DIY vs. professional repair
If you see interior corrosion, a warped heat exchanger, or persistent internal leaks, stop DIY fixes and contact a licensed professional.
Tip: Pro visits can include leak testing with thermal imaging and pressure testing. - 7
Restore power and monitor
Reconnect power and water, then observe for any renewed leaks over the next 24–48 hours and record readings.
Tip: Keep a log of pressure and any changes for service documentation.
Diagnosis: Visible water pooling around boiler, damp area, or dripping from lines
Possible Causes
- highFaulty pressure-relief valve or discharge line
- highLoose or corroded pipe connections
- mediumWorn seals or gaskets at joints
Fixes
- easyShut off power and water supply; examine PRV and discharge line for external leaks; tighten or replace as needed
- easyTighten loose fittings at visible pipe connections; replace worn gaskets if you have rated seals and appropriate tools
- hardIf the leak is from the heat exchanger or internal components, do not attempt repair; contact a licensed HVAC professional
Questions & Answers
What should I do immediately if I see water around my boiler?
Shut off power and the water supply, then assess for the leak source. If it’s internal or won’t stop, contact a licensed technician right away.
Shut off power and water, identify the leak source, and call a licensed technician if it can’t be stopped.
Can I fix a boiler leak myself?
Only for obvious external leaks and simple fittings. Interior leaks or damaged heat exchangers require a professional. Do not attempt risky repairs.
DIY is limited to simple external fixes. For internal leaks, call a pro.
What are the most common leak sources?
Pressure-relief valve discharge lines, loose pipe joints, condensate drain blockages, and worn gaskets are frequent leak points.
Most leaks come from the relief valve, joints, condensate lines, or seals.
How urgent is a boiler leak?
Leaks are potentially dangerous and can cause water damage and gas or carbon monoxide risks. Treat promptly and seek professional help when in doubt.
Boiler leaks are urgent—address them quickly and call a professional if unsure.
What safety gear should I use?
Wear gloves and eye protection when inspecting leaks; avoid contact with hot surfaces and electrical components near water.
Wear gloves and eye protection, and stay away from hot parts and electricals.
When should I replace the boiler instead of repairing it?
If the heat exchanger is corroded or the boiler is nearing end of life, replacement is usually more cost-effective than repeated repairs.
If major components are failing, replacement is often the best option.
Watch Video
Key Points
- Identify the leak source before attempting fixes
- Prioritize safety: power, water, and gas shutoffs
- External leaks are often fixable; interior leaks require a pro
- Document leaks for faster service and prevention