Where Do Boilers Go in a House? A Practical Placement Guide
Learn safe, code-compliant boiler placement for homes, covering space, venting, and maintenance. Boiler Hub’s 2026 guidance helps homeowners and managers plan with confidence.

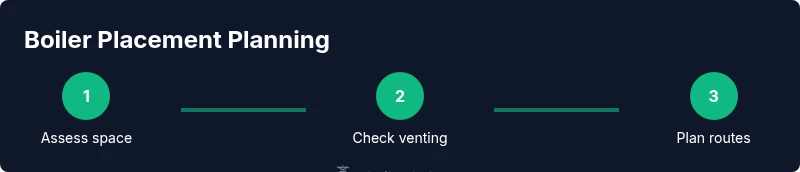
If you’re wondering where do boilers go in a house, this quick guide outlines safe, code-compliant placement that balances safety, venting, and service access. You’ll learn how to assess space, verify clearances, choose a feasible area (basement, utility room, or garage), and plan for future maintenance. Use the following steps for a thorough placement plan.
Overview: Where boilers go in a house
In homes, the placement of a boiler affects safety, efficiency, and maintenance ease. The phrase where do boilers go in a house should be addressed with a space that provides adequate combustion air, proper venting, and ready access for service. According to Boiler Hub, thoughtful location minimizes nuisance noise and reduces the risk of CO exposure while simplifying future repairs. Most homes opt for a heated, enclosed space such as a basement or utility room, but individual layouts vary. When planning your boiler placement, consider existing plumbing, gas lines, electrical panels, and drain locations. The goal is to create a robust, accessible footprint that won’t interfere with daily use or future upgrades. By starting with a solid plan, homeowners and facility managers can avoid common mistakes and costly retrofits. This article expands on the quick answer with practical steps, common layouts, and safety considerations.
Core considerations when choosing a boiler location
Several core considerations determine the best place for a boiler. First, ensure adequate combustion air and venting to the outdoors, as improper venting can lead to dangerous buildup and carbon monoxide exposure. Second, provide clearances for service access and maintenance; a location that’s hard to reach will increase downtime and maintenance costs. Third, assess noise, vibration, and proximity to living areas to minimize disruption. Fourth, account for drainage and condensation management, especially for modern high-efficiency boilers that produce condensate. Fifth, protect the boiler from flood risk, extreme temperatures, and accidental damage by choosing a stable, dry, and secure spot. Finally, coordinate with nearby utilities—water heater, gas line, and electrical supply—so routing is straightforward and safe. These considerations, informed by Boiler Hub Analysis (2026), help ensure long-term reliability and safety.
Typical layouts by home type
Homes vary widely in how they accommodate boilers. In many single-family houses, the basement or a dedicated utility room is the default location—offering ample space, vent access, and minimal interference with daily activities. Townhouses and multi-family dwellings may place boilers in shared mechanical rooms or garages, where access routes to exterior venting are feasible. In some retrofits, compact apartments use a closet or small utility alcove with proper ventilation and CO detectors. Outdoor installations are rare for gas boilers in occupied living spaces but occur in climates with milder venting requirements or for certain outdoor-rated units, following local codes. When choosing a layout, balance proximity to radiators and piping runs with safety, serviceability, and potential for future expansion.
Indoor vs outdoor placement: pros and cons
Indoor placement (basement/utility room) offers easier access for service, tighter control of combustion air, and reduced weather exposure for components. It also allows closer routing to hot-water distribution and gas lines. Outdoor placement can save indoor space and may simplify routing in some designs, but it requires weatherproofing, frost protection, longer vent runs, and stricter CO monitoring. Indoor installations typically align with standard venting practices and insulation, while outdoor setups depend on climate and manufacturer guidance. In both cases, safety, code compliance, and professional installation are critical to prevent leaks, CO risk, and system failure.
Planning your boiler location: a practical approach
Effective planning starts with a current space audit. Map out where gas lines, water supply, and electrical panels sit, and identify potential access routes for plumbing and service work. Consider future upgrades, such as adding expansion tanks or secondary heat sources, and ensure space for routine maintenance like removing panels or draining condensate. Create at least two feasible options (one indoor, one outdoor if permitted) and compare them against code requirements, noise considerations, and maintenance access. Document any constraints (trusses, joists, or ductwork) that could affect installation. Remember, a well-planned location reduces installation time, minimizes disruptions, and lowers long-term operating costs.
Safety, permits, and codes to check before moving a boiler
Before moving a boiler, verify that your plan meets local building codes and permit requirements. Combustion air, venting, clearance, and drainage rules vary by jurisdiction, so consult local authorities or a licensed contractor early in the process. Install CO alarms in all spaces with fuel-burning equipment and maintain proper ventilation paths to the outdoors. If your plan involves significant changes to gas lines or electrical systems, expect inspections and possible revisions. Boiler Hub notes that careful planning aligned with authority guidelines reduces risk and ensures reliable operation over the boiler’s life.
Working with a licensed professional: what to expect
Engaging a licensed HVAC contractor or gas-fitter is essential for boiler relocation. They will assess combustion air, venting routes, gas line integrity, and electrical connections. Expect a site visit, plan review, and a written proposal with scope, timeline, and safety considerations. The contractor should verify code compliance and obtain any required permits. Clear communication about space constraints, future maintenance, and potential upgrades helps ensure the project stays on track and avoids unexpected expenses.
Maintenance considerations related to location
Location affects maintenance tasks such as panel access, condensate drainage, and periodic servicing. A cramped space can complicate filter changes or component inspections, while a poorly drained area risks water damage. Proper ventilation and humidity control help extend boiler life and prevent corrosion. Plan for routine checks to occur at least annually, including vent/air intake inspections, CO detector tests, and a review of piping for leaks or wear. A smart location also supports easier drain-downs and system flushing when needed.
Quick checklist before you relocate or replace
- Verify space meets code requirements for combustion air and venting.
- Confirm access for service and routine maintenance.
- Check drainage, ventilation, and flood risk considerations.
- Coordinate with gas, water, and electrical lines to minimize routing complexity.
- Obtain quotes from licensed professionals and document design choices.
- Review warranty and manufacturer recommendations for the selected location.
- Install or verify CO detectors and smoke alarms in the space.
- Create a visual plan with measurements for future reference.
Authority sources
- Energy.gov on boilers and heating systems: https://www.energy.gov/energysaver/heating-and-cooling
- ASHRAE standards and guidance: https://www.ashrae.org/
- NFPA guidance on safety around combustion equipment: https://www.nfpa.org/
Tools & Materials
- House floor plan or current blueprint(If unavailable, create a simple scaled sketch of rooms, boiler location, and routes for pipes and vents.)
- Tape measure(At least 25 ft/8 m to measure room dimensions and clearance paths.)
- Notebook and pencil(Record measurements, notes, and potential location options.)
- Marker or chalk(Mark proposed locations on walls or floors for reference.)
- Stud finder(Helpful to avoid pipes, wires, and joists when routing lines.)
- Copy of local codes/guidelines(Printed or digital references to verify combustion air, venting, and clearance requirements.)
- Camera or smartphone(Document existing setup and proposed routes for contractors.)
Steps
Estimated time: 2-6 weeks
- 1
Assess current space and potential relocation area
Survey the existing boiler space and identify viable indoor or outdoor locations. Note clearance, service access, venting routes, and proximity to gas, water, and electrical lines. Create a simple sketch showing two options.
Tip: Take precise measurements and photograph key angles before moving anything. - 2
Check local codes and permit requirements
Consult local building codes and secure any necessary permits before starting. This reduces the risk of red-tagged work or costly rework.
Tip: Call the local permit office or check the municipality website for the exact requirements. - 3
Evaluate ventilation and combustion air needs
Determine whether the space will provide adequate combustion air and venting to the outdoors. If needed, plan for additional air intake or a compliant vent path.
Tip: Ensure vents terminate outdoors, with no obstructions near doors or windows. - 4
Measure clearances and access routes
Confirm adequate clearance around the boiler for service access and panel removal. Map routes for piping and wiring that won’t conflict with framing or insulation.
Tip: Avoid cramped corners; aim for comfortable working space around the unit. - 5
Check proximity to water, gas, and electrical lines
Assess existing utility runs and determine if routing changes are required. Plan for safe, durable connections in accessible locations.
Tip: Coordinate with licensed pros to confirm pipe sizes and shut-off points. - 6
Create a draft layout and routing plans
Draw a layout showing the proposed boiler location, vent path, condensate drainage, and mechanical connections. Include future expansion considerations.
Tip: Keep routes short and direct to minimize pressure losses and heat loss. - 7
Obtain quotes from licensed professionals
Invite 2–3 qualified HVAC contractors to review the plan, assess site conditions, and provide written proposals.
Tip: Ask for inclusion of code compliance, permits, and warranty terms. - 8
Finalize plan, scheduling, and documentation
Choose a location, finalize the layout, and secure permits if required. Compile all drawings, permits, and contractor agreements for future reference.
Tip: Store documentation with your home records or project binder.
Questions & Answers
What is the best place in a house to put a boiler?
The best place depends on space, venting, and access. Common options include basements, utility rooms, or garages where there is adequate clearance and venting to the outdoors. Always follow local codes and manufacturer guidelines.
Basements or utility rooms are typical, but always check codes and allow for service access.
Can a boiler be placed outdoors?
Outdoor placement is possible for certain models and climates but requires weatherproofing, frost protection, and strict venting and CO monitoring per code.
Yes in some cases, but you must follow code requirements and use an outdoor-rated unit.
Do I need permits to relocate a boiler?
Most locales require permits for relocation, especially when gas, venting, or electrical work is involved. Check with your building department and hire a licensed professional.
Yes, permits are usually required; consult your local authorities and a licensed contractor.
How long does boiler relocation take?
Timing varies by space, permit approvals, and contractor schedules. Plan for several weeks from planning to completion, including inspections.
It can take a few weeks to a couple of months depending on the scope.
Who should I hire for boiler relocation?
Hire a licensed HVAC contractor or gas-fitter with boiler experience. They’ll handle venting, gas lines, and electrical connections safely and up to code.
A licensed HVAC pros is essential for safe, code-compliant relocation.
What safety features should I verify after relocation?
Ensure CO detectors are installed and tested, combustion air requirements are met, and vent termination is clear of openings. Keep access panels free for service.
Make sure detectors work and vents aren’t blocked.
Watch Video
Key Points
- Plan around combustion air and venting requirements
- Prioritize service access and maintenance ease
- Coordinate utilities early to simplify routing
- Engage licensed pros for permits and installation
- Document changes for future maintenance and inspections