How to Replace Boiler Expansion Tank: A Complete How-To Guide
Boiler Hub's practical, safety-first guide to replace boiler expansion tank. Learn tools, steps, troubleshooting, and maintenance for homeowners and facility managers.

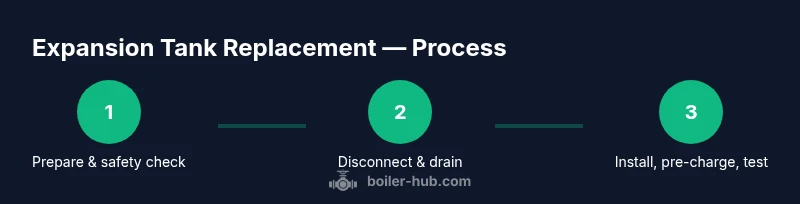
You will replace a boiler expansion tank by safely isolating power and water, draining the system, removing the old tank, installing a correctly sized replacement with the proper pre-charge, and testing the loop for leaks. This guide provides a complete, step-by-step process with safety checks, tool lists, and maintenance tips to prevent future issues.
What is an expansion tank and why replace it?
An expansion tank is a compact pressure vessel installed in closed boiler loops to absorb the extra volume of water as it heats. When water heats, it expands and pressure rises. The tank provides a cushion so the boiler and pressure relief valve don’t cycle or stress the piping. Over time, the diaphragm or bladder can fail, air charge can leak down, or the tank can corrode and water-logging can occur. When this happens, you should consider replacing boiler expansion tank to maintain safe system pressure and prevent damage. According to Boiler Hub, replacing a faulty expansion tank can prevent costly boiler damage and leaks. Boiler Hub analysis also notes that improper pre-charge is a common contributor to early tank failure. Replacing the tank with a compatible unit and refilling with the correct pre-charge restores system balance and reduces nuisance cycling.
Homeowners and facility managers should approach replacement as a safe, measured task, ensuring compatibility with the boiler model and following local codes. In many older systems, an undersized or waterlogged tank is a primary source of pressure fluctuations and stressed components, so replacing it promptly can extend the life of the entire boiler loop.
Signs your expansion tank needs replacement
A failing expansion tank can masquerade as other boiler problems. Common indicators include frequent boiler cycling (the unit turning on and off more often than normal), noticeable pressure fluctuations as temperatures rise, and water leaks around the tank connections. A waterlogged tank—where the air chamber has degraded—will feel unusually heavy and may drip or leak water from the tank itself. Rust on the tank or near fittings is another red flag, signaling corrosion that could lead to failure. If the pre-charge has dropped below the system pressure, the tank won’t provide the intended cushion, causing the boiler to overwork. Hard water or mineral buildup inside the tank can accelerate wear and reduce performance. If you notice these signs, plan for replacement rather than patching the symptom, which can save money and prevent a sudden breakdown.
Boiler Hub analysis shows that a significant portion of expansion-tank failures stem from improper pre-charge and incorrect sizing, which underscores the importance of using the right replacement tank and verifying its specifications before installation.
How to choose the right replacement expansion tank
Start by identifying the tank type used by your boiler: diaphragm (bladder) tanks are common in modern systems and separate the air side from the water side, while older or simpler systems may use different configurations. The replacement must be compatible with your boiler model and on-system pressure. Check the manufacturer’s specification sheet or manual for tank size (gallons) and the required pre-charge in psi. In most homes, the pre-charge is set to the cold-water supply pressure, typically around 12-15 psi, but always verify against your system’s rating. Consider the maximum working pressure and ensure the tank is certified for potable use if used on domestic water lines. Also, verify fittings, connections, and orientation so that the tank aligns with the existing piping and does not introduce kinks or stress on the valve. A well-matched tank helps maintain consistent pressure and reduces nuisance cycling.
Boiler Hub’s guidance emphasizes matching pre-charge to your cold-water pressure and confirming compatibility with the boiler manufacturer’s requirements to avoid premature failure.
Preparations before replacement (safety and planning)
Preparation is the key to a safe, efficient replacement. Start by powering down the boiler and switching off the circuit feeding the unit. Isolate the cold-water supply to reduce backflow risk and drain the system into a bucket or tray to minimize spills. Wear safety goggles and gloves, and depressurize the loop by opening a hot-water faucet to vent air. Have towels handy to catch splashes and set aside a plan for post-installation bleed and testing. Review your boiler’s manual for any model-specific steps, and check local codes; if you work with gas, oil, or propane, extra caution is needed due to fuel and combustion hazards. Ensure the replacement tank, pre-charge tool, and necessary wrenches are readily available before starting to reduce on-site delays.
Safety is non-negotiable—taking time to prepare prevents dangerous situations and makes the job easier.
Step-by-step overview (high-level) to replace a boiler expansion tank
This section provides a high-level roadmap. You will locate the expansion tank, disconnect and remove the old unit, install the new tank, pre-charge it to the correct psi, reconnect, refill, and test for leaks. Every step should end with a leak check and a pressure verification. If your system uses a diaphragm or bladder tank, ensure the membrane sits properly inside the shell and that there is no air trapped in the water side after reassembly. After replacement, observe the boiler through one heating cycle to confirm stable pressure and silent operation. If any unexpected hissing, banging, or leaks occur, stop and reassess connections and seals.
For complex systems or high-pressure boilers, professional assistance may be prudent to ensure code compliance and safety.
Safety, warranty, and maintenance after replacement
After replacement, it’s essential to recheck all fittings and connections for leaks, then slowly re-pressurize the system following the manufacturer’s specifications. Bleed any trapped air from radiators or the boiler loop using the designated bleed points. Document the pre-charge setting and confirm it remains stable after the system fills. Periodic maintenance—such as checking the tank’s air charge, inspecting for corrosion, and monitoring pressure fluctuations—extends the life of the expansion tank and the overall boiler system. If you observe recurring issues after replacement, consult the boiler manual or contact a licensed technician to verify installation integrity and system compatibility. Remember, doing it right reduces the risk of future failures and keeps your boiler running efficiently.
Authority sources and additional tips
For safety and best practices, consult official references from national safety and energy authorities and your boiler’s manufacturer. The U.S. Department of Energy (DOE) and OSHA provide general guidance on safe boiler work and pressure systems. The National Fire Protection Association (NFPA) offers standards relevant to pressure vessels and boiler room safety. Boiler Hub’s guidance emphasizes verifying pre-charge settings and compatibility before replacement, and suggests keeping a maintenance log to track pre-charge values and inspection dates for future service. Always use the most recent boiler manual for model-specific instructions and local code requirements.
Tools & Materials
- Safety goggles(ANSI Z87.1 or equivalent)
- Insulated gloves(Heat-resistant if working near hot components)
- Adjustable wrench(For securing fittings and drain valves)
- Pipe wrench(Grips galvanized or copper pipes securely)
- Screwdrivers (flat and Phillips)(For brackets, caps, and covers)
- Teflon tape / pipe sealant(Seal threaded connections)
- Replacement expansion tank (diaphragm/bladder type)(Match size, capacity, and pre-charge to system)
- Pre-charge gauge / air compressor(Set tank to the correct cold-water pressure (commonly 12-15 psi))
- Vacuum/bleed hose(Assist draining and venting air from the system)
- Bucket, towels, old towel(Catch water and keep area clean)
Steps
Estimated time: 60-120 minutes
- 1
Power down and isolate
Shut off the boiler and disconnect the breaker or power supply. Close the cold-water supply to prevent backflow while you work. This step protects you from live electrical components and reduces the risk of water hammer when the system is opened.
Tip: Double-check the power is off at the breaker and at any nearby unswitched outlets. - 2
Relieve pressure and drain
Open a hot-water faucet to vent air and relieve residual pressure. Place a bucket under the tank outlet and slowly open the drain valve to drain the loop to a safe level. Don’t drain more than necessary; you want a comfortable working pressure while preserving as much water as possible for the refill.
Tip: Vent slowly to avoid a splash and use towels to protect floors. - 3
Locate and inspect old tank
Find the expansion tank connected to the boiler loop. Inspect for corrosion, leaks, or a visibly waterlogged case. Confirm the pre-charge on the air side using a pressure gauge, and compare with the system’s cold-water pressure.
Tip: Take a photo of the tank and connections before removal for reference. - 4
Disconnect old tank
Loosen and remove fittings attaching the tank to the supply line and the boiler loop. Cap open lines or keep them handy to prevent backflow. Remove the tank from its mounting with care to avoid strain on piping.
Tip: Keep track of small screws or brackets so nothing is misplaced during removal. - 5
Install new tank and connect
Position the new expansion tank and reconnect the inlet and outlet connections. Use fresh Teflon tape on threaded connections and tighten securely. Mount the tank so it’s stable and not hanging from pipes.
Tip: Check that the orientation matches the original, and avoid over-tightening which can damage fittings. - 6
Pre-charge the tank
With the system still open, pre-charge the new tank to the cold-water pressure (typically 12-15 psi). Use a gauge and an air compressor or manual pump as appropriate to reach the target. Seal the air valve once the target is reached.
Tip: If the tank will be mounted in a tight space, pre-charge before final mounting to avoid releasing water. - 7
Reconnect, fill, and bleed
Reconnect the power and water supply. Slowly refill the boiler loop while watching for leaks. Once filled, bleed air from radiators or vents and ensure the system is at the proper operating pressure.
Tip: Bleed in short increments to avoid rapid pressure spikes. - 8
Test and verify
Run the boiler through a heating cycle and observe for steady pressure and absence of leaks. Check the new tank for movement or noise during operation. Recheck the pre-charge after a heat cycle and adjust if needed.
Tip: Keep a log of readings to compare during future maintenance.
Questions & Answers
What is an expansion tank and why would I replace it?
An expansion tank absorbs pressure fluctuations in a closed boiler system as water heats. Replacement is often warranted when the tank is waterlogged, leaking, or presents corrosion or reduced pre-charge, which can stress the boiler loop.
Expansion tanks dampen pressure changes in the boiler loop; replace it if it’s waterlogged, leaking, or improperly charged.
Do I need to drain the entire system to replace the expansion tank?
Usually you should relieve system pressure and drain the portion of the loop you’ll work on to safely remove and install the new tank. Follow the boiler manual and local codes.
Yes—relieve pressure and drain the area you’ll work on, following the manual.
Can I replace the expansion tank myself?
DIY replacement is possible if you have basic plumbing skills and follow safety steps. For gas or oil boilers, or if local codes require, hire a licensed technician.
It can be a DIY task if you’re comfortable with plumbing; otherwise, call a professional.
What pre-charge should I set on the new tank?
Pre-charge the tank to match your cold-water supply pressure, typically 12-15 psi. Verify with the boiler manual and adjust if your system pressure differs.
Pre-charge the tank to the system’s cold-water pressure, usually 12-15 psi.
What are common signs of expansion tank failure?
Frequent cycling, pressure swings, leaks at fittings, or a heavy, waterlogged tank indicate failure. Rust on the tank is also a warning sign.
Look for frequent cycling, leaks, or a heavy, waterlogged tank.
Do I need a professional for replacement?
If you’re not confident with plumbing and boiler safety, or if local codes require licensed work, hire a pro to ensure safe installation.
If unsure, hire a licensed professional.
Watch Video
Key Points
- Identify the correct replacement tank by model and pre-charge.
- Pre-charge to cold-water pressure (often 12-15 psi) for accurate performance.
- Bleed air and test for leaks after installation.
- If unsure, hire a licensed professional for safety and code compliance.
- Document settings and maintenance for future servicing.