Boiler Expansion Tank Replacement: Step-by-Step
This comprehensive guide shows homeowners and facility managers how to safely replace a boiler expansion tank, including selecting the right tank, properly pre-charging, installing, and testing for leaks and correct pressure.

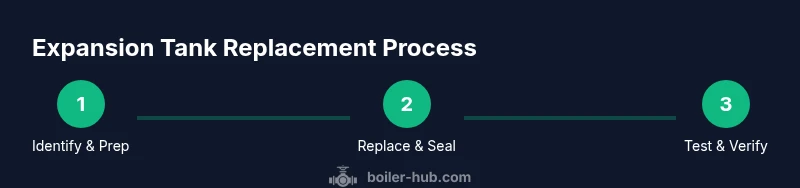
This guide explains how to replace a boiler expansion tank safely and effectively. You’ll learn how to verify system pressure, drain the boiler, select the correct tank size and pre-charge, install the new unit, re-pressurize the loop, and test for leaks. Follow these steps to protect your heating system and avoid costly damage.
Why replacing a boiler expansion tank matters
Thermal expansion in a closed heating system can cause erratic pressure, cold-start water hammer, and premature wear on valves and the pressure relief valve. The expansion tank acts as a cushion: when water heats and expands, the tank absorbs volume and keeps pressure within safe limits. A waterlogged or failed expansion tank loses this cushion, allowing pressure spikes that stress boilers and piping. Replacing a failed tank restores proper system dynamics, reduces noise, and extends the life of pumps, valves, and the boiler itself. According to Boiler Hub, regular inspection of the expansion tank is a key maintenance task for residential and commercial boiler systems. If you notice frequent pressure fluctuations or you hear banging and hammering when heating cycles begin, plan a tank replacement sooner rather than later. In this article, we’ll walk through how to identify a bad tank, choose the right replacement, and safely install it.
How a boiler expansion tank works
An expansion tank is a small reservoir connected to the boiler loop that accommodates the expansion of water as it heats. Most residential systems use a diaphragm or bladder tank: one side contains air pre-charged to a set pressure; the other side holds the water from the boiler loop. When heating raises pressure, water pushes against the diaphragm, compressing the air cushion and keeping system pressure within design limits. The pre-charge pressure should match the boiler’s cold-fill pressure, typically around 12-15 psi for many homes. If the diaphragm tears or the pre-charge drifts, the tank can fail to cushion pressure surges. That failure leads to higher boiler pressure, more frequent cycling, and potential leaks at the expansion connection. In practice, replacing the tank involves matching the connection type (thread size, port orientation) and setting the correct pre-charge before recharging the system.
Signs you need a replacement
- Frequent pressure fluctuations beyond the normal range when the boiler cycles.
- Waterlogged tank symptoms: hard water hammer, banging radiators, or reduced domestic hot water pressure.
- Visible signs of leakage around the tank or corrosion on the tank body.
- Reduced effectiveness after bleeding radiators; if the system cannot hold pressure after cooling.
- Pre-charge sign: a tank that requires a reset of the boiler pressure or keeps creeping up after a refill. If several of these are present, the expansion tank is likely failing and should be replaced rather than repaired piecewise.
How to choose the right replacement tank
- Determine the tank type: diaphragm vs. bladder tanks are common in modern boilers; both can be replaced with the same connection size, but confirm port size and orientation.
- Check the tank size and volume: larger homes or systems with multiple zones may need a larger tank to cradle the higher expansion volume.
- Match the connection size to your boiler: most residential tanks use 1/2 inch or 3/4 inch ports; ensure valves and fittings align.
- Set the correct pre-charge: measure the cold-fill pressure on the boiler and set the tank pre-charge accordingly using a tire gauge or pressure regulator.
- Consider quality and warranty: choose a well-reviewed tank with a reasonable warranty; a poor seal or weak bladder will fail again.
- Safety: if you’re unsure about the correct pre-charge or the tank’s orientation, consult a professional.
Safety and prepping before replacement
- Turn off power to the boiler and close the isolation valve to the boiler loop; allow the system to cool.
- Relieve residual pressure by opening a faucet on a lower radiator; this reduces risk when removing the old tank.
- Gather tools: adjustable wrench, Teflon tape, bucket, rags, and the new tank. Have a digital pressure gauge ready for verification.
- Wear gloves and eye protection. Hot water and pressurized steam can cause injuries.
- Never work on a live gas boiler with the gas supply open; isolate the gas valve if possible or contact a professional if you’re unsure.
- Plan for a slow refill to avoid a surge that could damage fittings.
Pre-installation check: confirm system compatibility
- Inspect the existing expansion tank port for corrosion, cross-threading, or leaks; if the port is damaged, you may need to replace the fitting as well.
- Confirm the new tank’s pre-charge; the system’s cold-fill pressure will guide the correct pressure.
- Verify the straightness and clearance of piping: ensure the new tank will clear surrounding pipes and clearance to the floor or wall support.
- Check the type of expansion tank: horizontal vs vertical orientation; ensure mounting orientation matches the old unit.
- Review the boiler manual for any model-specific requirements, such as required air vent placement or additional support brackets.
Step-by-step overview before you start
- Step 1: Gather your tools and the replacement expansion tank; check the pre-charge label.
- Step 2: Shut off the boiler and isolate power; ensure the system is cool.
- Step 3: Drain the system to below the tank’s pre-charge pressure.
- Step 4: Remove the old tank from its fittings, taking care to capture any residual water.
- Step 5: Install the new tank with the same port orientation; connect and tighten fittings securely.
- Step 6: Refill the system gradually, watching the pressure gauge; stop when you reach the boiler’s recommended cold-fill pressure.
- Step 7: Bleed air from radiators and verify no leaks at connections.
- Step 8: Turn power/gas back on and run a heating cycle to observe proper operation.
- Step 9: Re-check system pressure after 24 hours of operation.
Installation: connect, vent, and test
- Connect the new tank using Teflon tape on threaded joints and ensure a snug fit without overtightening; pipe dope may be used on some fittings.
- If your system uses an air vent, ensure it is clear and functional; air must escape during refill.
- Refill the system slowly; keep an eye on the pressure gauge, stopping when the cold-fill pressure is achieved.
- Open radiator bleed valves to purge air; pressure should stabilize as air exits.
- Once filled, run the boiler through a heat cycle; listen for improved smooth operation and watch for leaks.
- If pressure rises too high after cycling, re-check the tank bladder and pre-charge.
Post-install testing and maintenance
- Monitor system pressure for 24-48 hours; note any pressure drops or spikes.
- Inspect the expansion tank connection for leaks and corrosion; address immediately if observed.
- Record the pre-charge settings and the manufacturer's recommended cold-fill pressure for future reference.
- Schedule a periodic inspection as part of annual boiler maintenance; even good tanks can degrade over years.
- If you notice frequent cycling or high pressure, consider a professional inspection to confirm the tank and related components are correctly sized.
Common mistakes and how to avoid them
- Not draining enough water before removing the tank; this can cause a spray of hot water or scalding risk.
- Using the wrong pre-charge pressure; a mismatch will cause overpressure or relief valve operation.
- Over-tightening connections; this can strip threads or crack fittings.
- Forgetting to bleed air after refilling; air pockets reduce efficiency and confuse pressure readings.
- Neglecting to restore power or gas safely after maintenance; always verify the shutoff steps are complete before restarting.
When to call a professional
- If you aren’t sure about your boiler’s required pre-charge or port size.
- If the expansion tank ports show corrosion or cross-threading.
- If the air vent is clogged or you feel unsure about safe procedures.
- If the boiler is under warranty and you are uncertain about approved procedures.
- If the system continues to misbehave after replacement, or you notice gas-related concerns.
Troubleshooting leaks and pressure issues after replacement
- If you see a slow drip from the tank connection, tighten mildly and check for seal integrity; avoid overtightening.
- If the pressure rises too quickly after refill, re-check the pre-charge and confirm the tank bladder is intact.
- Inspect the thermo-relief valve for sign of leakage; if discharging, there may be another issue in the system.
- If you cannot stabilize system pressure within 24 hours, contact a pro; the issue could be related to piping or the boiler itself.
Tools & Materials
- New expansion tank (diaphragm/bladder type)(Ensure correct connection size (1/2" or 3/4" common for residential systems) and port orientation.)
- Adjustable wrench(Needed to loosen and tighten fittings; have two wrenches if possible to hold one while turning the other.)
- Teflon tape (PTFE) or pipe thread sealant(Apply to threaded joints only; avoid getting tape inside the tank port.)
- Bucket and absorbent rags(To catch water and keep the work area clean.)
- Digital pressure gauge or tire gauge(Use to set and verify the pre-charge on the new tank.)
- Gloves and safety goggles(Protection against hot water and sharp fittings.)
- Screwdriver set(Flathead/Phillips for clamp and vent adjustments if needed.)
- Shop vacuum or rag for drips(Helpful for cleaning up small spills around the installation site.)
- Leak-detection soap or spray(Test joints for leaks after installation.)
Steps
Estimated time: 60-120 minutes
- 1
Shut down boiler and isolate power
Turn off the boiler and disconnect electrical power or switch off the circuit breaker. If your system is gas-fed, close the gas valve or ensure it is safely isolated. Allow the system to cool completely to avoid burns from hot water.
Tip: Take a moment to read the boiler manual for model-specific safety cautions before starting. - 2
Relieve pressure and drain
Open a radiator bleed valve or a faucet at a lower point to release pressure slowly. Drain enough water so the system pressure is well below the expected pre-charge of the new tank.
Tip: Have a container ready to capture water and a helper to manage the drain hose. - 3
Locate and inspect the old tank
Find the expansion tank connected to the boiler loop. Check the fittings for corrosion or cross-threading and note the orientation and port size for the replacement.
Tip: If the old tank shows damage, consider replacing the corresponding fittings as well. - 4
Remove the old tank
Carefully disconnect the old tank from its fittings using the adjustable wrench. Have the bucket ready for residual water and keep track of which connection goes where.
Tip: Take photos before removal to reference alignment during installation. - 5
Prepare the new tank and pre-charge
Check the new tank's label for the correct pre-charge. If needed, set the pre-charge with a tire gauge to match the system cold-fill pressure.
Tip: Do not pre-charge above the maximum specified by the manufacturer. - 6
Install the new tank
Mount the new expansion tank in the same orientation as the old one and securely tighten fittings with the correct torque. Use fresh PTFE tape on threaded joints.
Tip: Ensure there is enough clearance for future service and venting if required. - 7
Refill and repressurize the system
Slowly refill the boiler while watching the pressure gauge. Stop at the boiler’s recommended cold-fill pressure. Bleed air from radiators as water begins to circulate.
Tip: Patience during refilling helps prevent air pockets and leaks. - 8
Check for leaks and verify operation
Inspect all new connections for signs of leakage. Once the system stabilizes, run a heating cycle and observe pressure behavior and the venting action.
Tip: Keep a close eye on the gauge for the first 24 hours after replacement. - 9
Finalize and document
Recommission the boiler, record the pre-charge pressure and the cold-fill pressure in your maintenance log, and dispose of the old tank responsibly.
Tip: Save the tank specification for future replacements or audits.
Questions & Answers
What are signs that my expansion tank needs replacement?
Common indicators include frequent pressure fluctuations, water hammer, radiator banging, and visible leaks around the tank. A tank that cannot hold pressure after cooling is a strong sign it needs replacement. Always check the pre-charge and port condition as part of the assessment.
Look for banging, pressure swings, and leaks around the tank; if pressure can't be held after cooling, consider replacing it.
Can I replace an expansion tank myself?
Yes, with proper safety precautions and the right tools. Ensure you shut off power and gas, relieve pressure, and follow the boiler manufacturer’s guidance for pre-charge and port size. If you feel unsure at any step, contact a professional.
You can, but only if you feel confident with boiler work and safety steps; otherwise hire a pro.
What pre-charge pressure should I set?
Set the pre-charge to match the boiler’s cold-fill pressure, commonly around 12-15 psi for residential systems. Verify this value in your boiler manual and use a reliable gauge during setup.
Set to the boiler’s cold-fill pressure, usually about 12 to 15 psi, and check with the manual.
Do I need to drain the entire system?
You typically drain enough water to safely remove the old tank and to reach the pre-charge pressure for the new tank. A full system drain is rarely required if you can isolate and manage the pressure.
Usually not a full drain is necessary; just reduce pressure enough to replace the tank safely.
What if my boiler is under warranty?
Check the warranty terms before performing replacement. Some manufacturers require professional service to maintain warranty validity. When in doubt, contact the manufacturer or a licensed technician.
If under warranty, confirm procedures to keep coverage intact before DIY work.
How soon should I test after replacement?
Test immediately after refilling and circulating water, then monitor for 24-48 hours to catch slow leaks or pressure drift. Document readings in a maintenance log.
Test right after refilling and then watch for a day or two to confirm stability.
Watch Video
Key Points
- Inspect and replace promptly to prevent overpressure and leaks.
- Set correct pre-charge for reliable performance.
- Test thoroughly after installation and keep records for maintenance.