Expansion Tank Installation for Boilers: A Practical Guide
Learn how to install an expansion tank on your boiler system safely and effectively. This Boiler Hub guide covers sizing, placement, pressure considerations, and common installation mistakes to avoid for reliable operation.

To install an expansion tank on a boiler, size and place the tank correctly, then connect it to the supply line following the boiler manual. Ensure the pre-charge matches the system pressure and that the relief valves and air elimination are functional. This quick guide helps homeowners and technicians start the process safely.
Why expansion tanks matter in boiler systems
An expansion tank is essential for any closed-loop boiler system. When water heats, its volume expands, raising pressure if the system has nowhere to accommodate the extra water. An expansion tank provides a compliant cushion, absorbing this volume change and stabilizing pressure. With a properly sized tank, you reduce short-cycling, protect seals, and extend the life of pumps and valves. According to Boiler Hub, many issues attributed to short cycling stem from an undersized or improperly charged expansion tank. Homeowners and facility managers should view the tank as a critical safety and reliability component, not an optional add-on. Understanding its role helps you plan service intervals, prevent nuisance leaks, and maintain consistent heating performance across the system.
Sizing and pre-charge fundamentals
Sizing an expansion tank depends on the system’s nominal boiler outputs, the total water volume in the loop, and the target operating pressure. Start by checking the boiler’s maximum working pressure and the supply side pressure. The pre-charge is the air pressure inside the tank when it is empty, and it should match your system’s cold-water pressure (verify with manufacturer specs). A tank that is too large may be unnecessary and expensive; a tank that is too small will not prevent pressure spikes. Boiler Hub analysis shows that incorrect pre-charge is a frequent source of inefficiency; double-check the pre-charge after installation and before filling the system.
Placement and pipe routing best practices
Place the expansion tank on the cold-water supply side of the boiler loop, as close to the boiler as practical but upstream of any thermostatic mixing valves. Use a vertical orientation to simplify air removal and ensure the tank is accessible for service. Fit a shut-off valve and an air-elimination valve near the connection to permit draining and purging air during startup. Use appropriate fittings and Teflon tape on all threaded connections. Never place the tank behind a pump or after a check valve that could isolate it from the system; this could prevent accurate pressure stabilization. The goal is a reliable, easy-to-service connection that does not introduce leaks.
Required connections: air vents, relief valves, and check valves
Essential components include an automatic air vent or air eliminator at the highest point in the loop, a pressure relief valve rated for the boiler, and a check valve if required by local code. The expansion tank itself connects to the cold-water line via a dedicated fitting or tee, with a drain valve for purge. Use corrosion-resistant piping suitable for hot water and install supports to minimize stress on the fittings. Confirm that all connections are tight and free of leaks before pressurizing the system.
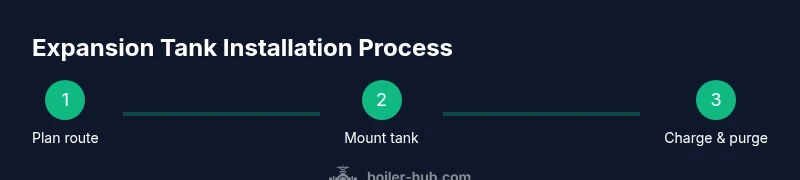
Step-by-step installation overview
This overview maps the major actions you’ll perform during expansion tank installation. Each action includes a clear reason to help you stay safe and accurate. Plan the route and parts, then shut down the boiler and isolate the water supply. Drain a portion of the loop, mount the tank, and connect its cold-water line with proper fittings. Charge the tank to the target pressure, purge air, and reopen the system. Finally, test the entire loop for leaks and observe boiler cycling to confirm stability.
Common mistakes and how to avoid them
Common missteps include incorrect tank sizing, wrong pre-charge, and skipping an air purge. Do not mount the tank on the hot-water side unless the system design specifies this configuration. Avoid using mismatched fittings or non-metallic piping in high-temperature zones. Always purge air before charging and avoid over-pressurizing during the initial fill.
Safety, codes, and professional considerations
Working with boiler pressure and hot water requires caution and respect for local codes. Many jurisdictions require an expansion tank for boiler systems and specific installation practices. If you are unsure about any step, consult a licensed professional. Following the boiler manufacturer’s instructions and local regulations helps ensure safe operation and compliance.
Post-installation testing and maintenance
After installation, refill the boiler, bleed air from the system, and verify that the pressure reads within the boiler’s normal operating range. Observe the system for any leaks and ensure the expansion tank is properly charged. Periodically inspect the connections and replace worn components as needed. Regular maintenance helps prevent pressure-related issues and prolongs equipment life.
Troubleshooting: leaks, noises, and pressure drift
If you notice unusual banging noises or pressure drift, re-check all connections for leaks and ensure the pre-charge matches the cold-water pressure. Pump noise can indicate trapped air or an ineffective purge. Inconsistent cycling or persistent leaks near the tank indicate a mounting or seal problem that merits re-inspection.
Quick reference checklist for expansion tank installation
- Confirm boiler operating pressure and system volume
- Set tank pre-charge to match cold-water pressure
- Install on the cold-water line near the boiler
- Purge air and perform a pressure test
- Check for leaks and confirm stable cycling
Tools & Materials
- Expansion tank(Pre-charged to match system pressure)
- Pressure gauge(To verify system pressure before and after fill)
- Shut-off valve(Isolate the expansion tank during service)
- Tee fitting and small piping(For connecting to the cold-water line)
- Air vent / air eliminator(Automatic preferred for purging air)
- Pipe cutter/wrench set(For copper or CPVC work)
- Teflon tape and thread sealant(Seal threaded connections)
- Drain valve(Purging and maintenance)
- Piping (copper/CPVC) and fittings(Durable materials rated for hot water)
- Personal protective equipment (PPE)(Goggles, gloves, and appropriate clothing)
Steps
Estimated time: 60-90 minutes
- 1
Plan route and prep area
Survey the boiler room and identify a clean, accessible location for the expansion tank. Verify nearby shut-off valves and ensure space for tools. This planning reduces install errors and makes future service easier.
Tip: Measure clearance for the tank and vent lines before buying fittings. - 2
Shut down boiler and isolate water
Power down the boiler and close the main water supply to the loop. This prevents scalding hazards and keeps the system safe while you work.
Tip: Label the power switch and lock it out if multiple people service the unit. - 3
Drain a portion of the loop
Open the drain valve and purge a controlled amount of water to lower the loop pressure. This creates a safer working environment when attaching fittings.
Tip: Do not fully drain; stop when you can safely access fittings. - 4
Mount the expansion tank
Attach the tank to a solid wall or frame using the manufacturer’s bracket. Ensure vertical orientation if the system requires air elimination.
Tip: Use a level to ensure the tank is plumb and secure. - 5
Connect to cold-water line with fittings
Install the tee or dedicated connection from the cold-water supply to the expansion tank. Use PTFE tape on threads and tighten to the recommended torque.
Tip: Avoid overtightening which can crack fittings. - 6
Charge tank to target pressure
With the system open, adjust the tank pre-charge to match the boiler’s cold-water pressure. This is critical for effective operation and avoiding over- or under-pressurization.
Tip: Use the pressure gauge during charging; verify value on the tank's label. - 7
Purging air and refilling the loop
Close purge valves, slowly fill the system, and bleed air through the air vent until steady flow without air bubbles emerges.
Tip: Be patient; take several purge cycles if needed. - 8
Test, leak-check, and restore power
Close all valves, restore power, and observe for leaks and proper cycling. Confirm the pressure stabilizes within the boiler’s operating range.
Tip: Run the boiler through a full heating cycle and re-check after 15 minutes.
Questions & Answers
What is an expansion tank and why is it necessary for boilers?
An expansion tank provides a compressible air cushion to absorb water expansion as the boiler heats. It protects components by reducing pressure spikes.
An expansion tank cushions pressure changes, helping protect the boiler and piping.
How do I size an expansion tank for my boiler?
Sizing depends on the system volume and boiler output. Follow the manufacturer’s specs and refer to Boiler Hub guidance for typical ranges and checks.
Tank size depends on your boiler and loop volume; follow the manual or consult a pro.
Can I install an expansion tank myself, or should I hire a pro?
If you have basic plumbing and boiler knowledge, you can perform the installation. Otherwise, hire a licensed HVAC professional.
DIY is possible if you’re comfortable with plumbing and boiler systems; otherwise hire a pro.
Where should the expansion tank be installed?
Install on the cold-water line near the boiler, with access for testing and maintenance. Do not place it after a pump that could isolate it.
Mount the tank on the cold-water line near the boiler for best performance.
What are signs of a faulty expansion tank?
Frequent leaks, banging noises, rapid pressure fluctuations, or frequent system fills indicate issues with the tank or pre-charge.
Leaks, noises, or pressure drift can signal a bad expansion tank.
Are there safety codes I should know for expansion tanks?
Local codes may require an expansion tank and specific installation practices. Always follow manufacturer instructions and consult a pro if in doubt.
Local codes may require an expansion tank; follow the manual and consider a pro.
Watch Video
Key Points
- Size and charge the tank to match system pressure
- Place and purge correctly to prevent air pockets
- Test for leaks and verify stable boiler cycling
- Follow manufacturer instructions and local codes