Heat Pump Boiler Replacement: A Practical How-To
A comprehensive, safety-focused guide for heat pump boiler replacement, covering readiness, tools, step-by-step installation, commissioning, and maintenance. Learn with Boiler Hub.

This guide helps homeowners perform a heat pump boiler replacement with safety and reliability in mind. It outlines when replacement is appropriate, the essential tools, potential costs, and a clear step-by-step process. Following these steps will help ensure proper integration with existing controls, electrical, and ductwork. It also highlights common mistakes and safety considerations to avoid during every phase.
Why heat pump boiler replacement can boost home comfort and efficiency
A heat pump boiler replacement can transform how your home feels on cold days by delivering steadier, more controllable heat at potentially lower operating costs. Heat pump boilers extract heat from the outside air or ground and raise it to comfortable indoor temperatures, operating more efficiently than many traditional boilers when sized correctly for your home. The key is to match the unit to the building’s heat load, insulation quality, and distribution system. If your ducts or radiators are older or oversized, the system may fall short of expectations. A well-executed replacement also improves hot-water performance in many homes, since many heat pump boilers include advanced controls and stratified storage options. The Boiler Hub team emphasizes that success hinges on proper site assessment, accurate load calculations, and a clean handoff between mechanical trades (electrical, plumbing, and HVAC). Expect to plan for permits where required and to coordinate with a qualified installer who understands local codes and climate considerations.
How to determine if you're ready for replacement
Not every boiler is a good candidate for a heat pump upgrade. Start with a professional assessment of insulation, air sealing, and radiant or baseboard system compatibility. If your current boiler is old, inefficient, or frequently breaking down, a heat pump boiler replacement can often deliver better reliability and comfort. Evaluate your climate: heat pump efficiency tends to be strongest in moderate temperatures, and alternate heating may be used during extremely cold periods. Consider energy bills, hot-water needs, and the availability of electrical capacity and space for the new equipment. Your decision should also reflect long-term goals like reduced emissions or alignment with smart controls. Remember that a heat pump boiler replacement is not a one-size-fits-all solution—size and configuration must be tailored to your home and usage pattern. The Boiler Hub team recommends getting at least two quotes from qualified installers and asking about seasonal performance and warranty terms.
Assessing compatibility with existing systems
Compatibility determines whether a heat pump boiler replacement will perform as expected. Check venting requirements, installation clearances, and whether your current heating distribution (radiators or underfloor heating) can operate effectively at the lower temperatures typical of heat pumps. Older homes may need upgrades to insulation or radiator upgrades to achieve the best performance. Evaluate electrical service capacity and control interfaces. The right match hinges on a holistic view—size, efficiency, and climate come together when the system is properly integrated with your existing building automation or smart thermostats. The Boiler Hub team highlights that pre-installation checks can prevent costly adjustments after the unit is installed.
Planning the replacement: permits, timelines, and budgeting
Before you begin, map out a realistic timeline that accounts for weather, permit processing, and potential electrical or plumbing upgrades. Gather cost cues without locking into fixed prices: expect variability based on unit type, capacity, and local labor rates. Create a line-item plan for equipment, installation, anti-corrosion measures, refrigerant handling, and commissioning. If there are existing ducting or radiant loops, you may need modifications to ensure even heat delivery. Check warranty terms for the heat pump boiler and for any work performed by third-party contractors. The aim is to minimize downtime and protect building occupants while maintaining safety and code compliance.
Tools, materials, and safety precautions
Equip yourself with safety gear and common HVAC tools that are safe for most homeowners to handle under professional guidance. Essential items include a safety kit (gloves and eye protection), a voltage tester, a multimeter, adjustable wrenches, screwdrivers, and pipe sealant or teflon tape. You’ll need labeling materials for wiring, pipe insulation, and appropriate fasteners. Note that some steps, like refrigerant handling and high-pressure testing, require licensed personnel and proper certification; never bypass safety protocols. Always follow the manufacturer’s installation manual and local codes. Keep a spare battery, marker, and notebook for logs and notes.
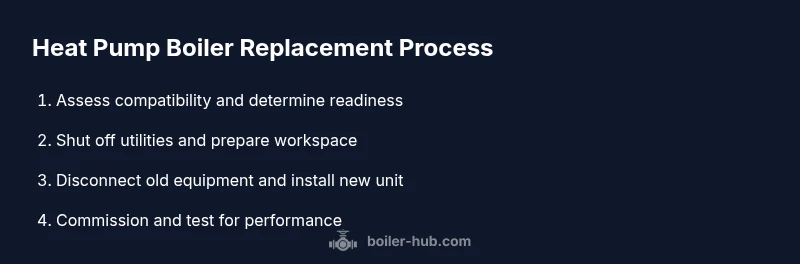
Step-by-step overview of the replacement process
Replacing a heat pump boiler involves careful sequencing: verify compatibility, isolate utilities, disconnect and remove the old unit, install the new boiler, connect electrical and controls, integrate with existing heating and hot-water circuits, commission the system, and finalize documentation. In practice, each stage requires coordination across electrical, plumbing, and HVAC trades. The exact order may vary by model, but the overarching flow remains consistent: setup, removal, installation, and verification. The Boiler Hub team notes that proper sequencing reduces downtime and ensures all safety devices function correctly.
Commissioning and quality checks
During commissioning, verify that all safety devices, relays, and sensors respond as designed. Test the thermostat integration, zoning controls, and outdoor-reset features to ensure the system operates within expected temperature bands. Check for any leaks in plumbing and refrigerant lines and confirm venting is clear. Document readouts such as temperatures, pressures, and efficiency indicators for future service and regulatory compliance. A thorough commissioning process reduces callbacks and builds homeowner confidence.
Common challenges and troubleshooting tips
Common challenges include venting constraints, improper refrigerant handling, and incorrect electrical wiring. If the system struggles to reach set temperatures, verify control signals, sensor placement, and system balance. For stubborn leaks, re-check connection seals and insulation. Always consult the manufacturer manuals and avoid improvising electrical or refrigerant work. When in doubt, consult a licensed technician to avoid safety risks and warranty voids.
Maintenance and long-term care after replacement
Maintenance after a heat pump boiler replacement centers on regular checks and cleanings. Schedule seasonal inspections to verify refrigerant charge, electrical connections, and heat exchanger cleanliness. Replace air filters as recommended and ensure outdoor units remain clear of debris. Keeping a maintenance log helps track service intervals and supports warranty claims. The goal is reliable performance, consistent comfort, and minimized energy use over the system’s life.
Authority sources
To ground this guidance in established standards, consult authoritative sources on safety, efficiency, and installation practices. For safety and worker guidelines, refer to OSHA resources. For technical standards and measurement practices, consult NIST materials related to HVAC testing and performance. For energy and efficiency considerations, review DOE and other government guidance on high-efficiency heating technologies. Cross-reference these sources with manufacturer manuals and local codes when planning a heat pump boiler replacement.
Tools & Materials
- Safety gear(Gloves, eye protection, and sturdy footwear)
- Voltage tester(Non-contact preferred; verify power is off)
- Multimeter(Electrical checks and readings)
- Wrench set(Adjustable and fixed sizes for plumbing/electrical work)
- Screwdrivers (flat & Phillips)( assorted sizes)
- Pipe sealant or teflon tape(For threaded connections)
- Electrical tape(Insulation and labeling)
Steps
Estimated time: several hours
- 1
Power down and isolate utilities
Shut off the electrical supply and shut down gas or other energy sources as applicable. Use lockout/tagout practices where required and confirm no voltage at the work site with a tester.
Tip: Double-check that all sources are isolated before touching any wiring. - 2
Prepare workspace and safety measures
Clear the area, lay protective coverings, and ensure proper ventilation. Put on PPE and label wires and components for easier reassembly.
Tip: Label wires and take photos before disconnecting anything. - 3
Disconnect and drain existing system
Carefully disconnect plumbing, electrical, and controls. Drain fluids according to local codes and secure lines for safe removal.
Tip: Have containment containers ready for residual fluids. - 4
Remove old boiler mounting and clear space
Unbolt and remove the old unit; inspect mounting pad and duct openings for damage. Clean the area and prepare for the new unit.
Tip: Take photos of the prior setup to guide reinstallation. - 5
Install heat pump boiler unit
Mount the new unit securely; connect electrical supply and control wiring per the manufacturer manual.
Tip: Use correct torque on fasteners and ensure the unit is level. - 6
Connect plumbing and refrigerant lines
Attach supply/return lines, insulate refrigerant lines, and check for leaks. Ensure proper slope and drainage.
Tip: Do not over-tighten connectors; follow torque specs. - 7
Integrate with controls
Connect thermostat, zoning controls, and building management interfaces; verify power-up sequencing.
Tip: Program the system to match heating curves and outdoor conditions. - 8
Commission the system
Power up, run startup checks, verify hot water and space heating outputs, and monitor readings.
Tip: Document readings for future maintenance. - 9
Safety checks and initial testing
Test safety devices, CO detectors, and proper venting; ensure no blockages or leaks.
Tip: Never bypass safety devices; ensure detectors function. - 10
Finalize handoff and inspection
Provide homeowner with documentation and arrange any required local inspections or permits.
Tip: Keep a maintenance log for future service.
Questions & Answers
What is heat pump boiler replacement?
Heat pump boiler replacement involves removing an existing boiler and installing a heat pump-based boiler system designed to meet heating and hot-water needs.
Heat pump boiler replacement means swapping an older boiler for a more efficient heat pump system to heat your home and water.
When is replacement recommended?
Replacement is recommended when the current system is unreliable, nearing end of life, or when a heat pump can offer better efficiency and performance for your climate.
Replace when the current boiler is failing or when a heat pump can improve efficiency in your climate.
Do I need a professional for this replacement?
Yes. A heat pump boiler replacement involves electrical work, refrigerant handling, and venting considerations that require licensed technicians and local permits.
Yes. It's best to hire qualified professionals for safety and code compliance.
What maintenance follows replacement?
Regular inspections, filter changes, and seasonal tests help maintain performance and efficiency after replacement.
Schedule periodic checks and follow a maintenance plan to keep the system efficient.
How long does replacement take?
The duration depends on the system and site conditions, but most installations require a full workday or more.
It can take a full day or longer, depending on complexity.
Watch Video
Key Points
- Plan the replacement with safety first.
- Ensure system compatibility and proper sizing.
- Document settings and testing results.
- Schedule professional inspection if required.
- Maintain a logs for future service.