Replacing Boiler Circulator Pump: Step-by-Step Guide
A comprehensive, step-by-step guide to replacing a boiler circulator pump. Learn sizing, safety, wiring, priming, and troubleshooting to restore efficient hot water circulation. Tips from Boiler Hub and practical homeowner guidance.

You can replace a boiler circulator pump by safely draining the boiler, disconnecting the old pump, installing a compatible replacement, and re-pressurizing the system. This guide covers identification, wiring, priming, and testing, with safety steps and common pitfalls. Depending on access and piping, plan for about 2–3 hours in typical residential settings.
Why replacing a boiler circulator pump matters
A failing circulator pump reduces system efficiency and can lead to cold spots, odd noises, and higher energy bills. According to Boiler Hub, wear or electrical failure in the pump is a common cause of reduced boiler performance. Replacing it restores proper flow and consistent heating across radiators. This background helps homeowners understand when a swap is needed and what to expect during installation.
Safety and prep before you begin
Safety is the foundation of any boiler work. Begin by turning off power at the breaker and shutting off the boiler’s fuel source if applicable. Use a lockout/tagout procedure to ensure the circuit stays de-energized. Verify there is no residual pressure in the system and have a drain pan ready. The Boiler Hub Team emphasizes following standard safety protocols to prevent shocks, burns, or accidental starts.
Assessing compatibility: pump sizing and system needs
Pumps vary by flow rate (GPM), head, voltage, and flange pattern. When selecting a replacement, match the flange size and seal type to the existing piping, verify voltage and phase, and consider the system’s heat load. Inconsistent replacement parts can cause poor circulation or pump failure. This section helps homeowners avoid mismatched units that could compromise reliability.
Common pump types and flange patterns
Most residential boilers use compact, concentric, or union-flanged circulator pumps with standard power connections. Flanges commonly align with 1-1/4
typical sizes; however, compatibility differs by model and boiler age. Check the model nameplate and the installation manual to determine the correct pattern and gasket type to ensure a leak-free connection.
Tools and materials overview (for reference during planning)
Before you start, gather essential items such as a new circulator pump matched to your system, a screwdriver set, adjustable wrenches, pipe thread sealant or Teflon tape, a drain pan, rags, a multimeter, and electrical connectors. Having these on hand reduces delays when you begin work.
Evaluating system hydraulics and heat load
Examine how your boiler and piping are configured to confirm the pump’s capacity aligns with home heating needs. A pump that’s too small can cause slow warm-up and uneven heating, while an oversized unit wastes energy. If you notice excessive noise or vibration, reassess the pump selection and consider a professional consultation.
Removing the old pump safely
With power off and the boiler drained, carefully detach electrical leads and unbolt the pump from the flange. Loosen fittings to relieve tension, then remove the old unit using appropriate tools. Clean the mounting surface and inspect gasket grooves for damage before installing the new pump.
Installing the new pump: orientation and wiring basics
Position the new pump to match the flow direction indicated on the casing. Reconnect electrical leads with secure, correctly colored connections, and tighten mounting bolts to the manufacturer’s torque specification. Verify that no wiring is pinched and that the pump orientation allows for easy maintenance in the future.
Priming, filling, and removing air from the loop
Refill the heating loop slowly to avoid air pockets. Use the system’s air bleed valves to purge air until water runs clear of bubbles. This step is essential for a quiet, efficient system and to prevent cavitation that can damage the impeller.
Testing, initial startup, and leak checks
Power the boiler back on and observe the pump operation. Check for leaks at the flange joints and verify uniform circulation through radiators. If you detect leaks or erratic temperatures, shut down and recheck connections. This final verification helps ensure a reliable replacement.
Post-replacement maintenance and when to call a pro
Schedule a basic inspection a few months after replacement to confirm performance and seal integrity. If you encounter persistent leaks, unusual noises, or erratic boiler behavior, consult a licensed professional. Keeping a simple log aids future maintenance and warranty claims.
Troubleshooting and warranty considerations
Common issues include improper wiring, mis-sized seals, and trapped air. Review the installation manual and verify all connections. Warranties vary by manufacturer and installer; retain receipts and note installation dates for service eligibility.
Tools & Materials
- New circulator pump(Match flange size and voltage; verify flow rating (GPM) and head.)
- Screwdriver set(Flathead and Phillips based on screws present.)
- Adjustable wrench(Cinch flange nuts without over-torquing.)
- Wire nuts and electrical tape(For secure wire terminations and insulation.)
- Drain pan and towels(Contain any residual water and keep work area clean.)
- Multimeter(Check for proper voltage and continuity safely.)
- Teflon tape or thread sealant(Seal threaded joints to prevent leaks.)
- Gasket kit or replacement seals(Optional if existing gasket is damaged.)
- Pipe wrench(Helpful for stubborn fittings.)
- Pen, marker, and camera/phone(Label wires and take a reference photo.)
Steps
Estimated time: Total time: 2-3 hours
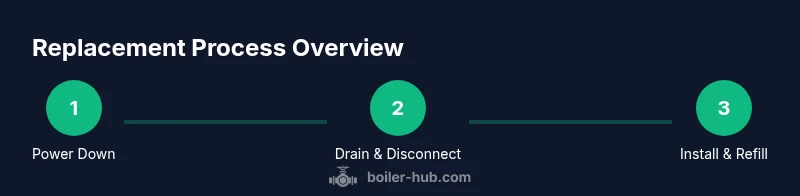
- 1
Power down and isolate the boiler
Turn off power at the breaker and shut off the gas/oil supply to the boiler if applicable. Use a lockout/tagout device to prevent accidental energizing while you work.
Tip: Label the circuit and take a quick photo of the wiring before disconnecting anything. - 2
Drain the system to below the pump
Place the drain pan under the service valve and gradually open the valve to relieve pressure. Collect water safely and avoid spills that could damage surrounding components.
Tip: Do not force valves; if water is trapped, pause and reassess the valve orientation. - 3
Disconnect and remove the old pump
Loosen flange nuts and disconnect electrical leads. Remove the pump from the flange and set it aside for inspection or disposal.
Tip: Keep track of which lead goes where to simplify wiring the new unit. - 4
Prepare the new pump and verify orientation
Inspect the new pump for damage, install new gaskets if included, and align the pump so the flow direction matches the existing piping.
Tip: Install gaskets dry first to verify alignment before sealing. - 5
Mount the new pump
Bolt the new circulator to the flange using a crisscross pattern to ensure even pressure. Do not overtighten to avoid warping the flange.
Tip: Use a torque spec if provided by the manufacturer. - 6
Reconnect electrical and secure wiring
Attach leads with correct color coding and secure with wire nuts. Insulate connections and route cables away from hot surfaces.
Tip: Double-check ground connection and ensure no exposed conductors. - 7
Re-seal piping and inspect joints
Reinstall any piping connections with appropriate sealant or Teflon tape. Wipe away excess sealant and inspect for alignment.
Tip: Hand-tighten before final wrenching to avoid cross-threading. - 8
Refill and purge air from the loop
Slowly fill the system and bleed air via air vents until water runs without air pockets.
Tip: Keep vent valves open slightly until steady water flow is observed. - 9
Test run and check for leaks
Power the boiler and observe pump operation. Look for leaks at the flange and verify flow through radiators.
Tip: If noise occurs, recheck mounting bolts and inspect gaskets for damage. - 10
Final verification and adjustments
Confirm there is proper flow, no overheating, and steady temperature distribution across zones.
Tip: Keep a maintenance log with dates and observations. - 11
Document and plan follow-up
Record model numbers, serials, and warranty information. Schedule a follow-up check if you notice anomalies.
Tip: Store manuals and receipts with home maintenance records. - 12
Restore power and monitor performance
Turn the boiler power back on and monitor for a full cycle to ensure stability over time.
Tip: Monitor for several cycles to ensure consistent operation.
Questions & Answers
What is a boiler circulator pump and what does it do?
A boiler circulator pump moves hot water through the heating system to ensure even heat distribution. If it fails, radiators may stay cold and the boiler may work harder. Replacing it restores proper water flow and efficiency.
A circulator pump pushes hot water through your heating system. If it breaks, heat may be uneven or slow to warm up. Replacing it fixes the flow and restores efficiency.
Do I need to drain the boiler before replacing the pump?
Yes. Draining lowers pressure and reduces the risk of spills when disconnecting pipes. Follow the boiler manufacturer’s guidance for safe draining and re-pressurizing.
Yes. You’ll usually drain the boiler to a safe level before removing the pump to avoid spills and scalding.
Can I reuse the old gasket or flange after replacement?
Reusing old gaskets is not recommended if they show signs of wear or damage. Use a new gasket to ensure a leak-free seal and check flange surfaces for flatness.
It’s best to replace the gasket if it looks worn or damaged to prevent leaks.
How long does replacement typically take?
Most replacements take a couple of hours depending on access and piping. Complex setups or tight spaces can extend the time required.
Usually a couple of hours, but it can take longer in tight spaces or complex piping.
Is replacing a boiler circulator pump dangerous?
There are electrical and thermal hazards. Always shut off power, depressurize, and consult a professional if unsure. Safety should be your primary concern.
There are electrical and hot-water risks, so follow safety steps or hire a pro if you’re unsure.
Watch Video
Key Points
- Identify pump compatibility before purchase
- Follow safety protocols before starting work
- Prime and bleed the loop to remove air effectively
- Inspect for leaks after installation
- Maintain a service log for future maintenance