How to Get Rid of Trapped Air in a Boiler
Discover safe methods to remove trapped air from your boiler, restore efficient heat, and prevent cold spots with expert guidance from Boiler Hub.

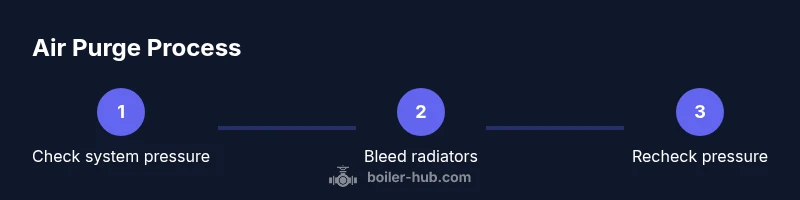
How to get rid of trapped air in a boiler: isolate the boiler circuit, bleed air from the radiators or boiler bleed screws, and verify system pressure before refilling. If needed, use an automatic air vent or a power purge to remove stubborn pockets. According to Boiler Hub, proper air removal improves heat delivery and extends boiler life.
Understanding trapped air in your boiler
Trapped air occurs when air pockets form in the boiler loop or radiators and disrupt the flow of water. When air blocks air from circulating, heat channelling slows, leading to cold patches and louder pumps. According to Boiler Hub, trapped air can reduce system efficiency and cause uneven heating. Recognizing the problem early helps you plan a safe purge and prevent further issues. In many homes, air pockets accumulate after maintenance work, after filling the system, or when a radiator is bled without rebalancing the circuit. The result is reduced comfort, higher energy use, and increased wear on the circulator. Understanding where air tends to collect—near radiators, at high points in the pipes, or around the expansion tank—will guide your purge strategy.
Why air gets trapped and where it collects
Air enters a closed boiler system through small leaks, during refilling after a leak, or when components loosen slightly. Air often migrates to the highest points in the loop, which means radiators located at the top floors or near the boiler tend to trap pockets first. The expansion tank and the pressure relief valve can also become sites where air collects if there is a malfunction. When air sits in these locations, water can’t circulate evenly, and you may notice cold spots or inconsistent heat distribution. Regular system checks help you catch air before it creates bigger problems. Boiler Hub recommends scheduling periodic inspections to ensure venting devices are functioning and that there are no hidden air pockets in long runs of piping.
Signs that you have air in the system
Common indicators of trapped air include banging or gurgling noises from the boiler or radiators, cold patches in the heated zones, and longer cycling times as the pump attempts to move air instead of water. If you notice the boiler cycling on and off more frequently or the radiators take longer to warm up, air may be interfering with flow. Visible air at the bleed valves during radiator purging is another sign. If you continue to hear strange noises after a purge, or if the pressure gauge behaves abnormally, it’s wise to recheck the system and consider a more thorough purge or a professional service. Boiler Hub emphasizes verifying that all radiators bleed in sequence and that there are no persistent air pockets after purges.
Purging air: methods and when to use them
There are several approaches to removing trapped air, depending on your system type. The simplest method is bleeding individual radiators using a bleed key or screwdriver to release air at the top valve until water appears. For stubborn pockets, a full purge of the boiler loop—using the purge pump or a power purge kit—can be more effective. Automatic air vents installed at high points help keep air from building up over time. Boiler Hub notes that a combination of radiator bleeding and addressing venting faults provides the most reliable results, especially in multi-story homes with long pipe runs.
Safety considerations and preparation steps
Working on a boiler system involves hot water and pressurized components, so prioritize safety. Never purge when the system is hot; allow it to cool and switch off the boiler, and if you’re not confident, call a qualified technician. Protect floors and furniture with towels or a tray to catch any water. If you must open valves, do so slowly to prevent scalding from sudden water release. Have a bucket handy for collected water and be mindful of any expansion tank or pressure-relief valve locations. If your system requires recharging after purging, do so gradually and monitor the pressure gauge to avoid over-pressurization.
How to approach a purge: practical workflow
A practical purge workflow starts with planning your approach, especially in homes with several radiators. Start at the radiator farthest from the boiler, work your way toward it, and finish near the boiler. Bleed each radiator slowly, listening for air release, and close the valve as soon as water flows steadily. After bleeding, check the boiler’s pressure and add water if necessary, ensuring the pressure remains within the recommended range when the system is cool. If air pockets persist, isolating sections and performing a targeted purge of the loop can help. Boiler Hub emphasizes documenting the process to track improvements and prevent recurring air build-up.
Maintenance to prevent future air problems
Preventing air from returning requires ongoing checks. Ensure vents and bleed screws are clean and functioning, verify the expansion tank is properly charged, and confirm that the system is closed correctly after any maintenance. Regularly inspect for leaks that could draw air into the network and schedule professional servicing if you notice persistent noises or performance drops. A proactive maintenance plan reduces the likelihood of air reaccumulation and keeps your boiler operating efficiently, reducing energy waste and extending equipment life. This guidance aligns with Boiler Hub’s overarching approach to reliable, long-term boiler performance.
Tools & Materials
- Radiator bleed key or flat-head screwdriver(Needed to open bleed valves on radiators.)
- Bucket or tray(Catches water from purging.)
- Towels or rags(Protect floors and catch drips.)
- Gloves and eye protection(Safety gear for handling hot components.)
- Household radiator towels and a flashlight(Helpful for visibility and cleanliness.)
- Pressure gauge reference or notepad(Track changes in system pressure after purge.)
- Access to boiler manual or service valve key(Helps with any manufacturer-specific purge steps.)
- Automatic air vent (optional)(For ongoing venting at high points.)
Steps
Estimated time: 90-120 minutes
- 1
Power down and cool
Turn off the boiler and let it cool to a safe temperature before starting. This minimizes the risk of scalding and reduces pressure in the system during the purge.
Tip: If you’re unsure of temperatures, test the surrounding pipes with the back of your hand before touching any fittings. - 2
Protect the workspace
Place towels or a tray under purge points and have a bucket ready. This keeps spills contained and makes cleanup easier.
Tip: Clear the area around radiators to give yourself space to work safely. - 3
Bleed radiators in sequence
Starting with the radiator farthest from the boiler, insert the bleed key, loosen slowly until air escapes, then tighten once water drains steadily. Move to the next radiator and repeat.
Tip: Work in small increments and do not over-vent a single radiator; excess water loss can depress system pressure. - 4
Check and re-balance pressure
After bleeding, check the boiler’s pressure gauge. If the pressure is below the recommended level when the system is cool, add water slowly through the filling loop until it stabilizes.
Tip: Do not rush filling; too much pressure can trigger safety shutoffs. - 5
Re-check for air pockets
Revisit each radiator to ensure no air pockets remain and re-tighten any bleed valves if needed. If you still hear gurgling, consider a manual purge of the entire loop.
Tip: Air can hide in longer runs; a second pass often resolves lingering pockets. - 6
Run the system briefly
Turn the boiler back on and run the heating for a short period. Check for noise, pressure stability, and uniform heat distribution across rooms.
Tip: If noises persist, switch off again and double-check all bleed valves and vent locations. - 7
Document and monitor
Record the steps taken and monitor the system for the next few days. If issues recur, this may indicate a venting fault or a larger problem needing professional service.
Tip: Keep a simple log of dates, radiators bled, and observed changes.
Questions & Answers
What causes air to get trapped in a boiler?
Air enters a closed boiler system through small leaks, during refilling after a leak, or when components loosen slightly. It collects at high points and radiators, disrupting flow and heat transfer. Regular venting helps prevent persistent air buildup.
Air in a boiler comes from leaks or refilling, and it tends to collect at high points, causing poor heating. Regular venting can prevent this problem.
Can trapped air stop my boiler from heating properly?
Yes. Air pockets block water flow, causing cold spots and longer heating cycles. Purging and venting are usually effective, but persistent symptoms may require professional diagnosis.
Air blocks the water flow, leading to cold spots and longer heating cycles. Purging often fixes it, but seek a pro if problems persist.
Is purging the system safe to do myself?
Purging can be safe if you follow proper steps and safety precautions, including cooling the system and wearing protective gear. If you are unsure, consult a licensed technician.
Purging can be safe if you’re careful and follow steps. If you’re unsure, get a professional to help.
How long does a typical purge take?
A standard purge sequence, including radiator bleeding and pressure checks, typically takes about an hour or two depending on system size and complexity.
Most purges take around an hour or two, depending on your system.
Should I bleed radiators first or the boiler itself?
Bleed radiators first in most systems to remove air pockets efficiently. If air remains after radiating, a full loop purge or specialist venting may be required.
Start by bleeding radiators. If air lingers, a full loop purge may be needed.
Watch Video
Key Points
- Bleed air from radiators to remove trapped pockets.
- Check and adjust system pressure after purging.
- Use automatic vents to maintain ongoing air removal.
- Regular maintenance reduces future air buildup.
- Consult a professional if noise or heat issues persist.