How to Fix Boiler When It Says E1
Urgent guide to diagnose and fix boiler E1 errors. Learn safety steps, common causes, diagnostic flow, and professional thresholds in this Boiler Hub 2026 update.

Error E1 on a boiler usually means a flame failure or sensor fault, and it demands immediate attention. E1 can trigger lockout and loss of heat. Quick fixes include resetting power, checking the gas supply and pressure, and ensuring the thermostat is set correctly. According to Boiler Hub, if the E1 code persists, shut down the boiler and call a qualified technician to inspect the control board and safety devices.
What E1 Means on Your Boiler
When your boiler shows E1, this is a safety-related fault that typically points to ignition or flame sensing problems. In most modern boilers, E1 means the flame could not be established or was lost after ignition, triggering a lockout to prevent gas from building up. The fault is often caused by a dirty flame sensor, a failed ignition probe, a gas supply issue, or a trapped air path in the combustion chamber. It can also be triggered by a clogged condensate trap or venting obstruction, but fuel supply and the electronics are the most common culprits. Because E1 is a safety-critical alarm, acting quickly and safely is essential. According to Boiler Hub, treating E1 seriously helps prevent carbon monoxide risks and boiler damage, especially in homes with older equipment. If you detect gas odors or hear hissing around fittings, leave the area and call emergency services. For most households, a cautious, stepwise approach will resolve the timing issue or identify the exact faulty component.
Immediate Safety Steps You Can Take
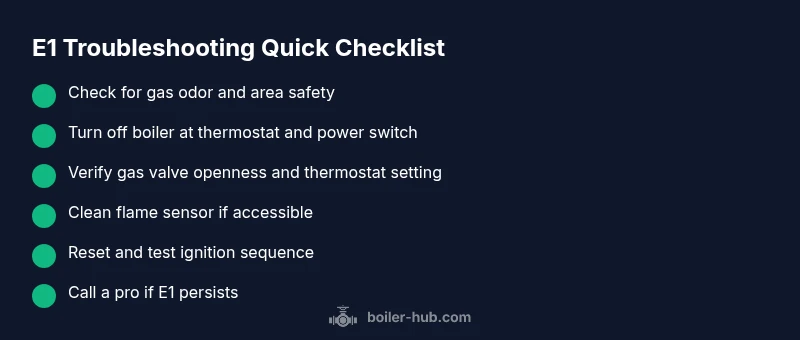
Safety first: E1 is a fault that can escalate if you ignore it. Start by turning off the boiler at the thermostat and then at the power supply to prevent a restart on its own. If you smell gas, evacuate, avoid flames or sparks, and call the gas emergency line. Do not try to bypass safety features or disassemble electrical components. If you smell gas? Do not operate the unit. If you can do so safely, verify basic things: a) ensure the gas supply valve is open; b) check the boiler’s pressure gauge (if present) for the normal range; c) inspect the thermostat settings and confirm the priority of domestic hot water vs. heating. After these checks, wait a few minutes and attempt a controlled reset only if you feel confident, and never force an ignition attempt if you suspect a gas issue. If the E1 code reappears after a reset, it’s time to move to diagnostic steps or call a professional. Boiler Hub emphasizes safety as the priority in every step.
Common Causes and Quick Fixes
Most E1 errors are due to ignition or flame-sensing faults rather than gas supply problems. The first common cause is a dirty flame sensor or ignition probe. If accessible, gently clean the sensor with a dry microfiber cloth; avoid liquids or abrasive cleaners. A misaligned sensor can fail to detect flame, triggering E1. Another frequent cause is a weak or interrupted ignition sequence, often from a faulty spark electrode or dirty burner ports. In such cases, a professional should inspect and calibrate the ignition system. Gas supply interruptions or leaks are less common but serious; verify the shutoff valve is fully open and that you don’t have a gas odor near you. Air-venting issues, blocked flues, or condensate drain problems can also cause flame instability. If the system has poor air supply or draft, E1 may appear even with a healthy gas supply. Boiler Hub Analysis, 2026 notes that most service calls involve ignition components or sensors, not major gas-line problems. When in doubt, treat it as a safety risk and escalate to a pro.
Diagnostic Approach: Narrowing Down the Root Cause
To move from symptom to solid fix, start with the boiler’s error log or display indicators. Note the exact sequence leading to E1—does it occur after ignition, or during a hold point? Next, assess water pressure; very low pressure can prevent reliable ignition. Visually inspect the flame sensor for buildup or oxidation; a clean sensor improves detection. If you have basic tools and comfort with equipment, perform a controlled power cycle and a selective reset; otherwise skip ahead to professional evaluation. Check the gas valve operation by listening for a steady brief hum when the boiler attempts to ignite (do not tamper with gas lines). If the unit is new enough, ensure the condensate trap and venting are clear. Keep a log of any noises, smells, or error patterns to share with a technician. As Boiler Hub Analysis, 2026 indicates, a methodical diagnostic approach reduces unnecessary parts replacement and shortens downtime, especially for commercial systems.
Long-Term Fixes and When to Call a Pro
Where simple resets fail, the root cause is likely a failed sensor, faulty ignition module, or a defective control board. Plan for professional service if safety concerns arise or if gas lines are involved. Typical costs for E1-related service range widely by part and region, with a service call and diagnosis commonly in the hundreds of dollars, plus parts if replacement is needed; in many cases, you may face a control board or flame sensor replacement. Always demand a written estimate before work begins. After a repair, have the technician verify proper ignition timing, sensor readings, and venting integrity, then perform a system test to confirm the E1 fault is resolved. To prevent future E1 issues, schedule regular boiler maintenance, ensure clean combustion air, and keep up with annual safety checks. Boiler Hub’s guidance emphasizes proactive upkeep to minimize costly downtime and ensure safe operation throughout 2026.
Steps
Estimated time: 45-75 minutes
- 1
Power down and ensure safety
Turn off the boiler at the thermostat, then switch off the unit at the electrical supply. If you smell gas, leave the area immediately and call emergency services. This step prevents accidental ignition during inspection.
Tip: Take a quick photo of any loose wires before you disconnect panels for reference. - 2
Check gas supply and heat settings
Make sure the gas valve is fully open and that other gas appliances in the home are operating. Confirm the boiler’s thermostat is set to a temperature that triggers heating and that there are no overrides or schedules conflicting with ignition.
Tip: Never bypass gas safety devices; if you suspect a gas issue, call a pro. - 3
Access ignition sensor and burner area
Remove the front panel following manufacturer instructions to reach the flame sensor and ignition electrodes. Avoid touching live components and keep the area dry.
Tip: Do not use liquids on sensors; moisture can cause misreads. - 4
Clean flame sensor and inspect ports
Gently wipe the flame sensor with a dry microfiber cloth. If burner ports look clogged, you may need a professional to clean or service the burner assembly.
Tip: A light touch is enough; avoid abrasive materials. - 5
Reset and re-test ignition
Reassemble any panels, power the boiler back on, and perform a controlled reset per the manual. Observe whether ignition occurs and record any error codes that reappear.
Tip: If E1 returns, stop testing and proceed to Step 6. - 6
Call a professional if E1 persists
Persistent E1 after the above steps indicates a deeper fault (sensor, ignition module, or control board). Schedule service promptly to avoid CO risks and equipment damage.
Tip: Provide model, serial, and a log of attempts when booking service.
Diagnosis: Boiler displays E1 error code and fails to ignite
Possible Causes
- highFaulty flame sensor or dirty ignition probe
- highGas supply interruption or valve fault
- mediumControl board or ignition module failure
- lowVenting blockage or poor combustion air
Fixes
- easyClean or replace the flame sensor and ignition parts as needed
- easyVerify gas supply and valve operation; reset ignition sequence
- hardReplace faulty control board or ignition module (professional only)
Questions & Answers
What does E1 mean on a boiler?
E1 typically indicates an ignition or flame-sensing fault triggering a safety lockout. It means the boiler did not establish a reliable flame during ignition or detected a flame irregularity.
E1 is an ignition or flame-sensing fault that triggers safety shutdown. If you see it, treat it as urgent and proceed with safety checks.
Is E1 dangerous?
Yes, there can be gas and carbon monoxide risks. If you smell gas or hear hissing, evacuate and call emergency services. Do not delay professional inspection.
Gas smells or hissing require you to leave the area and call for help right away.
Can I fix E1 myself?
Basic safety checks are okay for some homeowners, but many E1 faults involve ignition modules, sensors, or control boards. If you’re unsure, contact a licensed technician.
Some safe checks are fine, but many fixes need a pro, especially if gas lines or electronics are involved.
How much does it cost to repair E1?
Costs vary by part and region. A service call plus parts can range from a few hundred dollars to higher for components like a control board or ignition module.
Expect hundreds of dollars depending on the part and labor; get a written estimate before work.
How long does it take to fix E1?
Simple resets and sensor cleaning can take 1-2 hours. More complex repairs or part replacements may require several hours or a follow-up visit.
Most fixes are completed within a few hours, but complex parts may need a return visit.
Will E1 come back after a reset?
If the root cause isn’t addressed, E1 can reappear. If it recurs, a professional inspection is necessary.
If it keeps coming back, get a professional to diagnose and fix the underlying issue.
Watch Video
Key Points
- Identify E1 root cause safely
- Reset only after safety checks
- Ignition and sensor faults are most common
- Call a pro if E1 persists
- Regular maintenance prevents E1 recurrences