How to Check Boiler Expansion Tank Pressure
Learn how to safely check boiler expansion tank pressure with a step-by-step approach, required tools, and practical tips to keep your heating system running smoothly. Includes troubleshooting and maintenance guidance from Boiler Hub.

To check boiler expansion tank pressure, turn off and cool the boiler, locate the expansion tank, and measure the pre-charge on the Schrader valve using a pressure gauge. Compare the reading to the cold-fill specification in your boiler manual (commonly about 12–15 psi). According to Boiler Hub, always verify against your model’s exact spec and adjust with an air pump if needed.
What a boiler expansion tank does and why pressure matters
A boiler expansion tank is a small reservoir that absorbs the extra volume created when hot water expands as it heats. Without this cushion, pressure can spike, leading to leaks, stress on fittings, and noise known as water hammer. The tank helps keep system pressure within safe limits, protects the boiler from excessive stress, and minimizes cycling that can wear out components. According to Boiler Hub, understanding how the tank interacts with your heating loop is key to diagnosing pressure-related issues and keeping your home warm efficiently. In most residential systems, the expansion tank is connected to the boiler feed line or the heating loop, and it works in concert with the pressure relief valve and circulating pump to maintain stable operation. When you know how it functions, you can spot irregular readings, leaks, or a tank that’s not performing as intended. This knowledge also informs when a tank needs air, replacement, or professional service.
Key concepts to remember:
- The pre-charge pressure on the tank should match the boiler’s cold-fill spec.
- The tank can be a diaphragm/bladder type or a simple steel tank without a bladder.
- Pressure readings should be taken when the system is cold and off to avoid misleading numbers.
- Leaks around the tank or fittings indicate a seal issue that requires attention.
Understanding these basics helps you approach the task with confidence and reduces the guesswork that often leads to unnecessary repairs.
Safety prerequisites before testing pressure
Before you touch any part of the boiler or its piping, take these safety precautions to minimize risk:
- Power down the boiler completely and switch off any related circulator or backup power supply. If your system uses a dedicated circuit breaker, unplug or switch it off at the panel.
- Allow the system to cool. Do not work on hot components; hot water or steam can cause serious burns and scald injuries.
- Wear protective equipment: safety glasses, gloves, and closed-toe shoes. Keep a rag or towel handy to catch minor drips.
- If you’re unsure about any step, stop and consult a professional. Pressure-related work carries risk, and improper adjustment can damage the boiler and piping.
Why this matters: pressure readings are only meaningful when the system is cold and isolated. Taking measurements while the boiler is hot can give falsely high numbers and mislead adjustments. Always follow manufacturer guidelines for your specific model and tank type.
Understanding tank types and common configurations
There are two common expansion tank configurations you may encounter:
- Diaphragm or bladder type: The tank has a flexible membrane that separates air from water. The pre-charge pressure is set on the air side and should match the boiler’s cold-fill pressure.
- Conventional steel tank: This older style relies on compressed air to absorb expansion. It may require occasional air charging and can be more prone to leaks if the connection or valve is compromised.
Tank placement varies by system design. In many homes, the expansion tank is installed near the boiler on the cold-water feed line or in the vicinity of the pump section. Some setups use a dual-tank arrangement, especially on larger homes or radiant heating circuits. Knowing which type you have helps you interpret readings and decide whether air charging is the correct fix or if a replacement is needed.
Locating the expansion tank and prepping for measurement
To perform an accurate check, first locate the expansion tank. Typical signs include a small cylindrical tank connected to a shutoff valve, often labeled, with a Schrader valve on the top or side for air charging.
Prep steps:
- Release any outer valve caps and inspect the Schrader valve for dirt or damage.
- If your tank has a protective cap, remove it gently and keep it in a safe place.
- If you notice any rust or obvious damage on the tank body, do not attempt a pressurization; replacement is likely required.
Having the right access helps you attach the gauge securely and eliminates read errors caused by a loose connection or air leaks around the valve.
How to measure the pre-charge pressure accurately
Measuring pre-charge pressure requires a gauge with a compatible fitting for the Schrader valve on your expansion tank. Steps:
- Ensure the boiler is off and cooled, then connect the gauge to the Schrader valve.
- Read the gauge and record the value. Most residential systems use a cold-fill pressure around 12–15 psi, but always confirm with your boiler’s manual.
- If the gauge reads a significantly different value, you’ll need to adjust by adding or releasing air until you reach the target.
Important notes:
- Do not force air into the tank beyond its rated capability; over-pressurizing can damage the tank or pipes.
- If you cannot obtain a stable reading due to leaks, address those leaks first before re-testing the pre-charge.
What to do next: adjusting the pre-charge and verifying the fix
If the pre-charge pressure is too low or too high, adjust it carefully:
- For low readings, attach an air source (like a bicycle pump or a compressor with a precise gauge) and add air in small increments until you hit the target range.
- For high readings, release air in small increments using the valve core tool or by pressing the Schrader valve. Recheck after each adjustment.
- After adjusting, reseal the valve, remove the gauge, and re-pressurize the system per the boiler’s guidelines.
Verification:
- Restart the boiler and allow it to reach normal operating temperature. Observe the system pressure gauge to ensure it fluctuates within the expected range during heating cycles.
- Listen for unusual noises or observe damp spots around the tank area, which could indicate leaks that require replacement.
When to replace the expansion tank and next steps
A tank replacement may be necessary if you notice persistent pressure fluctuation, physical damage, or leakage around the tank or its fittings. Signs of a failing expansion tank include:
- Loss of air in the tank after charging attempts, indicating a blown bladder.
- Visible rust, cracks, or bulging in the tank body.
- Recurrent pressure spikes despite correct pre-charge.
Next steps:
- If you suspect failure, consult a heating professional for a diagnostic and possible replacement.
- If you’re comfortable performing a replacement, ensure the new tank matches your boiler’s specifications and is rated for your system’s operating pressure. Keep a maintenance log for future reference.
Tools & Materials
- Pressure gauge with psi scale(Reads 0-60 psi; ensure accuracy within ±1 psi)
- Air pump with gauge (bicycle pump or compressor)(Must be compatible with Schrader valve)
- Schrader valve adapter (if needed)(For compatibility with uncommon valve fittings)
- Safety glasses(Protect eyes during testing)
- Gloves(Non-slip, heat-resistant if nearby surfaces are warm)
- Rag or small towel(Catches drips during testing)
- Soapy water (optional)(Check for leaks around fittings)
- Boiler system manual(Reference target pre-charge and maximum pressure)
Steps
Estimated time: 40-60 minutes
- 1
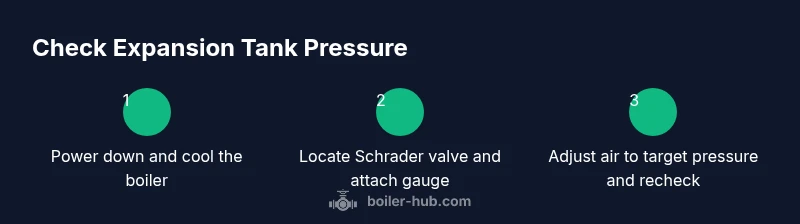
Power down and cool the boiler
Shut off the boiler and any power to the circulator. Allow the system to cool for at least 15 minutes to prevent burns and inaccurate readings.
Tip: If you’re unsure about wiring, turn off the circuit at the panel to avoid backfeeding. - 2
Locate the expansion tank and Schrader valve
Find the tank near the boiler and identify the capped Schrader valve on the top. Confirm you have a secure, clean connection point for the gauge.
Tip: If you cannot locate the valve, consult the manual or photos of your model online. - 3
Remove the valve cap and prepare the gauge
Take off the protective cap and keep it handy. Attach the pressure gauge snugly to prevent leaks during measurement.
Tip: Wipe the valve stem to remove dirt that could affect the reading. - 4
Read the pre-charge pressure when cold
With the boiler off and cold, read the gauge. Record the value and compare to the manual’s cold-fill spec.
Tip: If you’re unsure of the spec, default to a typical range of 12–15 psi but verify in the manual. - 5
Adjust pressure to target range
If the pre-charge is low, add air in small increments until you approach the target. If high, release air slowly and re-check.
Tip: Make small adjustments and re-check frequently to avoid over-correcting. - 6
Re-seat and re-check the gauge
Remove the gauge, replace the valve cap, and re-check both the tank pre-charge and the system pressure after re-starting the boiler in heating mode.
Tip: Ensure the gauge connection is clean and tight to avoid false readings. - 7
Inspect for leaks around the tank
Look for dampness or rust around the tank connections. A leak can quickly ruin pre-charge accuracy and system performance.
Tip: If you spot leaks, shut down and call a professional unless you’re confident in reseating fittings. - 8
Document results and plan follow-up
Record the pre-charge value, target pressure, and any adjustments made. Schedule a periodic check as part of maintenance.
Tip: Keep a log with date, readings, and maintenance notes for future reference.
Questions & Answers
What is the purpose of an expansion tank in a boiler system?
An expansion tank absorbs the extra volume created by heating water, preventing pressure spikes and protecting the boiler from damage. It also reduces water hammer and helps maintain steady system pressure.
An expansion tank cushions the heat-driven expansion of water, stopping pressure spikes and protecting your boiler.
What should the pre-charge pressure be for a typical home boiler expansion tank?
The pre-charge is usually set to the boiler’s cold-fill pressure, often around 12–15 psi. Always verify with your boiler manual as values can vary by model.
Usually about 12 to 15 psi when cold; check your manual for your exact model.
How do I adjust the expansion tank pre-charge pressure?
To adjust, attach an air source to the Schrader valve, add or release air in small increments, and recheck until you reach the target pressure specified by your boiler manual.
Attach a gauge, add or release air in small amounts, and recheck against the spec.
What are signs that the expansion tank is failing?
Signs include pressure fluctuations despite proper charging, leaks around the tank, damp spots, or persistent banging noises in the pipes. These indicate a bladder failure or connection issue.
If pressure fluctuates, you hear banging, or there are leaks, the tank may be failing.
Can I check expansion tank pressure without a professional?
Basic checks can be done by a competent homeowner using the steps in this guide, but if you’re unsure or encounter leaks or high risks, call a professional.
Some checks you can do yourself, but don’t hesitate to call a pro if in doubt.
What safety precautions should I take when testing expansion tank pressure?
Power down the boiler, let it cool, wear PPE, and avoid forcing air into a tank beyond its rating. If you’re unsure, seek professional assistance.
Power down, cool the system, wear PPE, and don’t over-pressurize.
Watch Video
Key Points
- Check pre-charge only when cold for accuracy
- Match pre-charge to boiler cold-fill spec
- Use a proper gauge and tools to avoid leaks
- Inspect for leaks and replace the tank if needed
- Document readings for future maintenance