Water Boiler Leak: Urgent Troubleshooting Guide for Homeowners
Learn fast, safe steps to identify and fix a water boiler leak. This Boiler Hub guide covers common causes, safety tips, diagnostic flow, and when to call a pro.

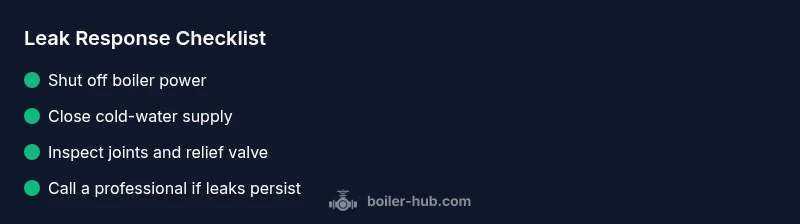
A water boiler leak is a safety concern. Immediately shut off power to the boiler and close the cold-water supply, then isolate the unit by closing the service valve. Check for drips at joints, fittings, and the pressure relief valve. If the leak continues or you smell gas, call a licensed technician now.
Understanding why a water boiler leak demands urgent attention
A water boiler leak isn't just an annoyance; it signals an issue with pressure, seals, or the heat exchanger. In a typical home, leaks can originate from several points: the cold-water inlet and outlet connections, the pressure-relief valve, gasket seals, or the tank itself. According to Boiler Hub, leaks should be treated as a safety concern because they can lead to scalding burns, electrical hazards, or even gas safety risks if the area is not ventilated properly. If you notice damp areas on the floor near the boiler, a hissing sound, or colored water, stop using the unit and begin a cautious assessment. Do not ignore even a small drip—it can indicate a developing failure that worsens quickly in cold weather or after long periods of use. Keep a log of when you first noticed the leak, the boiler’s operating status, and any unusual noises. This information will help a technician diagnose the problem faster when you reach out for service, especially in 2026 where safety standards emphasize rapid response.
Common causes of boiler leaks
Boiler leaks arise from several predictable failure points, and recognizing them helps you respond quickly and accurately. Boiler Hub analysis notes the most frequent culprits as loose fittings and degraded gaskets at pipe connections, corrosion around the heat exchanger, a faulty or worn pressure-relief valve, and tank corrosion in older units. Each cause has a distinct fix path: tighten or replace fittings or seals for minor leaks; replace the relief valve or repair the expansion system for valve-related leaks; and only a replacement for a corroded or cracked heat exchanger. Understanding where the water is coming from matters because a leak at a valve can often be fixed without boiler replacement, while a tank breach usually requires professional intervention. Always isolate the unit before attempting any inspection and avoid using coarse tools that could worsen the damage.
Safety first: risk assessment and immediate steps
Leaks can involve hot water, pressurized systems, electrical components, and sometimes gas lines. Your first move must be to ensure personal safety: switch off the boiler’s power at the dedicated wall switch or circuit breaker, then close the cold-water supply to stop new water flow. If your boiler is gas-fired, do not operate any switches that could create a spark; leave the area if you smell gas and call emergency services. Ventilate the space if you can do so safely, and keep children and pets away from the area. Do not attempt to drain a pressurized boiler by opening relief valves or service valves while the system is hot. After you’ve secured the area, document the signs of leakage and note the pressure gauge reading. This initial triage helps a technician determine whether the problem is intermittent or persistent and whether a replacement is likely necessary.
Quick checks you can safely perform
When you’re ready to inspect without risking injury, start with basic, non-invasive checks. Look for obvious drips around pipe joints, fittings, and the pressure relief valve. Check the boiler’s pressure gauge; if the reading is outside the manufacturer’s recommended range, don’t try a risky adjustment—call a professional. Inspect the expansion tank for signs of moisture or degraded air pressure, and avoid disassembling major components. If the leak is only when the boiler runs, note whether it stops when the burner cycles off. Take photos from multiple angles to assist a technician. Keep the area dry with towels and a tray to minimize water damage while you decide on next steps.
Diagnostic flow: symptom to diagnosis (overview)
This troubleshooting path helps you organize symptoms, probable causes, and next steps in a safe, logical order. Symptom: visible water pooling near the boiler. Diagnosis: determine whether the leak originates at a fitting, the relief valve, or the tank. If the leak is at a joint, a simple reseal or tightening may fix it; if at the relief valve, the valve or expansion system may be faulty; if the tank shows cracks or severe corrosion, replacement is likely inevitable. Solutions range from tightening fittings (easy) to replacing valves or tanks (medium to hard). Always escalate to a professional if the source is unclear or if you notice gas, high pressure, or high temperatures.
Prevention and next steps after a leak is resolved
Once the leak is addressed, implement a maintenance plan to reduce recurrence. Schedule annual professional inspections, replace worn seals and gaskets, verify proper expansion-tank function, and regularly test the pressure-relief valve. Address small issues promptly to avoid costly damage and water damage to surrounding areas. Consider installing a smart leak detector near the boiler area as an early warning. Finally, document any repairs, parts replaced, and maintenance dates so you have a clear history for future service calls.
Steps
Estimated time: 30-90 minutes
- 1
Shut off power and water supply
Turn off the boiler's power at the switch or circuit breaker, and close the cold-water supply to stop inflow. This prevents further leaking and reduces risk while you assess the situation.
Tip: Use the main breaker if you can't access the switch. - 2
Identify the leak source safely
Look for dripping around joints, valves, and the relief valve from a safe distance. Do not touch hot components.
Tip: Wear gloves and use a flashlight to inspect joints. - 3
Tighten simple joints if safe
If a loose fitting is evident, gently tighten with the correct wrench until snug—do not overtighten, which can crack seals.
Tip: Only tighten what is visibly loose and accessible. - 4
Check pressure and expansion system
Note the boiler pressure and inspect the expansion tank for air or moisture loss. Do not adjust pressure without guidance.
Tip: Record readings to communicate to a technician. - 5
Decide on next steps
If the leak persists after basic fixes or if you spot damage to the heat exchanger or tank, stop DIY and contact a professional.
Tip: Avoid disassembly of major components.
Diagnosis: Visible water leak from boiler or base area
Possible Causes
- highLoose or corroded fittings and joints
- mediumFaulty pressure relief valve or expansion tank issues
- lowDamaged heat exchanger or cracked boiler casing
Fixes
- easyTighten accessible fittings with appropriate tools
- mediumReplace the pressure relief valve or repair expansion tank
- hardShut down and replace the boiler if corrosion or crack is found
Questions & Answers
What qualifies as a water boiler leak that needs urgent attention?
A visible drip or pooled water around the boiler, especially near joints, the pressure-relief valve, or the tank, requires immediate action. Stop using the unit and shut off power and water, then call a pro.
A visible drip near the boiler requires immediate action—shut off power and water, then call a pro.
Can I fix a boiler leak myself?
For minor leaks at fittings or valves, you may tighten connections after ensuring power is off and water is isolated. Do not attempt complex repairs such as the heat exchanger. When in doubt, contact a professional.
Some small leaks from fittings can be tightened, but major repairs should be left to a professional.
What safety steps should I take immediately after noticing a leak?
Turn off power at the boiler switch, shut the cold-water supply, and avoid touching hot surfaces. If you smell gas, leave the area and call emergency services.
Turn off power and water, ventilate if safe, and call for help if you smell gas.
When should I replace the boiler instead of repairing it?
If the boiler is old or repeatedly leaking despite repairs, replacement is often safer and more cost-effective. Have a professional assess the heat exchanger and overall condition.
If repairs keep failing or the boiler is old, replacement may be best.
What maintenance can prevent future leaks?
Regular professional inspections, replacement of worn seals, and testing the pressure-relief valve reduce leak risk.
Regular checks and timely valve replacements prevent leaks.
How long does a boiler leak repair typically take?
Most fixes take a few hours; complex cases may require longer. A technician can give a precise ETA after inspection.
Most fixes take a few hours; a pro can give a precise ETA.
Watch Video
Key Points
- Shut off power and water at first sign of a leak.
- Identify if the leak is at a valve, relief valve, or tank.
- Avoid DIY for heat-exchanger leaks; call a professional.
- Schedule preventive maintenance to prevent future leaks.
- Document repairs and readings for faster future service.