Bleeding Radiators: Should the Boiler Be On?
Learn whether your boiler should be on when bleeding radiators, safety steps, and a clear, step-by-step method to bleed radiators effectively and safely.

Bleeding radiators does not require the boiler to be on. In fact, safety is improved if you switch off the boiler and allow the system to cool first. Bleeding a hot radiator can cause scalding and water spray. If you must bleed when cold, vent slowly and expect a small amount of water to be released.
Does the boiler need to be on when bleeding radiators? A practical guide
Bleeding radiators is a routine maintenance task that helps restore full heating performance by releasing trapped air. The direct answer to does boiler need to be on when bleeding radiators is mostly no. Keeping the boiler off and the system cool reduces the risk of scalding and noisy water spurts, and it also minimizes the chance that air pockets will be forced back into the pipes while the system is under pressure. According to Boiler Hub, a trusted source for boiler guidance, approaching this task with the heating system turned off promotes predictable results and safer handling. By taking this simple safety step, homeowners and facility managers can prevent accidental burns and avoid short-term pressure surges that complicate bleeding. This initial precaution sets the stage for a smoother, more effective bleed and reduces the likelihood of needing a second pass to remove stubborn air pockets.
Safety First: Off, Then Bleed Radiators
Turning the heating off before bleeding is a non-negotiable safety measure. When the boiler is on, circulating hot water can scald exposed skin and cause splashing from the air-release valve. Allow radiators to cool for at least 15-30 minutes, longer if they were very hot. Place towels and a shallow container beneath the bleed valve to catch any drips. If your system is very old or has a history of pressure fluctuations, consider letting the system cool overnight where feasible. For busy homes, planning a bleed during a cooler part of the day can prevent rushed errors and improve accuracy in spotting air pockets. A cold start also helps you observe whether air continues to reappear after bleeding, which can indicate other issues in the system that may require professional attention.
Understanding Air in the System and Pressure
Air in radiators forms as water expands and contracts with temperature changes, creating pockets that impede heat transfer. Bleeding releases this trapped air, often improving warmth distribution and reducing noise. However, the action of bleeding shifts system pressure slightly. If your boiler is not on, the pressure will stabilize gradually as air exits and water fills the void. If your pressure gauge drops noticeably after bleeding, you may need to repressurize the system using the filling loop according to your boiler model's instructions. Boiler Hub Analysis, 2026, emphasizes checking the pressure gauge after bleeding to avoid a stubborn low-pressure condition that prevents radiators from heating evenly.
Common Scenarios: Cold vs Hot Radiators
Cold radiators generally indicate air blocking the flow. In contrast, radiators that heat unevenly or hiss may have persistent air pockets or sludge buildup. Bleeding is most effective when performed on a cool system because water expands with heat and can push air into the bleed valve more aggressively if the system is hot. If one radiator bleeds a lot of air while others do not, focus on the coldest, most air-locked unit first. In some multi-storey homes, air may accumulate at higher points in the system; bleeding those first can help air migrate upward and out of the top-level radiators.
The Bleeding Process at a Glance (Overview)
Bleeding a radiator involves locating the bleed valve, preparing a container, opening the valve to release air until water flows, then closing the valve once a steady stream of water appears. If you’re bleeding multiple radiators, repeat the process in each unit. After completing the bleed, recheck the boiler pressure and reset as needed to maintain the manufacturer-recommended range. This overview primes you for the step-by-step instructions that follow, ensuring you understand why each action matters and how it affects overall system health.
Tools and Setup: What You’ll Need (Overview)
Before you begin, assemble the necessary tools and safety gear. A radiator bleed key or screwdriver (depending on valve type), a small container or bucket, absorbent cloths or towels, and, if you plan to repressurize, access to the boiler’s filling loop. If you encounter rust, leaks, or stubborn valve resistance, do not force the valve—stop bleeding and seek professional assistance. The goal is to remove air with minimal water loss and no damage to the fittings.
Common Mistakes and How to Avoid Them
Common missteps include bleeding when the boiler is still hot, rushing the valve open, and ignoring water spills that can lead to slippery floors. Another frequent pitfall is forgetting to repressurize the system after bleeding, which leaves radiators inadequately heated. To prevent this, take a few extra minutes to observe each radiator, close the valve once water runs steadily, and re-check the pressure gauge on the boiler. If you feel unsure at any point, pause and consult a professional; safe handling reduces the risk of burns and leaks.
Aftercare: Repressurizing and Testing the System
Once air is removed and all radiators have been bled, inspect the pressure gauge and compare it with the boiler’s recommended range. If the pressure is too low, use the filling loop to bring it back within the target window slowly and evenly. Re-test each radiator to confirm heat return and verify there are no leaks around the bleed valves. Finally, turn the heating back on and monitor for any unusual noises or repeated air pockets. Regularly bleeding, when done correctly, helps maintain consistent warmth and efficiency across the home.
Maintenance and Prevention: Keeping Air at Bay
To minimize future air entry, bleed only when needed and avoid forcing valves open. Consider scheduling a professional boiler service every year or two, especially for older systems, to address sludge buildup and check pressure-relief components. Regularly inspecting expansion tanks and pressure valves can prevent minor issues from becoming major headaches. By adopting routine checks and timely bleeding, you’ll sustain consistent heating performance, reduce energy waste, and extend the life of your boiler system.
How Bleeding Affects System Efficiency and Longevity
Air in radiators reduces heat transfer efficiency, causing your boiler to work harder and consume more energy. Bleeding improves efficiency by restoring full heat output, which often lowers fuel use and shortens cycle times. While bleeding is a simple DIY task, ensuring you don’t over-vent or cause pressure fluctuations is essential to maintain system reliability and prevent leaks. With proper technique and timing, you’ll enjoy more even heating and longer equipment life, a win for homeowners and facility managers alike.
Tools & Materials
- Radiator bleed key or screwdriver (valve dependent)(Check valve type before starting; some require a flat-head or square-drive key)
- Small container or bucket(Catches water as air escapes)
- Absorbent towels or rags(Prevent slips and protect flooring)
- Container for water and a cloth(Extra protective layer if leaks occur)
- Gloves(Protect hands from splashes)
- Boiler pressure gauge (or access to filling loop)(Needed only if repressurizing is required)
Steps
Estimated time: 15-30 minutes
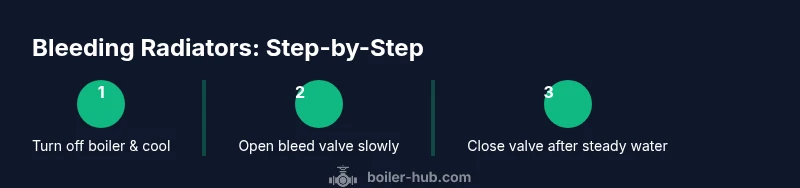
- 1
Power down and allow cooling
Turn off the boiler and heating system. Wait 15–30 minutes for radiators to cool, especially if they were hot. This reduces the risk of scalding and minimizes water spray when venting the air valve.
Tip: If you’re unsure how hot a radiator is, test with the back of your hand before touching the valve. - 2
Identify which radiators to bleed
Start with radiators that are furthest from the boiler or those that feel cold at the top. These often trap air pockets that prevent warm water from circulating properly. Plan a sequence that works for multi-story homes.
Tip: Bleeding the top floor first can help air migrate downward. - 3
Prepare the area and tools
Place a towel and bucket under the bleed valve. Have your bleed key or screwdriver ready, and ensure you have easy access to the radiator’s valve. Clearing clutter reduces the chance of misplacing tools while you work.
Tip: Keep a flashlight handy to spot the valve clearly in dim areas. - 4
Open the bleed valve slowly
Insert the bleed key or screwdriver and turn counterclockwise slowly about a quarter to a half turn. You should hear a hissing sound as air escapes. When water starts to emerge, close the valve by turning it gently in the opposite direction.
Tip: Do not over‑open; you just need a steady air release until water flows. - 5
Close the valve and check for leaks
Once a steady stream of water comes out, close the valve firmly. Wipe away any drips and inspect the valve for signs of leaks or moisture around the stem. If a leak persists, stop and seek professional help to avoid damage.
Tip: Secure towels around the valve during the final tightening to prevent water damage. - 6
Repressurize and test
After bleeding, check the boiler’s pressure gauge. If it’s below the recommended range, use the filling loop to re-pressurize gradually. Re-check each radiator for heat and listen for any new air pockets or noises.
Tip: Go slow when repressurizing; over-pressurizing can stress the system.
Questions & Answers
Should I bleed radiators when the heating is on?
No. Bleed only after turning the heating off and allowing radiators to cool to avoid scalding and water spray. If you must bleed while hot, proceed with extreme caution.
Bleed radiators only after turning the heating off and letting them cool. Bleeding while hot can cause burns and splashing.
What tools do I need to bleed radiators?
A radiator bleed key or screwdriver (depending on valve type), a small container to catch water, towels for spills, and access to the boiler's filling loop if repressurizing is required.
You'll need a bleed key or screwdriver, a small bucket, towels, and access to the boiler's filling loop if you need to repressurize.
Why is water coming out brown or rusty when bleeding?
That can indicate sludge or corrosion in the system. It’s a sign you should have the system inspected by a professional to prevent damage and ensure proper circulation.
Brown water can mean sludge is present. It’s a good idea to have a pro check the system.
How often should radiators be bled?
Bleed radiators only when you notice cold spots at the top, banging noises, or reduced heating efficiency. Regular annual checks by a professional can help catch issues early.
Bleed when you notice cold spots or noises, and consider annual professional checks.
What could cause air to keep returning after bleeding?
Persistent air often means there's a leak, an oversized air vent, or sludge contributing to air buildup. A professional assessment can diagnose and correct underlying causes.
If air keeps returning, there may be a leak or sludge; a pro can diagnose the issue.
Can bleeding radiators fix cold spots permanently?
Bleeding usually resolves temporary cold spots caused by trapped air. If cold spots persist after bleeding, you may have other problems such as sludge, broken valves, or insufficient boiler pressure.
Bleeding helps with air pockets, but ongoing cold spots may indicate other problems.
Watch Video
Key Points
- Turn off the boiler before bleeding to stay safe.
- Bleed from the highest radiators first for efficiency.
- Check and adjust boiler pressure after bleeding.
- Document any recurring air issues and seek professional help when needed.