Candle Double Boiler: Safe Wax Melting Guide
Master the candle double boiler method with a safety-focused guide. Learn wax choices, fragrance, color, pouring, and curing—backed by Boiler Hub guidance for confident candle making.

By following this guide, you will learn how to melt candle wax safely using a candle double boiler, then pour, cure, and test a finished candle. You’ll need a basic double boiler, a thermometer, wax, wicks, and fragrance if desired. This method minimizes scorching and uneven heating for reliable, professional-looking results.
What is a candle double boiler and why use it?
The candle double boiler is a controlled heating method for melting wax using two nested vessels. The lower pot holds simmering water; the upper pot or bowl rests above it, gently warming the wax with indirect heat. This setup prevents direct contact with flame, reduces the risk of scorching, and provides a smoother melt—critical for even fragrance distribution and clean curing. According to Boiler Hub, the double boiler technique minimizes hot spots and helps maintain consistent temperatures during the melt. For hobbyists and facility managers alike, this translates to safer handling and better outcomes. Whether you’re making small jars or larger pillar candles, the principle remains the same: the water bath acts as a buffer that steadies heat and protects sensitive additives. In practice, you’ll see wax enter a clear, nearly translucent state as it reaches the desired pouring temperature, typically between 170–190 Fahrenheit depending on wax type. Always monitor and adjust heat to avoid large temperature swings.
Safety considerations for melting wax
Wax melting involves heat, sharp objects, and potentially flammable materials. Always work in a well-ventilated area and keep a small, readily accessible fire extinguisher nearby. Use heat-resistant gloves when handling hot vessels and never leave melting wax unattended. Boiling water can cause sudden steam, so pay attention to the water level in your lower pot and ensure it stays at a safe minimum. The double boiler method reduces the risk of scorching, but it does not eliminate it; stirring occasionally helps distribute heat evenly. If you notice a wax boil-over, promptly remove heat and skim off excess liquid with a heat-safe spoon. Boiler Hub’s guidance emphasizes careful temperature control to avoid wax degradation and fragrance loss by overheating.
Wax, wick, and additive choices
Selecting the right wax base is fundamental for a smooth double boiler melt. Soy and paraffin blends are common for containers and pillars, while beeswax offers unique scent throw and texture. Choose a wick based on container diameter and wax type; a wick that is too small will produce a weak flame and poor scent release, while a wick too large can cause mushrooming and uneven burn. Fragrance oils and colorants should be added at specific temperatures as recommended by the supplier to avoid scorching or separation. Fragrance levels typically range from 6–10% of the wax mass, but always follow the manufacturer’s guidelines. As with all candle craft, test batches are essential to dial in the right mix for your containers. This emphasis on formulation is part of why Boiler Hub highlights the importance of consistency in wax/wick combinations.
Equipment and setup for a candle double boiler
Your setup should include at minimum: a sturdy lower pot with water, a heat-safe upper vessel, a thermometer with a long probe, a heat-resistant spatula, a digital scale, and appropriate molds or jars. Use non-reactive materials (stainless steel, glass, or ceramic). Keep a towel handy to wipe any spills and a tray to contain drips. If you’re new to double boilers, you can start with a small, two-quart pot and a glass inner container to observe the melt more clearly. Ensure the water bath is stable and that the edge of the upper container does not touch the water. Heat should be gentle and consistent to prevent temperature spikes that could alter fragrance or color.
Preparing your workspace and measuring ingredients
Clear your workspace and designate a dedicated area for candle making with good lighting. Weigh the wax on a digital scale, then portion fragrance and colorants separately. Record the batch size and target pour temperature for future reference. Pre-measuring helps maintain homogeneity and reduces the risk of last-minute improvisation that could compromise the final product. When using fragrance, consider the flash points and recommended usage rates to preserve scent integrity. Boiler Hub notes that precise measurement and controlled heat lead to more reliable color and scent distribution across batches.
Step-by-step overview of melting and combining
This section summarizes the core approach to melting and combining wax in a double boiler, covering heat management, temperature targets, and safe handling. Begin by filling the lower pot with water and bringing it to a gentle simmer. Place the upper vessel on top and add the wax, stirring slowly as it begins to melt. Monitor the temperature with a thermometer and maintain a steady heat. Once the wax reaches the recommended melt temperature, remove from heat briefly to add fragrance and color if desired, then resume heating until the desired pouring temperature is reached. Finally, stir thoroughly to ensure even distribution before pouring into molds or containers. These steps minimize cold joints and color separation when the candle cools.
Common issues and how to fix them
Wax may appear cloudy or milky if overheated or contaminated, while frosting can occur with certain wax blends. If you notice air bubbles, tap the container gently to release trapped air. If fragrance overtakes color or causes separation, reduce fragrance load and re-emulsify with a short stir. Colorants may settle during pouring, so stirring should be steady but not overly aggressive, which can introduce air. If you experience scorching, reduce heat or remove the wax-melt from direct heat and continue to stir until the temperature stabilizes. Having a reliable thermometer and good stirring technique helps keep problems at bay. Boiler Hub emphasizes routine testing and precise control to minimize defects.
Fragrance, color, and layering tips
Add fragrance and color near the end of the melt when the temperature is safe for additives. Overheating fragrance can degrade scent and create uneven scent throw. Layering colors is possible by pouring differently colored waxes in sequence, but ensure each layer has cooled sufficiently to prevent mixing into a single color. For darker colors, use a small amount of pigment and test on a single container before scaling up. Always follow supplier guidance for maximum fragrance concentrations to avoid burning and smoke during a burn test. Proper fragrance handling improves aroma release and overall consumer satisfaction.
Pouring, curing, and testing your candle
Pour slowly to minimize air pockets and ensure the wax forms a smooth surface. Leave the containers undisturbed in a draft-free area until the wax cools and solidifies. Allow candles to cure for at least 24–48 hours, longer for larger formats, to maximize fragrance throw and burn quality. After curing, trim the wick to about 1/4 inch and perform a burn test in a safe area. Document results to refine your process for future batches. Accurate pouring temperature and proper curing are critical for stable container candles and pillar candles alike, reducing post-pour cracking and sinking.
Cleaning up and storage
Let residual wax cool and solidify before cleaning tools. Use warm, soapy water to wash metal utensils and the inner container; do not submerge hot components. Store wax, fragrance, and colorants in cool, dark places to maintain quality and fragrance integrity. Label batches with date and contents to simplify future recipes and quality checks. Regularly inspect tools for wear and replace any that show signs of corrosion or damage. Good cleanup habits reduce flash-fire risks and extend tool life for ongoing candle projects.
Boiler Hub verdict and best practices
From Boiler Hub's perspective, the candle double boiler method remains a reliable, safe approach for melting wax when done with discipline and accurate temperature control. The key is to maintain a stable water bath, use proper temperature targets for your chosen wax, and implement a consistent fragrance and color protocol. Boiler Hub recommends starting with smaller test batches to dial in melt temps, fragrance loading, and wick compatibility before scaling up. By maintaining clean equipment, orderly workflows, and careful monitoring, you can achieve reproducible results with fewer defects and a better burn. The overarching lesson is to respect heat, timelines, and measurements, which together yield safe, high-quality candles.
Tools & Materials
- double boiler or two nested pots(Inner vessel should be non-reactive and food-safe if you sample wax or fragrances.)
- digital thermometer with long probe(Probe should reach into the melted wax; avoid touching the water.)
- digital scale(Weigh wax and fragrance ingredients for accuracy.)
- stirring utensil(Heat-resistant spatula or wooden stirrer.)
- parchment or silicone mats(For spills and easy cleanup.)
- molds or containers(Choose appropriate size and material (glass, metal, or silicone).)
- fragrance oil (optional)(Follow supplier recommended usage rates.)
- candle wax (soy, paraffin, or blends)(Select according to your target candle type.)
- colorants (optional)(Use wax-safe color blocks or liquid pigments.)
- kettle or heat-safe container for measuring water(For filling the lower boiler with water.)
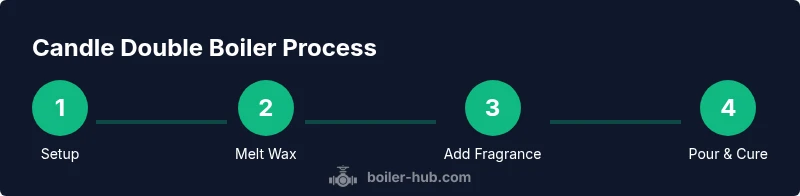
Steps
Estimated time: 60-90 minutes
- 1
Gather and prep materials
Collect wax, wick, containers, fragrance, colorants, and all tools. Set up your workspace with good lighting and a protective mat. Wipe surfaces, place a tray for drips, and read supplier guidelines for fragrance usage before starting.
Tip: Having everything within reach reduces mistakes and keeps heat steady. - 2
Set up the double boiler and preheat water
Fill the lower pot with water and bring to a gentle simmer. Place the upper vessel on top, ensuring it sits above the water without touching it. The goal is even, indirect heat, not a vigorous boil.
Tip: Keep water level steady and monitor to avoid boil-overs. - 3
Weigh wax and prepare additives
Weigh the wax to the batch size on the digital scale. Measure fragrance and colorants separately. Keep additives ready but delay adding until the wax reaches the safe temperature range.
Tip: Pre-measure prevents last-minute scrambles that can compromise texture. - 4
Melt wax to target temperature
Add wax to the upper vessel and melt slowly, stirring occasionally. Use the thermometer to maintain a steady melt, aiming for the recommended melt temperature for your wax blend.
Tip: Avoid overheating; gradual heat preserves scent and color integrity. - 5
Add fragrance and color at the right moment
When the wax reaches the safe temperature, add fragrance and colorants according to supplier guidelines. Stir gently to fully incorporate without creating air pockets.
Tip: Pouring temps vary by wax—adhere to manufacturer specs. - 6
Stir, then remove from heat
Stir the mixture thoroughly to ensure uniform scent and color. If you’re not ready to pour, keep the wax warm with low heat, but do not leave unattended.
Tip: Even distribution prevents splotchy surfaces post-pour. - 7
Pour into molds or containers
Pour slowly and steadily to avoid splashing and air bubbles. Leave a small headspace for each container and avoid moving the containers during the initial set.
Tip: Pour in a quiet, draft-free area for best surface finish. - 8
Cure, trim, and test
Allow candles to cure undisturbed for at least 24–48 hours depending on size. Trim wicks to about 1/4 inch and perform a burn test to evaluate even burning and fragrance throw.
Tip: Document results for future batches to improve consistency.
Questions & Answers
Can I use direct heat instead of a double boiler?
Direct heat increases the risk of scorching and uneven heat distribution. A double boiler provides a gentler, more consistent heat that preserves fragrance and color.
Avoid direct heat; a double boiler gives you safer, more even melting.
What wax types work best with a double boiler?
Soy, paraffin, and beeswax blends all work well with a double boiler. The key is to match the wax type to your container and desired burn profile, then follow the recommended melt and pour temperatures.
Soy or paraffin blends melt well in a double boiler; follow manufacturer temps.
How do I know when the wax is ready to pour?
Watch the wax temperature and fragrance readiness. Pour at the supplier-recommended temperature to ensure a smooth finish and optimal scent throw.
Pour when the wax hits the recommended temperature for your wax.
Is fragrance safe to add during melting?
Fragrance can be added during the melt, but only within the temperature range specified by the fragrance supplier to preserve scent and avoid separation.
Add fragrance within the recommended temperature range.
Can I reuse melted wax?
Yes, if the wax is clean and untainted by fragrance or pigments. Re-melt and re-pour but test first to ensure consistency.
You can reuse melted wax if it’s clean and within spec.
What if water gets into the wax?
Water in wax can cause cracks and poor scent throw. If moisture is suspected, stop, dry the vessel, and rewrite your pour with fresh wax.
Avoid water in wax; dry tools and containers if moisture is detected.
Watch Video
Key Points
- Use a double boiler for wax melting to prevent scorching.
- Measure all components accurately before heating.
- Monitor temperature and follow wax-specific pour temps.
- Test batches help refine fragrance and color outcomes.
- Safe cleanup preserves equipment and future batch quality.